


'74 El Camino "Project Badass"
G3GM :: Media :: G3 Project Pictures
Page 4 of 7 •  1, 2, 3, 4, 5, 6, 7
 ![]()
Re: '74 El Camino "Project Badass"
![]() by builtnotbought Mon Apr 25, 2016 3:47 pm
by builtnotbought Mon Apr 25, 2016 3:47 pm
bigredlaguna wrote:How to remove water from the bed of an El Camino: 1) lower tailgate 2) Accelerate quickly.
I've never messed around with an El Camino, but I do not think they had any drainage capacity near the cab. You may want to make your own drains. Otherwise, just make sure the cover is watertight.
No need in lowering the tailgate, there is a gap under gate)
One more my great idea was to deflate rear bags under heavy rain while car sitting in the street)
builtnotbought- G3GM Member

- Street Cred : 3
Re: '74 El Camino "Project Badass"
![]() by builtnotbought Mon Jun 20, 2016 4:07 pm
by builtnotbought Mon Jun 20, 2016 4:07 pm
Custom fitted with hammer repaired pass side inner fender. Then installed on it rebuilt 77 oem battery tray.
Bought battery that fit it.
Problem with throttle pedal spring was solved with some pliers as spring was too weak to hold pedal. Everything was in right place.
Replaced rear brake cylinders for new ones.
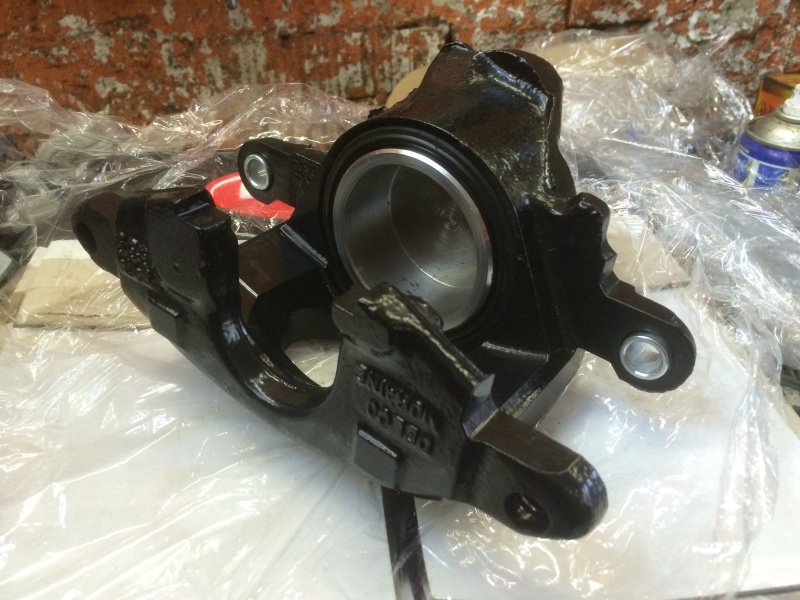
Rebuilt and powder coated front calipers, it's cool that all rubber rings were here in Russia, fit in new custom made stainless pistons. I think they look pretty good now for 40y.o. calipers =)
Bench bleeded new master cylinder. Installed all brake system. Several attempts to bleed it - no luck and all front of the car in brake fluid. Front hoses washers leak, prop valve leaks badly from front valve. Bought new washers and ordered new disc/drum prop valve, thanks Steve!
Bought all engine/trans liquids. Fill everything. Bought long ago new dipsticks from US ebay (china I think), engine well fitted, trans was impossible to fit to get around all body/engine corners. Cleaned and put in old one and delete I think old leak from the base of the dipstick by putting one more rubber ring of the same size.
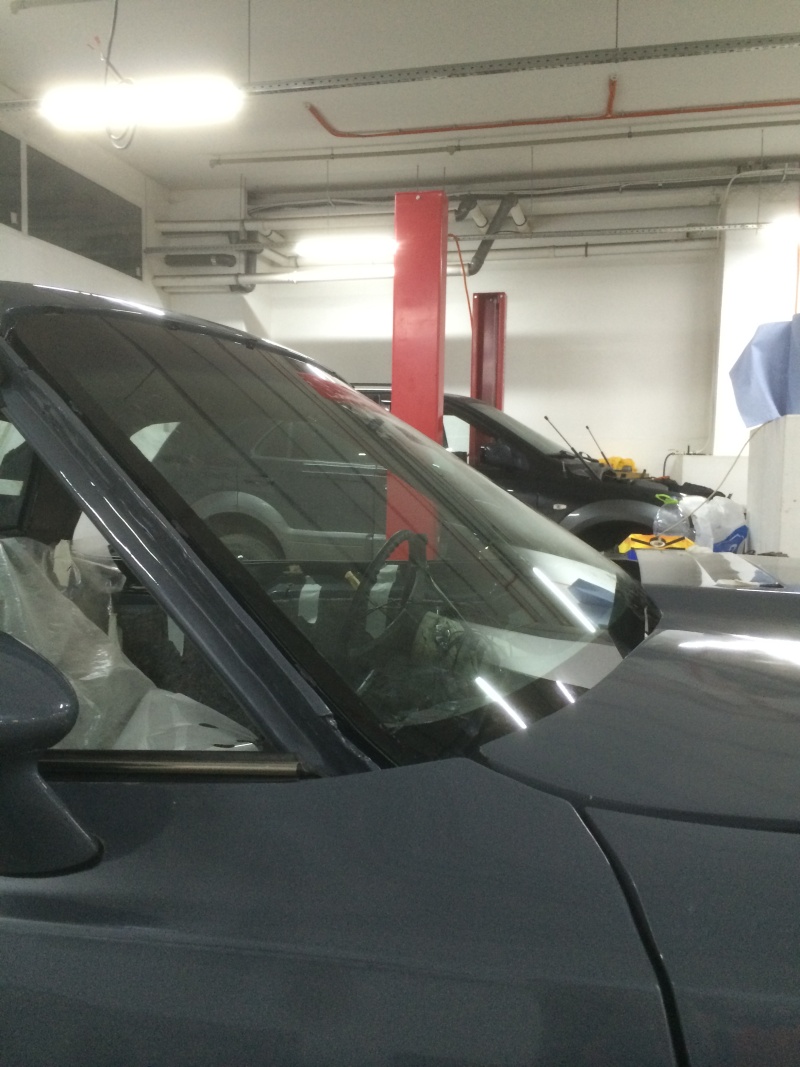
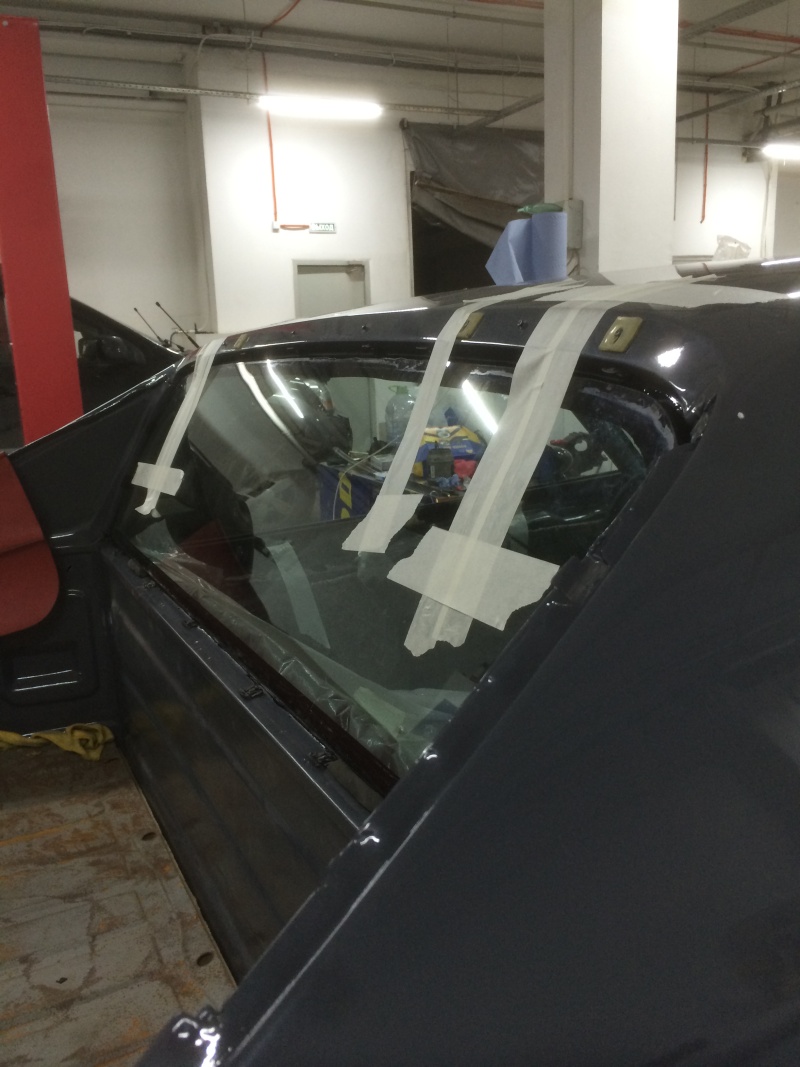
Glued in glass front/rear. It was a surprize that glasses don't have a wide black stripe around them to hide the seal...It was a job to put tape all around and draw a stripe with primer. Another curious thing was that rear glass was not my glass...the glass that was installed by previous owner was not flat (I don't know what factory shape is) and when trying to fit it to the body letters on glass could be read only from inside, not street...so the glass was cutted from a larger one from another car. Cool. So, a lot more sealer than usual and it's in place again!
After glass I assembled all new retrimmed interior except front and rear top ceiling moldings and dash.
As for the moldings on the front I think to install map light a little later and on the rear i still didn't install seat belts because I want new ones. I'm waiting for a great package from US with all needed parts to put under dash and then it will be installed. Need to finish some cluster and heater control mods and it will be ready. I will make quality photos after install. Oh, I didn't have matching steering wheel. Dreaming of new Nardi leather one. May be if I be lucky I will buy it before the local meet/show=) Oh, yes, I'm invited to my city local little american car show in the middle of August...and somehow I need to complete the most parts all the car. Don't know how but I will try.
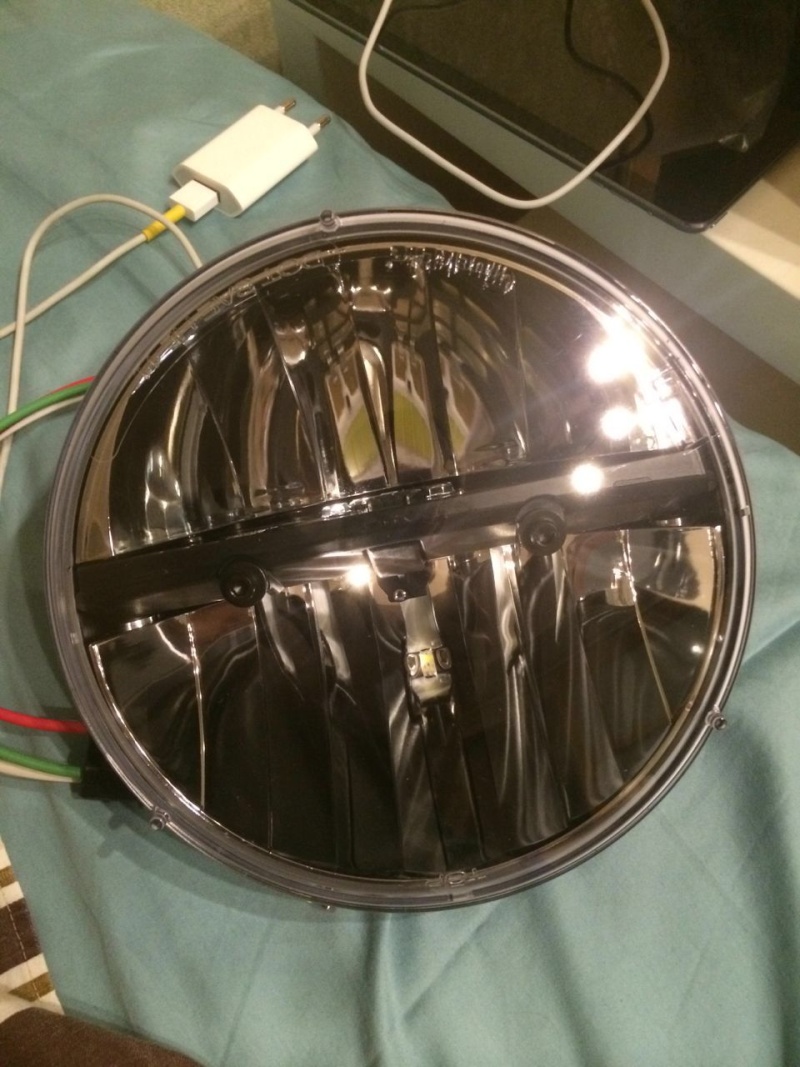
A friend of mine presented me some new headlights that I was dreaming of. They are the all new Trucklite leds. Already fitted them, looks dark and cool, a little adding to the devil look) Try to switch them - blink while cranking. Don't know why because trucklite offer resistors only for modern cars. Old one must live well with leds. Need to search.

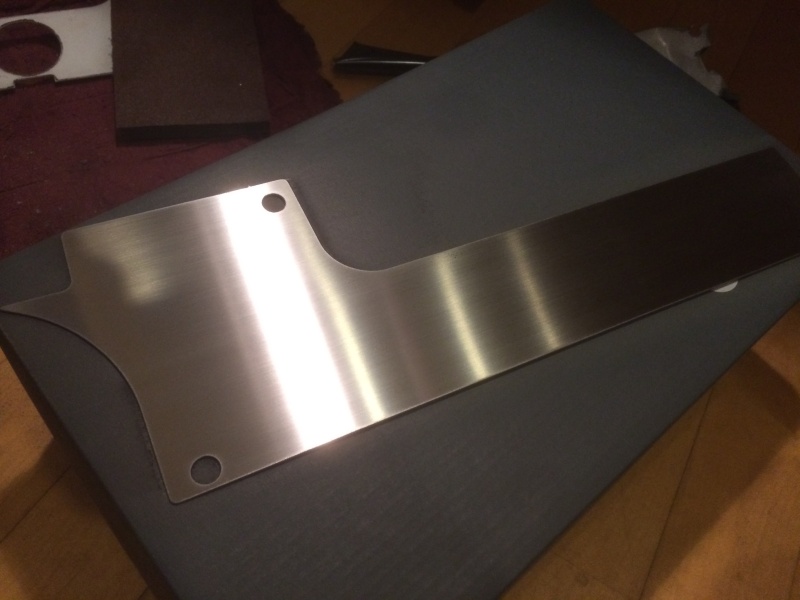
Designed and cutted some cluster trim from stainless steel and brushed to aluminium look.
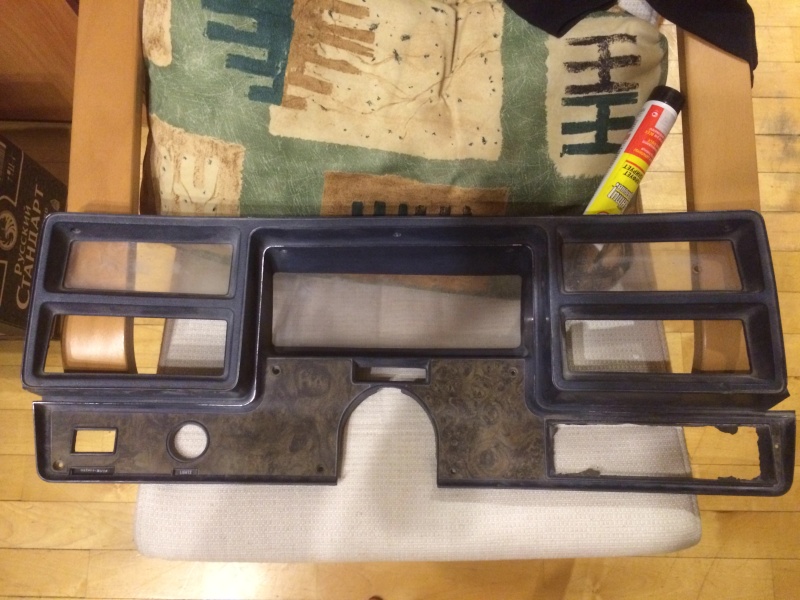
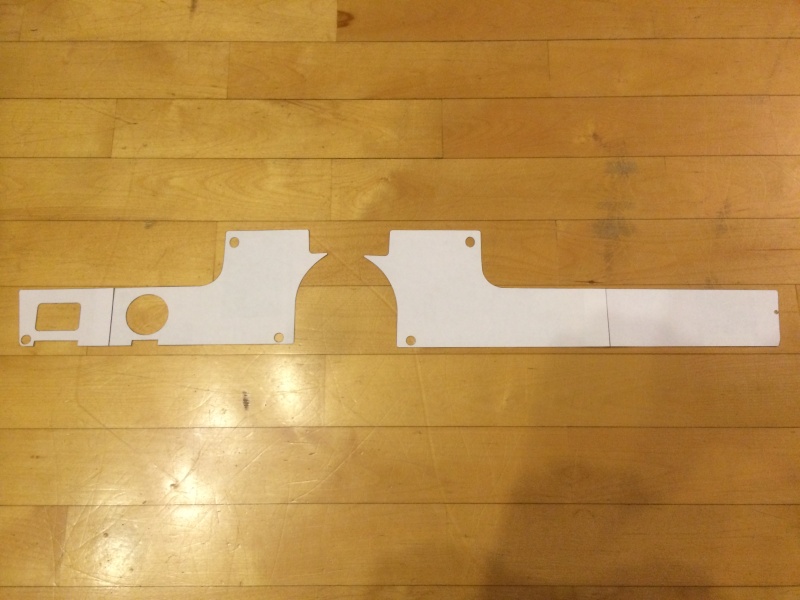


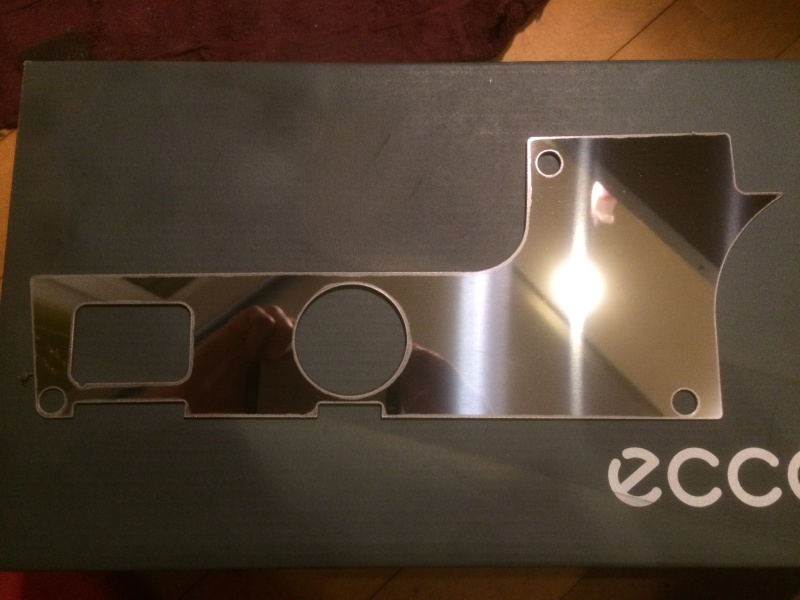
Drilled holes for additional gaudes. The worst thing is that temp gaude doesn't disconnect from it's sender, so I need to install dash, than route temp sender through cluster glass them under dash trough firewall - I think it's near impossible.
Forgot I bought a rear swaybar from Caprice with brackets and arms. Need to clean it powder coat and fit in somhow.
Besides that cleaned and painted matte blake inside rear view mirror.
And the most wonderfull part of the story is engine
builtnotbought- G3GM Member
- Street Cred : 3
Re: '74 El Camino "Project Badass"
![]() by builtnotbought Mon Jun 20, 2016 4:51 pm
by builtnotbought Mon Jun 20, 2016 4:51 pm
I will remind it's new 383 stroker with alu heads, EPS performer intake, Edel carb with el choke made by Smeding Performance. Heads are by Smeding too. It was sitting in the box for about 2.5-3 years waiting for the install.
After everything was filled in I cranked it several minutes as manufacturer told to spread oil everywhere.
After that a wonderfull puddles of different types of fluids began to appear. First my freshly installed temp and oil gauges. It's my fault because I didn't put any sealer on them and thought they were with selfsealing treads. Deleted them and stopped these leaks.
Than found a puddle under drivers header...it was collant from head, a stream from head. I was a little nervous because after using modern cars - leaking engine is not serviceable engine.
It was a discover for me that all lower head bolts are screwed inside the coolant pocket...who was that great designer...
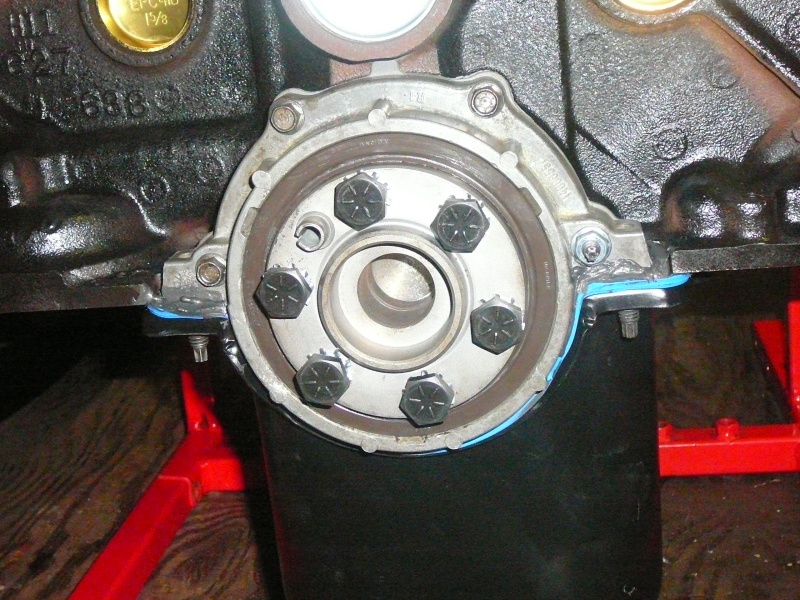
One more puddle was leaking from the converter shield. Took it off, it was rear crankshaft seal and may be stud with nut near it.
Week later I bought a sealer that manufacturer told me. Drained all coolant from radiator. Removed one bolt where leak supposed to be and there still was coolant inside the drivers head. I removed the drain plug on the drivers side on the edge of block and oil pan.

Nothing came out the hole except several drops of coolant I think and dirt. There was dirt inside the engine! It looked like some coal dissolved in coolant. What is it??? I don't know.
Okay I took out coolant through the bolt hole. Put sealer on bolt and screw it in. Waited 24h them fill in coolant. Started engine first time for a little. Aftel several days I examined engine. Drivers head now was wet near the bolts, not leaking but like stream before but wet.
All this upset me too much. Should new engine leak from everywhere will all fluids? IS it common for sbc to leak during work?
If telling chronologically then prop valve began to leak...then PWR steering pump began to leak from shaft and throw fluid everywhere (it didn't leak before frame off and I did nothing except paintint to it), and of coarse the alternator lives it's own life.
Warmed engine a little and seems like head leak is going away or may be it's just evaporates. Is it safe to run engine with such bolt coolant leak?
This weekend after some warming up while dealing with alternator new puddle appeared in the middle of the car near the rear of the engine. Took some fluid, seems like coolant again but didn't find from where looking under the hood. Closed the garage and walk away.
So the car managed to leak every fluid it has. Great beginning )
builtnotbought- G3GM Member
- Street Cred : 3
Re: '74 El Camino "Project Badass"
![]() by bigredlaguna Mon Jun 20, 2016 11:42 pm
by bigredlaguna Mon Jun 20, 2016 11:42 pm
As far as running the engine with one of the visible head bolts leaking just enough to steam up and not drip, there is no issue with that except you will need to add coolant once in a while and you will probably smell it all the time.
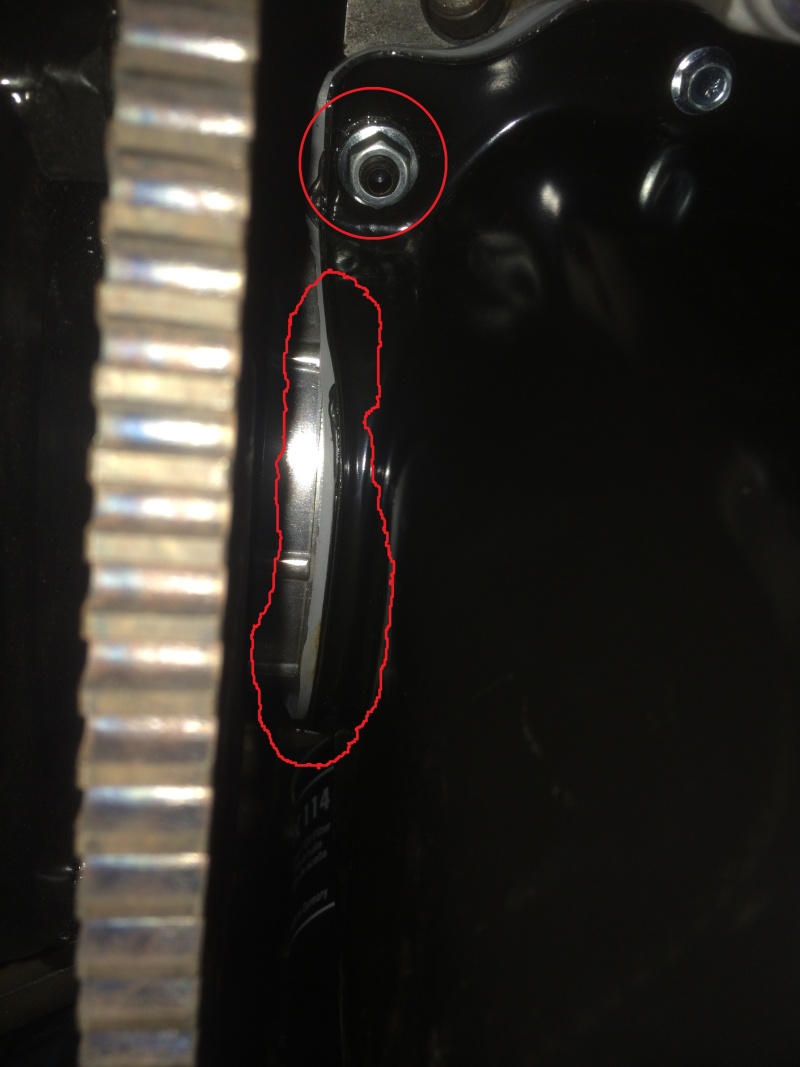
The engines I have swapped out/rebuilt have not had issues like this, but what you describe is not unusual. You might just snug up the pan bolts a little bit for the oil leak near the rear main. It looks like they put on the good pan gasket. There should be inserts in the gasket where the bolts go through to prevent over-torquing.

bigredlaguna- G3GM Senior Member

- Street Cred : 53
Re: '74 El Camino "Project Badass"
![]() by builtnotbought Tue Jun 21, 2016 3:11 am
by builtnotbought Tue Jun 21, 2016 3:11 am
bigredlaguna wrote:So sorry for the fluid leaks!! That is a frustrating situation. Every head bolt should have had some thread sealer on them because all of them go through to the water jacket. It is possible the builder missed applying the sealer or didn't put enough on the bolts. I would definitely keep an eye on the oil for signs of coolant contamination for a while. If you get to your second oil change without any problems you will more than likely be good to go for the life of the engine. If there isn't enough to make the oil discolor, you will have a milky substance on the underside of the oil cap (similar to what happens in short trip winter weather).
As far as running the engine with one of the visible head bolts leaking just enough to steam up and not drip, there is no issue with that except you will need to add coolant once in a while and you will probably smell it all the time.
The engines I have swapped out/rebuilt have not had issues like this, but what you describe is not unusual. You might just snug up the pan bolts a little bit for the oil leak near the rear main. It looks like they put on the good pan gasket. There should be inserts in the gasket where the bolts go through to prevent over-torquing.
When I removed bolt there were several coils like 3-4 in sealant, but not so much as shown on youtube when people put sealant on all coils with brush. Yes when I saw stream of coolant after cranking I drained oil back to canister and it was clean.
Hm, there is no usual oil cap on sbc, only breather.
The problem is that after I re-seal one bolt the stream of coolant went away and there were no puddle on the floor but engine block on the edge of the head gasket was still wet after sitting several days. It's very hard to determine what other bolt is leaking only if re-seal all lower bolts. May be they all leak a little.
When I warmed engine a little bit and let it cool down, the next day edge was dry.
May be all gaskets got dry after sitting 2 years in the box and will return to normal condition after warming engine more, don't know.
As for the oil leak I'm afraid not of the oil pan leak but of the crankshaft seal leak
builtnotbought- G3GM Member
- Street Cred : 3
Re: '74 El Camino "Project Badass"
![]() by tropdeprojet Tue Jun 21, 2016 3:33 am
by tropdeprojet Tue Jun 21, 2016 3:33 am
I will do the same time for the cluster trim. Last time I'm working on it, I working to make the sample. It's that little things that make the difference!
You will have a great car.
tropdeprojet- Donating Member

- Street Cred : 5
Re: '74 El Camino "Project Badass"
![]() by builtnotbought Tue Jun 21, 2016 5:00 am
by builtnotbought Tue Jun 21, 2016 5:00 am
tropdeprojet wrote:I very like the work that you did on your car!
I will do the same time for the cluster trim. Last time I'm working on it, I working to make the sample. It's that little things that make the difference!
You will have a great car.
Thank you! I can send you a dwg/dxf file with the drawing. If anybody else need file I can share too.
May be outline of the trim is not directly as factory but it is very close.
One more important thing about this trim - after it's cutted you need to bend it with hands to fit cluster. I used 1 mm stainless steel, it bends well.
Oh, and of coarse I forgot that I started my Autopilot V2 airride system, of coarse there is a little leak somewhere in hardlines LOL but for first start ever it's ok. Need only to buy lowering spindles to make front/rear drop equal to each other.
Oh, one more curious thing. I bought new ACdelco wipers...and pass side wiper don't fit under the hood
So open hood or working wipers only
The hood isn't touched with any mods in the area of pass wiper so I don't know what the problem is. If lifting hood a little up, wiper is free but hood is higher than fender line....
builtnotbought- G3GM Member
- Street Cred : 3
Re: '74 El Camino "Project Badass"
![]() by Showtime73 Tue Jun 21, 2016 5:36 pm
by Showtime73 Tue Jun 21, 2016 5:36 pm
Showtime73- Donating Member
- Street Cred : 1
Re: '74 El Camino "Project Badass"
![]() by builtnotbought Tue Jun 21, 2016 5:51 pm
by builtnotbought Tue Jun 21, 2016 5:51 pm
Showtime73 wrote:Awesome work! setting the bar high for those to come. I like it, I'm already copying your hood, so maybe I'll be the second with a working cowl induction hood on a 73 and the first on a Malibu. I'd also like the specs for the trim.
Thank you!
I ordered and now waiting for 70-72 cowl induction air cleaner kit, spacer and flapper parts but I still don't know air cleaner full height and how many mods I will need to do to fit it under hood.
When you'll be cutting out center part of the factory hood try to fix factory geometry as much as possible. Mine was fixed but I think it changed a little whatever. And there is a corner on the inside of 72 cowl section that directly hit the arm of pass side wiper. I didn't have opportunity to measure hood so I need to fix it somehow now.
PM me your email and I will send you a file... but 73 has another cluster with round gauges, doesn't it?
builtnotbought- G3GM Member
- Street Cred : 3
Re: '74 El Camino "Project Badass"
![]() by bigredlaguna Wed Jun 22, 2016 9:46 am
by bigredlaguna Wed Jun 22, 2016 9:46 am
The wipers need to be as low profile as possible. They hit even on an unmodified hood if you get some that are too tall.
Nice work so far. I look forward to seeing pics or video of you cruising in it.
bigredlaguna- G3GM Senior Member
- Street Cred : 53
Re: '74 El Camino "Project Badass"
![]() by builtnotbought Wed Jun 22, 2016 9:59 am
by builtnotbought Wed Jun 22, 2016 9:59 am
I've already found the manual how to change 2 piece rear main seal and got ready to worstbigredlaguna wrote:Sounds like you will be ok concerning the coolant leak. I hope you got a 1-piece rear main block. The 1-piece is easy to change, the 2-piece requires removal of the oil pan and at least the rear main cap. Removing the rear main cap means removing at least the oil pump and its driveshaft.
The wipers need to be as low profile as possible. They hit even on an unmodified hood if you get some that are too tall.
Nice work so far. I look forward to seeing pics or video of you cruising in it.
Now waiting on some new info from manufacturer of what to do next. They are not easy to communicate, or my describing is too bad))
Haha cool, so gm tried to hide wipers too carefully
Thank you, I'm waiting for too
builtnotbought- G3GM Member
- Street Cred : 3
Re: '74 El Camino "Project Badass"
![]() by 77mali Wed Jun 22, 2016 5:14 pm
by 77mali Wed Jun 22, 2016 5:14 pm
77mali- Donating Member
- Street Cred : 62
Re: '74 El Camino "Project Badass"
![]() by builtnotbought Wed Jun 22, 2016 5:59 pm
by builtnotbought Wed Jun 22, 2016 5:59 pm
Thank you77mali wrote:This is a one piece rear main seal.
Oh, the seal is inside the alu housing... so my oil was on the edge of oil pan gasket, not the seal..I need to check again
builtnotbought- G3GM Member
- Street Cred : 3
Re: '74 El Camino "Project Badass"
![]() by Hs1973 Thu Jun 23, 2016 2:22 pm
by Hs1973 Thu Jun 23, 2016 2:22 pm
A new engine is not supposed to leak at all. But lettilgængelig it sit for years can mean the seals dry out. Most engine builders say that a new engine needs to be started and broken in, within weeks. Or the lube in the bearings and such could run off, and that could hurt the engine at startup.

Hs1973- G3GM Enthusiast

- Street Cred : 14
Re: '74 El Camino "Project Badass"
![]() by tropdeprojet Thu Jun 23, 2016 6:13 pm
by tropdeprojet Thu Jun 23, 2016 6:13 pm
tropdeprojet wrote:I very like the work that you did on your car!
I will do the same time for the cluster trim. Last time I'm working on it, I working to make the sample. It's that little things that make the difference!
You will have a great car.
Thank you! I can send you a dwg/dxf file with the drawing. If anybody else need file I can share too.
Thank you it's nice from you! You work hard for this. I have a custom cluster trim because i will not take the original cluster. I can take the outside line but i have to make something different around the stearing.
tropdeprojet- Donating Member
- Street Cred : 5
Re: '74 El Camino "Project Badass"
![]() by Mcarlo77 Thu Jun 23, 2016 6:28 pm
by Mcarlo77 Thu Jun 23, 2016 6:28 pm
OR...get a set of used OEM wiper arms and the original Trico 43-160 wiper blades. I can pull wiper arms all day long at the salvage yards if anyone needs any. Blades can be bought online. And, I rarely see wiper arms on our "A" bodies out there that are scuffed from rubbing on the hood. Think this comes about when people start messing with their hoods/body panels and/or try to use newer wiper arms/blades as mentioned.
Mcarlo77- Donating Member
- Street Cred : 77
Re: '74 El Camino "Project Badass"
![]() by Hs1973 Sat Jun 25, 2016 6:14 am
by Hs1973 Sat Jun 25, 2016 6:14 am
I once had a dodge charger wich i bought from the original owner with only 50 Thousend miles on it in perfect condition, and the doors closed so Nice and sat Real Nice in the body. I wonder If that was the case with our a body cars considering how heavy the doors are.
Hs1973- G3GM Enthusiast
- Street Cred : 14
Re: '74 El Camino "Project Badass"
![]() by builtnotbought Sat Jun 25, 2016 3:29 pm
by builtnotbought Sat Jun 25, 2016 3:29 pm
Hs1973 wrote:The wiper issue is standart on all 73-77 with hidden wipers. The modern blades are usually to tall to fit under the hood. Even blades that look oem can be to tall. Only Way is to find the lowest blades availeble and ajust the the hood to sit as High so the wipers clear, that of course means you have to ajust the fenders and doors too.
A new engine is not supposed to leak at all. But lettilgængelig it sit for years can mean the seals dry out. Most engine builders say that a new engine needs to be started and broken in, within weeks. Or the lube in the bearings and such could run off, and that could hurt the engine at startup.
I made this way, re-painted old blades and plugged in rubbers from new wipers. It helped a little.
Engine was broken in in US at manufacturers shop.
Ok, if you want PM me your email.tropdeprojet wrote:
Thank you it's nice from you! You work hard for this. I have a custom cluster trim because i will not take the original cluster. I can take the outside line but i have to make something different around the stearing
Mcarlo77 wrote:
OR...get a set of used OEM wiper arms and the original Trico 43-160 wiper blades. I can pull wiper arms all day long at the salvage yards if anyone needs any. Blades can be bought online. And, I rarely see wiper arms on our "A" bodies out there that are scuffed from rubbing on the hood. Think this comes about when people start messing with their hoods/body panels and/or try to use newer wiper arms/blades as mentioned.
Hs1973 wrote:Yeah it usually starts with the bodywork. Espesially If the front fenders sit to low and to far back, then the hood comes to far back and sit to low also and then you have the wiper issue. If you then ad modern blades that are a little taller than oem, then you have wiperarms getting stuck on the back edge of the hood. Remember its not even an inch that makes the difference. I solved mine by lifting the doors up as much as it would go, and then lifting the fenders and hood. Then no more rubbing, and also the doors close like they should. I had to restore my hinges with new rollers and pins etc. Before the doors where sagging Real bad. I always wondered how the doors closed and how alignment looked from new.
I once had a dodge charger wich i bought from the original owner with only 50 Thousend miles on it in perfect condition, and the doors closed so Nice and sat Real Nice in the body. I wonder If that was the case with our a body cars considering how heavy the doors are.
Nooo, I don't want to mess with body aligning againg
Today noticed leak from temp gauge on the same drivers head. May it is the reason of the all coolant leak.
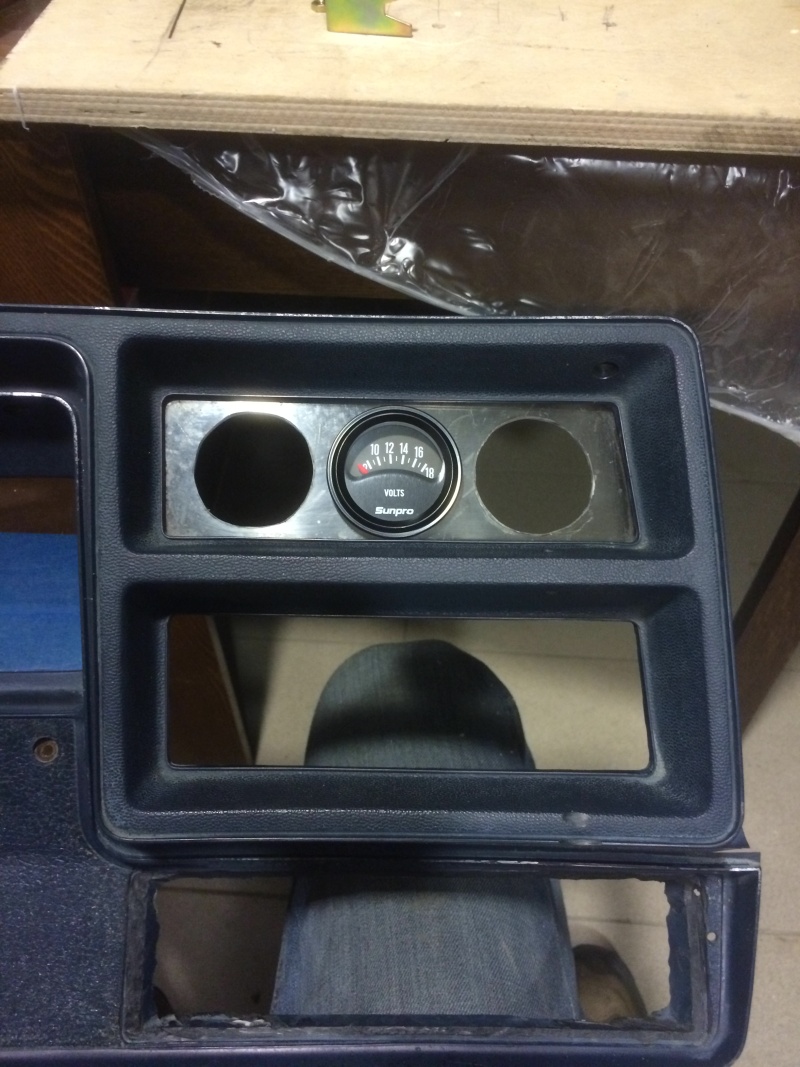
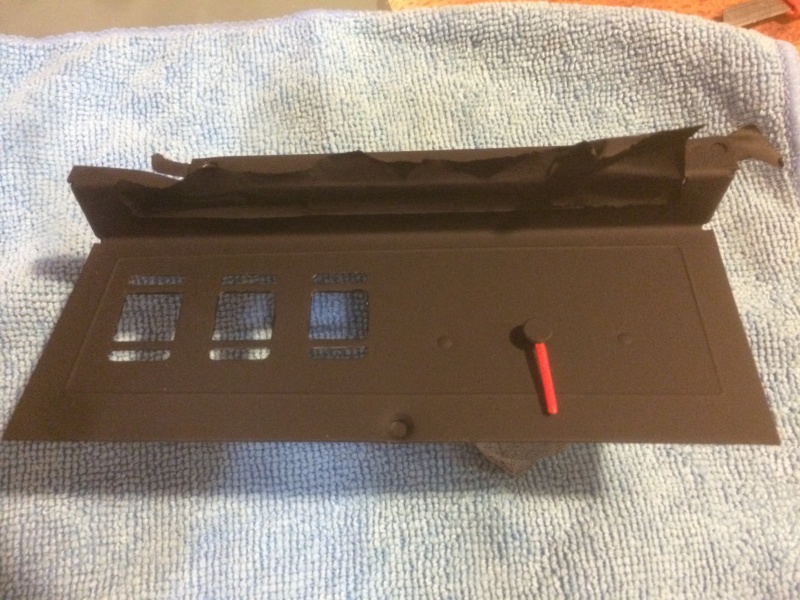
So that's how rebuilt heater controls look like
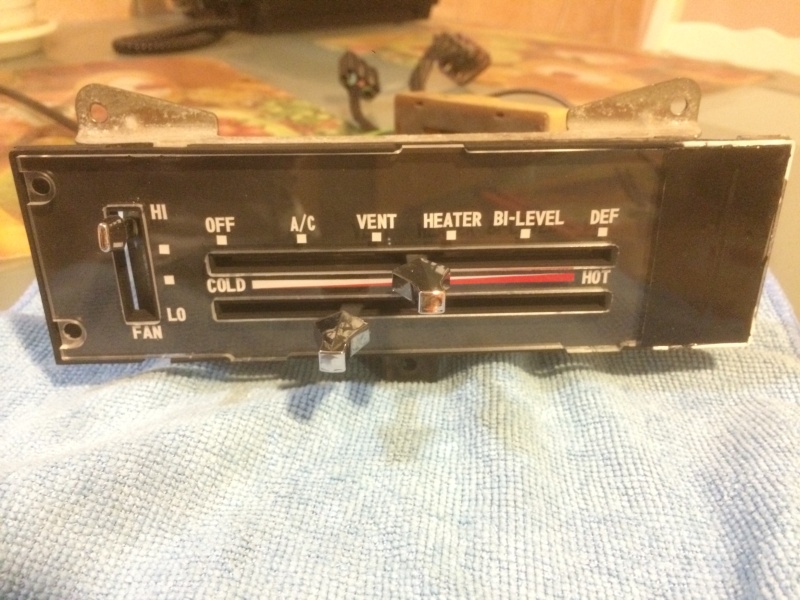
and rebuilt idiot lights

and some pin striping on all of the letters

builtnotbought- G3GM Member
- Street Cred : 3
Re: '74 El Camino "Project Badass"
![]() by Showtime73 Sat Jun 25, 2016 8:25 pm
by Showtime73 Sat Jun 25, 2016 8:25 pm
Showtime73- Donating Member
- Street Cred : 1
Re: '74 El Camino "Project Badass"
![]() by fasrnur Sat Jun 25, 2016 9:41 pm
by fasrnur Sat Jun 25, 2016 9:41 pm
fasrnur- G3GM Enthusiast
- Street Cred : 9
Re: '74 El Camino "Project Badass"
![]() by thatfnthing Mon Jun 27, 2016 9:09 am
by thatfnthing Mon Jun 27, 2016 9:09 am
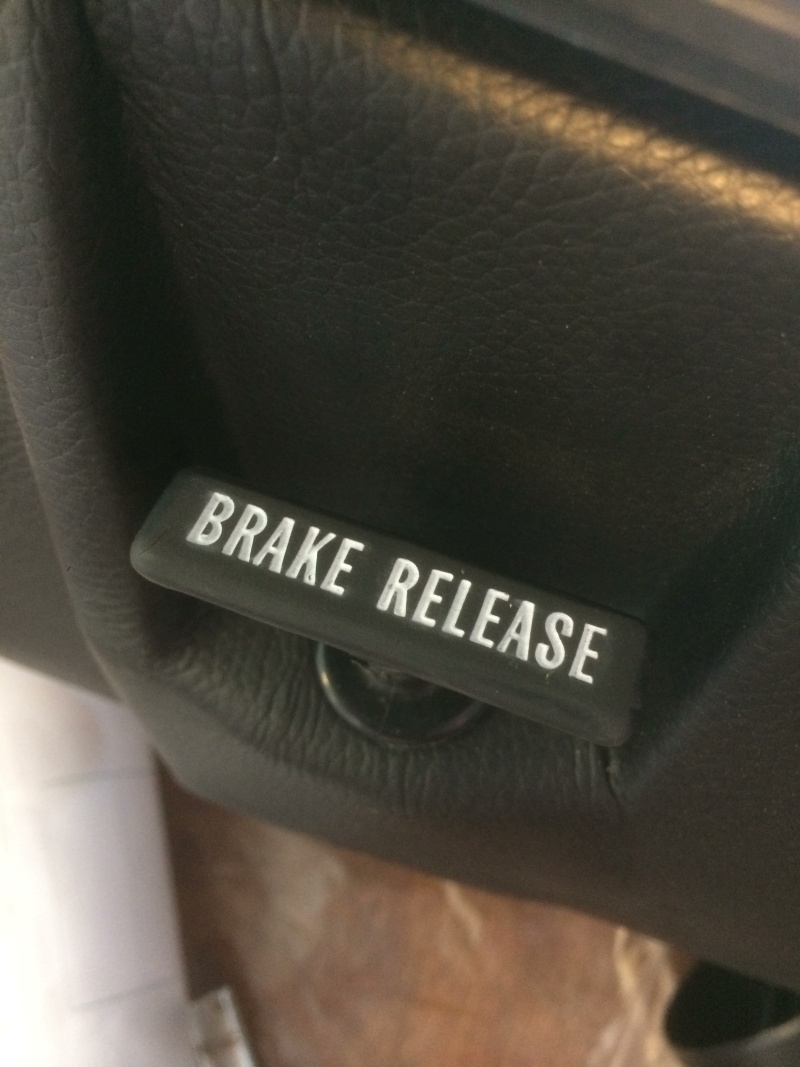
fasrnur wrote:Very nice work on the gauges and E-brake handle. But how in the world did you do that?
Ditto -- I'm always looking to learn a new technique, and I have a couple spots like the e-brake handle and defog switch that could use some love...

thatfnthing- Donating Member
- Street Cred : 65
Re: '74 El Camino "Project Badass"
![]() by builtnotbought Mon Jun 27, 2016 11:47 am
by builtnotbought Mon Jun 27, 2016 11:47 am
E-brake letters are painted/filled with white brush corrector pen and then all excess marks are deleted with light sand paper (it doesn't hurt because handle is covered with rubber). Came out well.
Hood handle you need to fill carefully with pen and then use some solvent to delete excess spots.
Cluster PRNDL letters (don't have a pic) are painted with the same white brush corrector pen but very carefully without making any excess spots.
Cluster speedo, idiot lights panel and heater controls are copied with a ruller and draw in AutoCad, then cutted on different color film with plotter.
Then glued to metal re-painted panels. If several colors needed, combined by hand (of coarse there is a way to plot image on transparent film as a block and then glue the whole block but I still didn't try it)
I can share everything, but designs are not ideal for the first time so they need some mods.
For example heater control plastic face didn't seat well because drill can't make sharp inside corners and heater body has rectangular frames on what face must seat; +- some mm in design that's need to be corrected; idiot gauge white stripe is not align with metal line on panel in the upper left corner (mistake).
builtnotbought- G3GM Member
- Street Cred : 3
Re: '74 El Camino "Project Badass"
![]() by JB2wheeler Mon Jun 27, 2016 8:29 pm
by JB2wheeler Mon Jun 27, 2016 8:29 pm

JB2wheeler- G3GM Fanatic

- Street Cred : 28
Re: '74 El Camino "Project Badass"
![]() by builtnotbought Sat Jul 16, 2016 6:10 pm
by builtnotbought Sat Jul 16, 2016 6:10 pm
Thank youJB2wheeler wrote:Great car and condition. Hard work, but self satisfiying. Keep up the good work. JB
So as for the brakes, I bought new prop valve disc/drums, played a little with pump air to catch the middle of the piston, installed POS plug and bleed the system not itself but with pushing pedal. When mounting prop valve I found a stock wire under the body for brake light, I prepaired it long time ago and forgot about it. I changed the pigtail from stock one to new type that was in kit with booster/master/prop valve.
Besides that tailgate latch was changed to 72 year latch with handle inside, big thanks to Steve for helping me, only left rod was extended a little to fit 72 latch.
Rear sway bar from some year caprice (26mm) was fitted to my stock rear end arms with perfect result. Thanks for giving me measurments!
I bought kit of cowl induction for 70-72 chevelle from GroundUP (awful communication service guys). And cutted cover for airride install. Photos will be later.
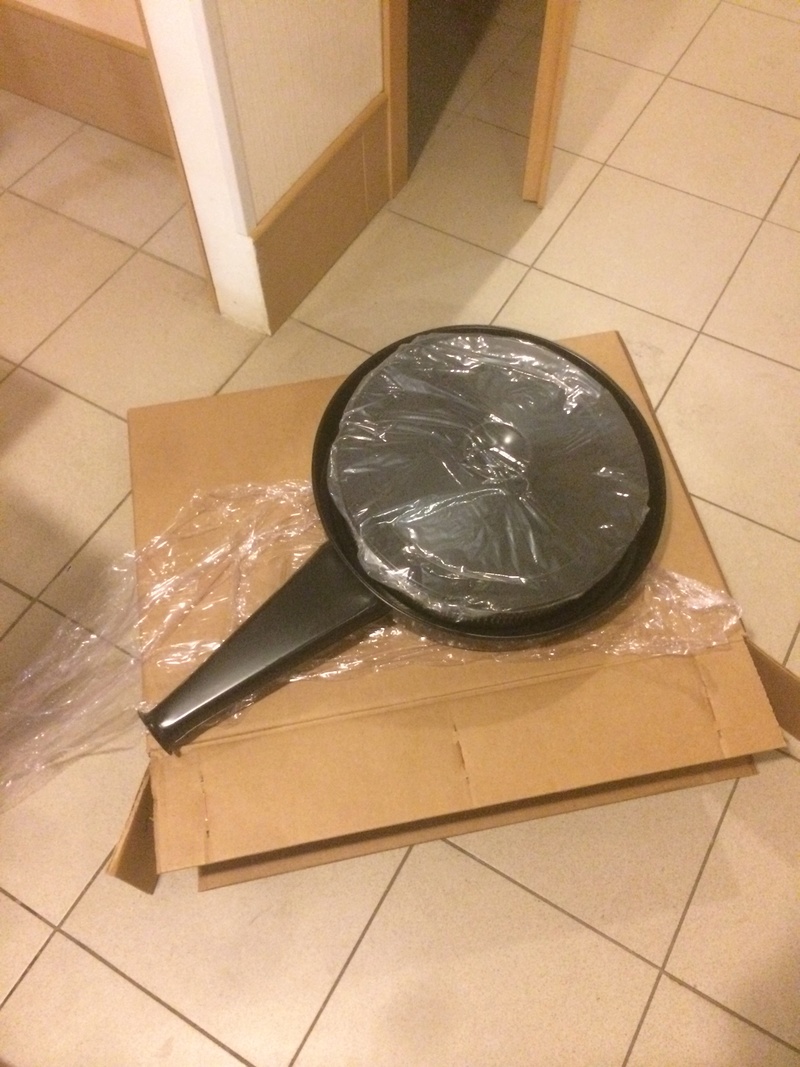
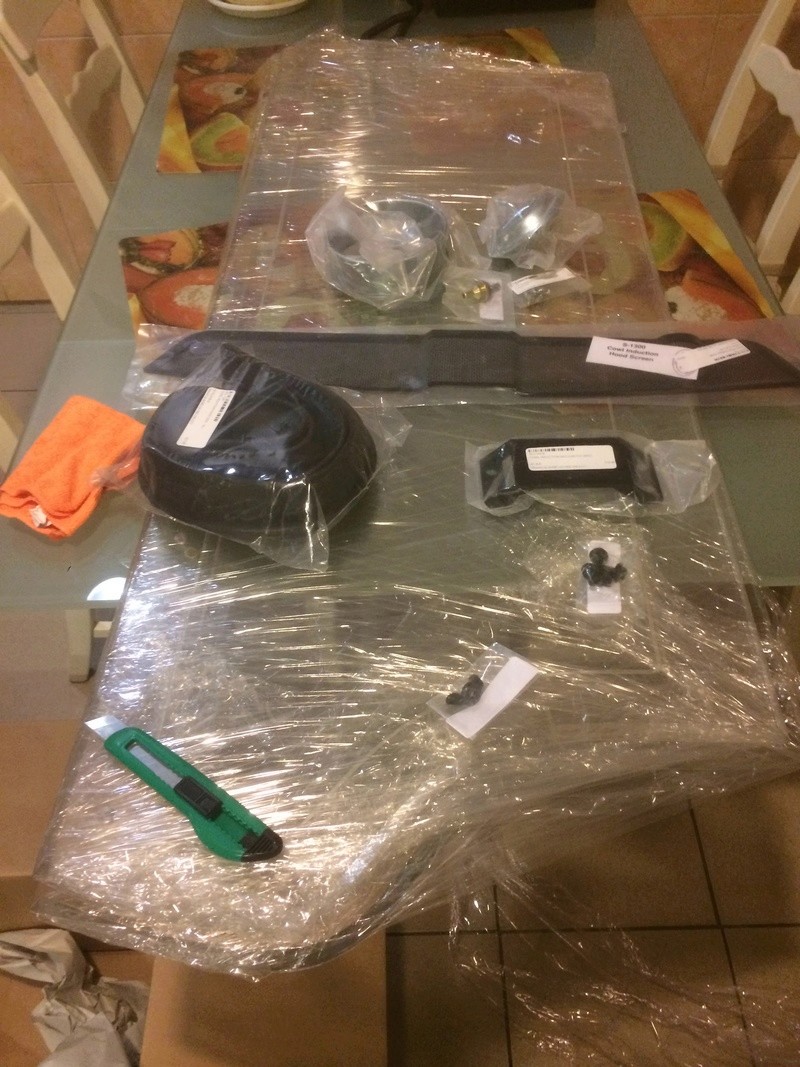
Filter base with stock 72 spacer cleared everything on the engine perfectly but rake angle of the hood was not the same as filter base. Some hummer work and now it sits allmost parralel to the hood. As for the alignment of the filter base center and hood cowl hole center - hood hole is a little closer to the firewall but still ok. Now it's about 15mm min distance from filter base flange to hood. Didn't understand how to mount cowl seal the right way...thinking of buying some universal square foam rubber instead of seal.
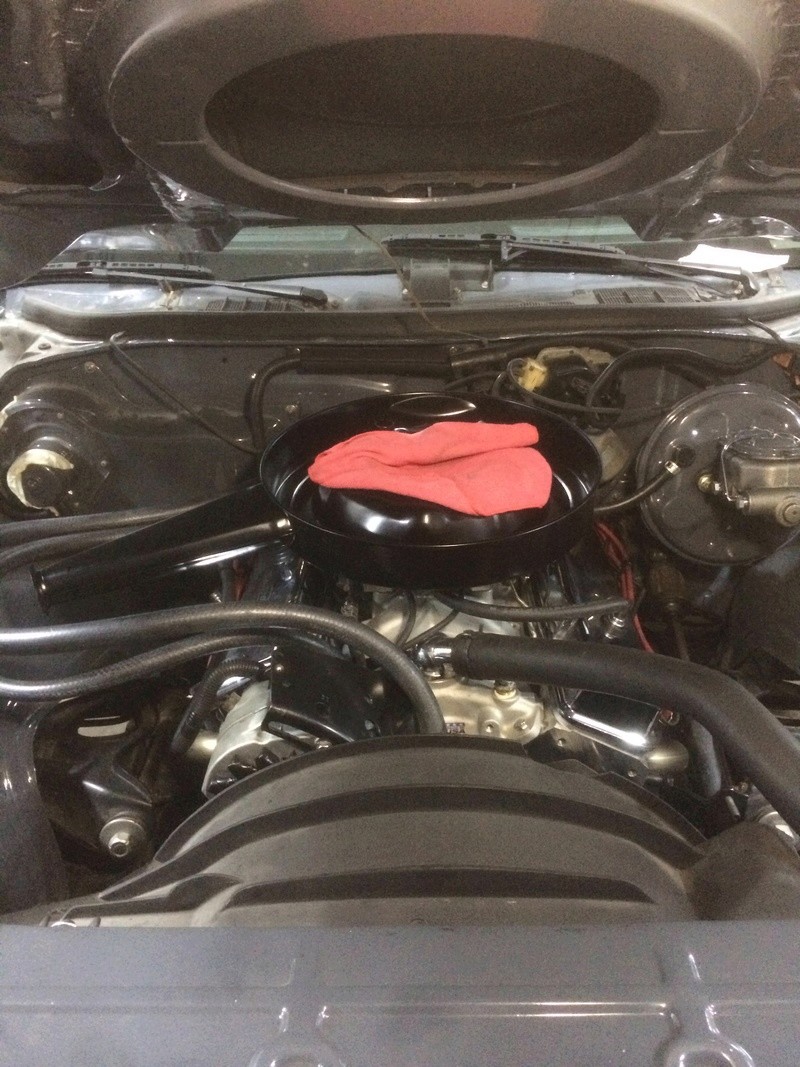
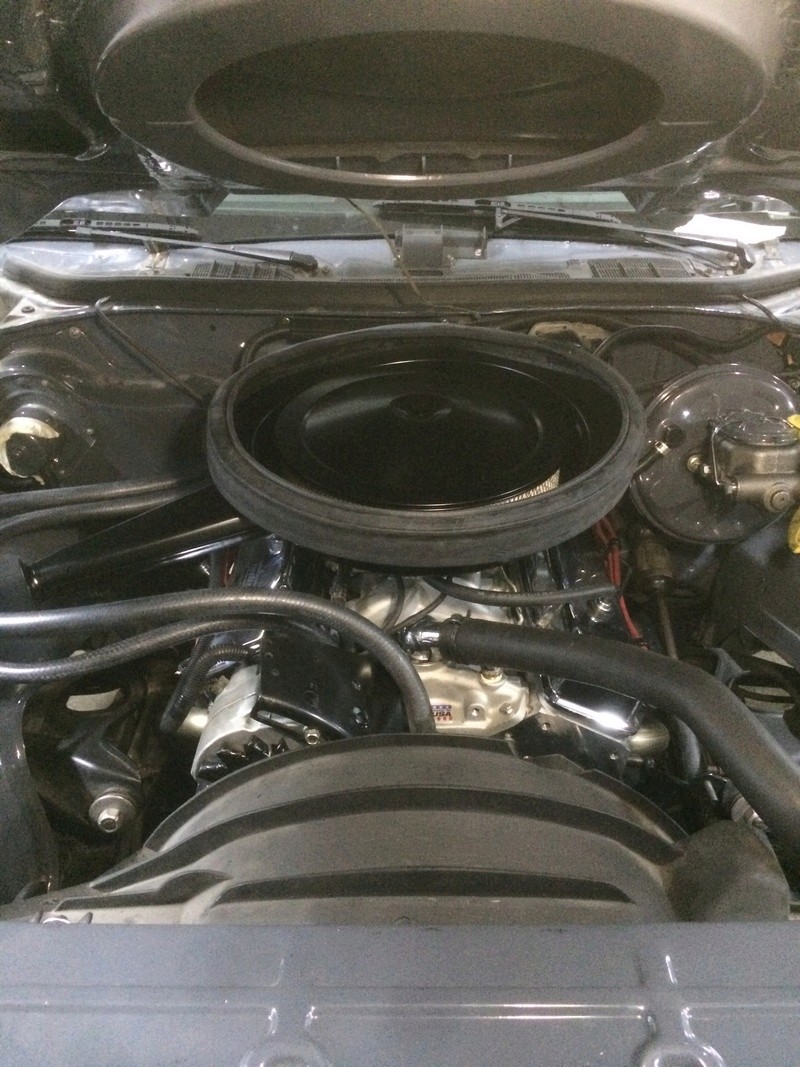
The way seal is mounted on photo it falls down from the flange after closing hood.
One more problem I found with fitting cowl induction is that vaccuum pod with it's bracket can have a contact with firewall, I didn't check it for now but it will be sad.
And the main problem for now is that paint shop refused to paint bumpers after sandblasting because chrome was still shiny and smooth. Now I'm thinking of how to make surface more suitable for painting.
builtnotbought- G3GM Member
- Street Cred : 3
Re: '74 El Camino "Project Badass"
![]() by Hs1973 Sun Jul 17, 2016 10:40 am
by Hs1973 Sun Jul 17, 2016 10:40 am
Hs1973- G3GM Enthusiast
- Street Cred : 14
Page 4 of 7 • 1, 2, 3, 4, 5, 6, 7 ![]()

 Similar topics
» MY DAILY DRIVER/PROJECT 73 EL CAMINO SS
» Classic Car Restoration Club: 1977 El Camino Project Car-Overview
G3GM :: Media :: G3 Project Pictures
» Rusty's progress motor Parts arrived LOL Half are on
» Painting Interior Plastic
» Anyone good at photoshop?
» El Camino/Sprint LH Aftermarket Quarter Panel FOR SALE
» 1973 chevelle four speed console
» dashes
» Used OEM Hood 73-77
» 76 Laguna parked in 2002
» Thanks for having me