


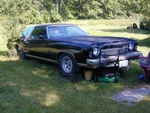
1977 Chevelle Malibu Classic Progress Photo's aka Mali
G3GM :: Media :: G3 Project Pictures
Page 10 of 27 •  1 ... 6 ... 9, 10, 11 ... 18 ... 27
 ![]()
Re: 1977 Chevelle Malibu Classic Progress Photo's aka Mali
![]() by pila Thu Jul 12, 2012 10:02 pm
by pila Thu Jul 12, 2012 10:02 pm
I soldered the old pan a few times, to cover pin holes in it. Time to do it right I suppose, but not a fun job....gotta raise the front of the engine etc.....
pila- Donating Member

- Street Cred : 43
Re: 1977 Chevelle Malibu Classic Progress Photo's aka Mali
![]() by 77mali Sat Jul 14, 2012 6:18 pm
by 77mali Sat Jul 14, 2012 6:18 pm
There's slight play in it- you can do it by hand but I assume that once the prop shaft is back in it will go away. Have new seals on order.
speedo stuff looks like in's in good shape, all the turnings gears and axles looks good. I think this was a rebuilt trans.
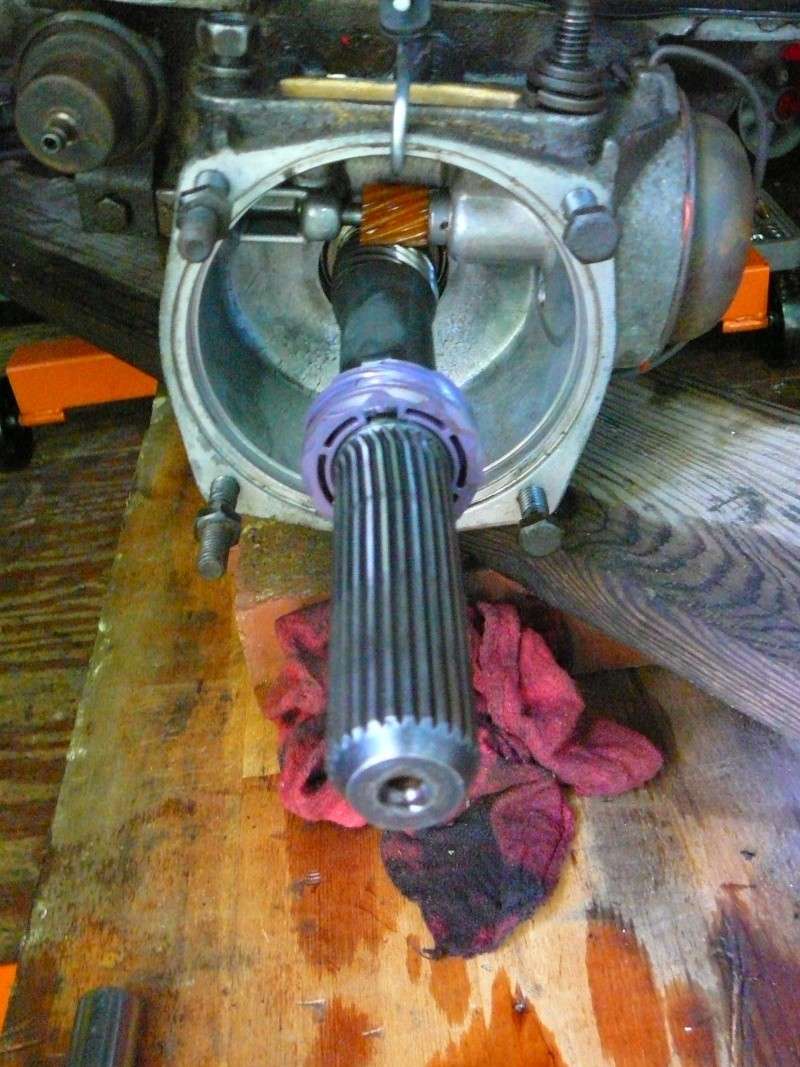
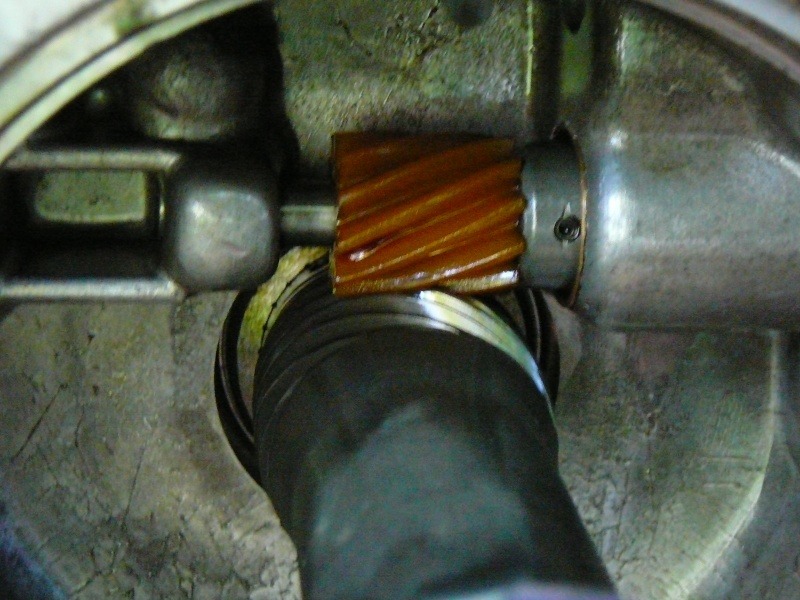
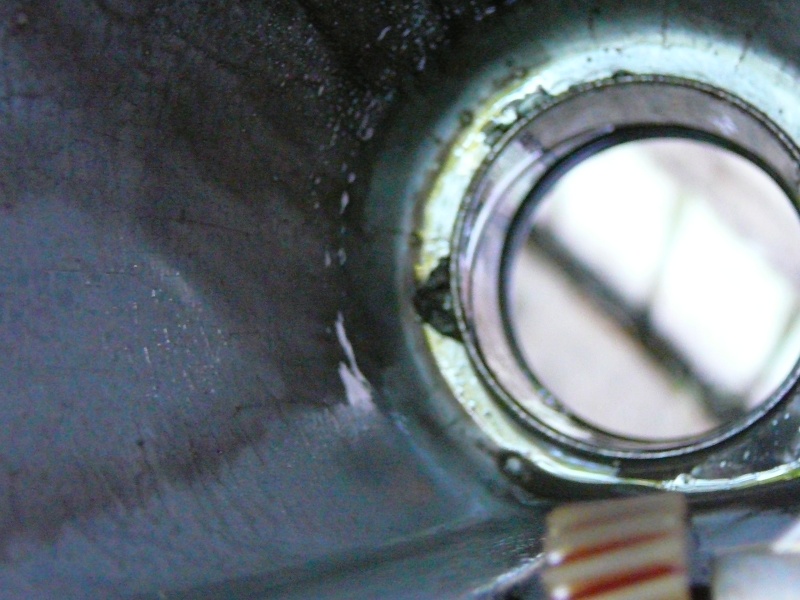
Notice the nicks & other damage on the inside of the end housing, looks like someone's replaced the bearing and wasn't all that careful...That kinda sux but hey maybe it can be fixed.
77mali- Donating Member
- Street Cred : 62
Re: 1977 Chevelle Malibu Classic Progress Photo's aka Mali
![]() by 1973 454 MONTE Sat Jul 14, 2012 6:44 pm
by 1973 454 MONTE Sat Jul 14, 2012 6:44 pm
Hehe
1973 454 MONTE- Donating Member
- Street Cred : 36
Re: 1977 Chevelle Malibu Classic Progress Photo's aka Mali
![]() by pila Sat Jul 14, 2012 6:59 pm
by pila Sat Jul 14, 2012 6:59 pm
pila- Donating Member
- Street Cred : 43
Re: 1977 Chevelle Malibu Classic Progress Photo's aka Mali
![]() by 77mali Sat Jul 14, 2012 7:18 pm
by 77mali Sat Jul 14, 2012 7:18 pm
1973 454 MONTE wrote:What's the bungie for? Do you loose the pan bolts?
Hehe
Har....har- No not 1 bolt missing
The bungie is there to keep it tight. (there are 2 on there) I have it balanced upside-down on the bottom of my engine stand with a board of wood & bricks underneath it to raise it up. (I can't find my wood scraps-
Last edited by 77mali on Sat Jul 14, 2012 7:29 pm; edited 1 time in total
77mali- Donating Member
- Street Cred : 62
Re: 1977 Chevelle Malibu Classic Progress Photo's aka Mali
![]() by 77mali Sat Jul 14, 2012 7:21 pm
by 77mali Sat Jul 14, 2012 7:21 pm
pila wrote: The marks in the casting are likely normal. They usually have a scarred look from the casting process.
I was hoping you'd chime in on that seeing as you've done a few. Thanks Bill!
77mali- Donating Member
- Street Cred : 62
Re: 1977 Chevelle Malibu Classic Progress Photo's aka Mali
![]() by 77mali Sun Jul 15, 2012 6:29 pm
by 77mali Sun Jul 15, 2012 6:29 pm
So I started the engine bay.
Found some nest remnants, apparently the critter that was living in my heater box had a couple up stairs bedrooms. Access seems to be where the cowl drains to the inner fender wells- they even had doors (with the flaps!)....this is the worst area but the rest looks awesome. I'm just going to clean it again and spray Por15 in there- that's it.
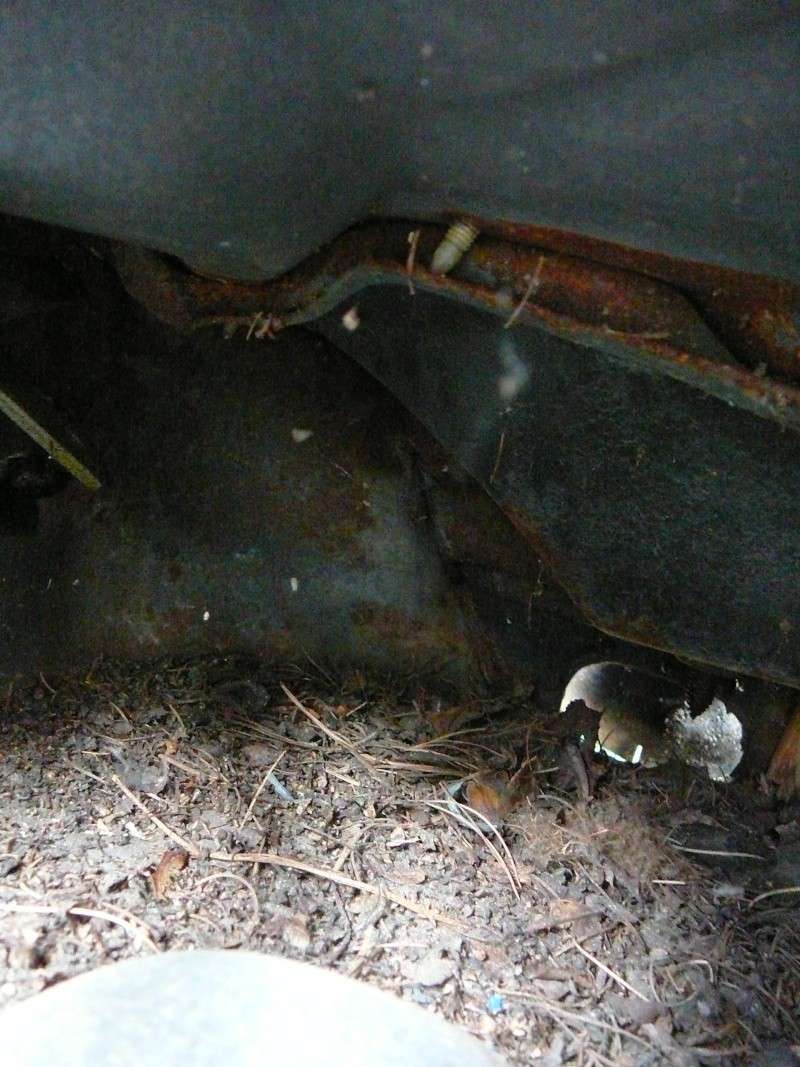
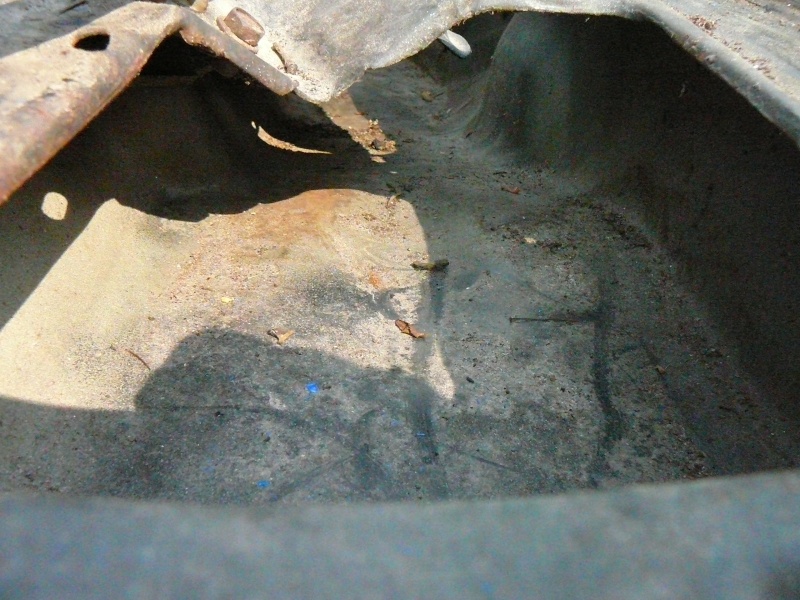
Most of the goopy crap from the A/C housing is off so now just some light work with the Dremmel tool and then paint & seam sealing.
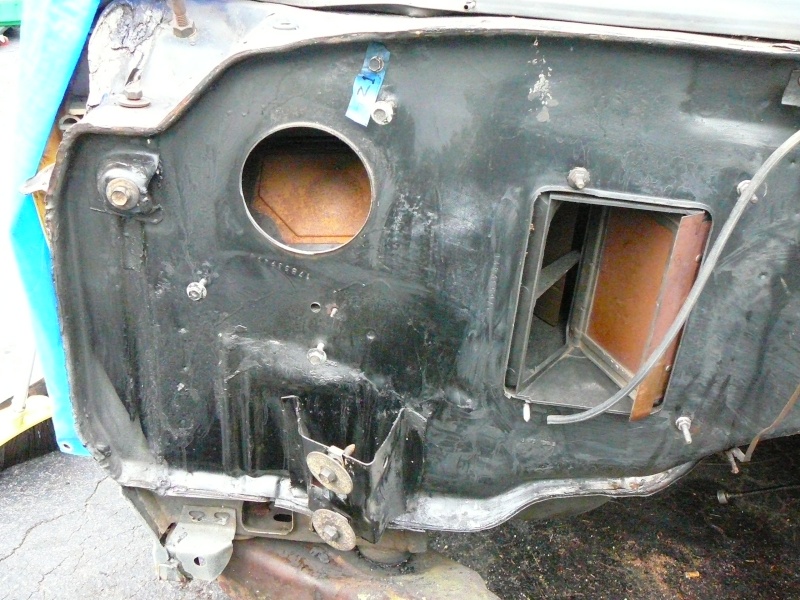
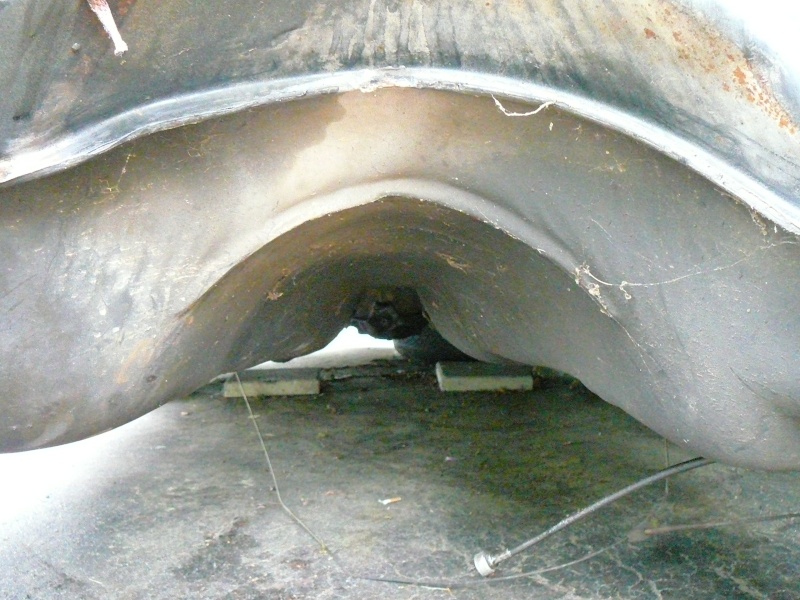
Underside looks very good up front. The rear diff looks lonely back there all by itself.
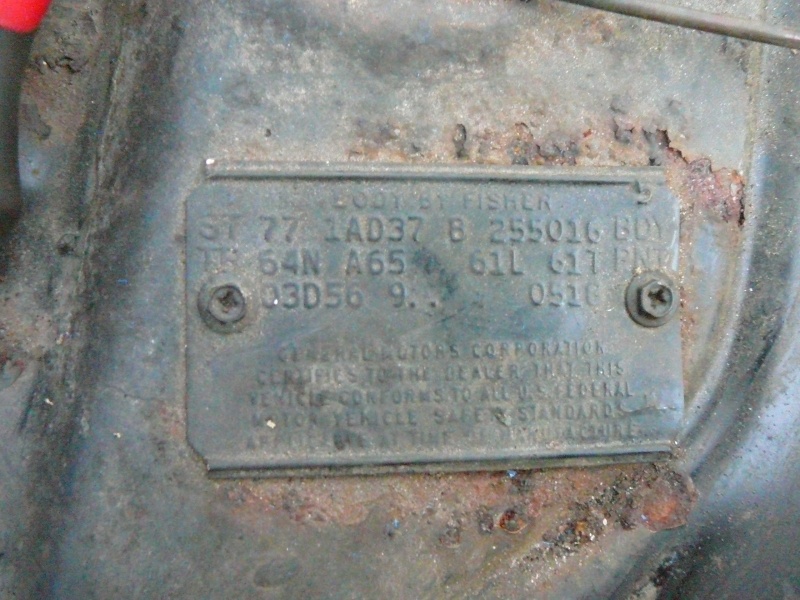
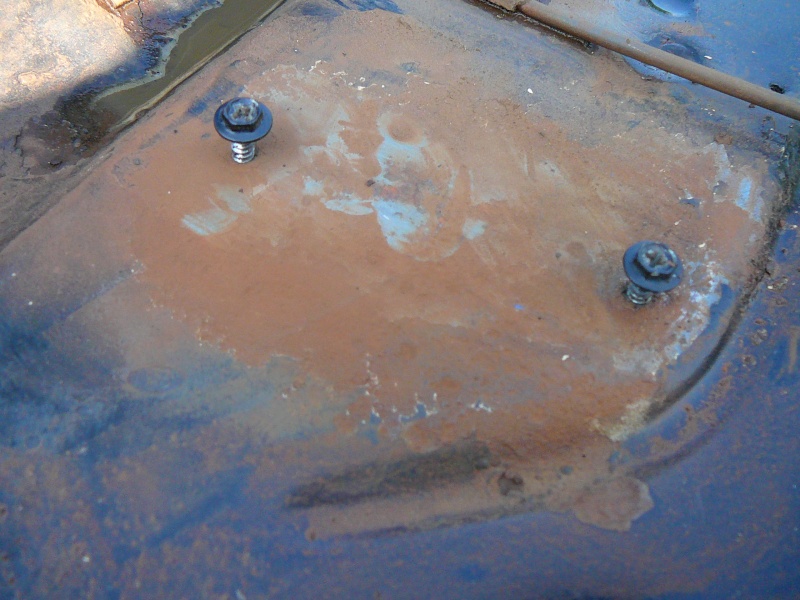
I had been waiting to take off the trim tag, it's now nailed up in the shop and won't go back on til the car's done. Minor rust under it but was able to wet-scrape it off. Using more Por-15 topside on the cowl with Duplicolor semi-gloss enamel top coat.
77mali- Donating Member
- Street Cred : 62
Re: 1977 Chevelle Malibu Classic Progress Photo's aka Mali
![]() by pila Sun Jul 15, 2012 9:13 pm
by pila Sun Jul 15, 2012 9:13 pm
pila- Donating Member
- Street Cred : 43
Re: 1977 Chevelle Malibu Classic Progress Photo's aka Mali
![]() by 77mali Sun Jul 15, 2012 9:23 pm
by 77mali Sun Jul 15, 2012 9:23 pm
77mali- Donating Member
- Street Cred : 62
Re: 1977 Chevelle Malibu Classic Progress Photo's aka Mali
![]() by 77mali Fri Jul 20, 2012 11:36 am
by 77mali Fri Jul 20, 2012 11:36 am
Decided on the following to save some $$$$.
The block will be exchanged as a core for a re- manufactured block of the same casting type with slightly larger cylinder bores from a standard 4".
Going with flat-top pistons and the shop is going to reassemble & balance the bottom end. Also am having them clean up the RHS cylinder heads to save prep time for painting and will be reassembling/lashing them myself. Flywheel is getting cleaned up as well as are the oil pump and a couple of other misc items, like the fuel pump. I decided to reuse the Cam & lifters.
Chomping at the bit until I get the assembly back home...
77mali- Donating Member
- Street Cred : 62
Re: 1977 Chevelle Malibu Classic Progress Photo's aka Mali
![]() by 1973 454 MONTE Fri Jul 20, 2012 2:10 pm
by 1973 454 MONTE Fri Jul 20, 2012 2:10 pm
1973 454 MONTE- Donating Member
- Street Cred : 36
Re: 1977 Chevelle Malibu Classic Progress Photo's aka Mali
![]() by 77mali Fri Jul 20, 2012 2:45 pm
by 77mali Fri Jul 20, 2012 2:45 pm
Last edited by 77mali on Fri Jul 20, 2012 7:22 pm; edited 1 time in total
77mali- Donating Member
- Street Cred : 62
Re: 1977 Chevelle Malibu Classic Progress Photo's aka Mali
![]() by 1973montec Fri Jul 20, 2012 6:46 pm
by 1973montec Fri Jul 20, 2012 6:46 pm


1973montec- Donating Member
- Street Cred : 17
Re: 1977 Chevelle Malibu Classic Progress Photo's aka Mali
![]() by 77mali Fri Jul 20, 2012 7:12 pm
by 77mali Fri Jul 20, 2012 7:12 pm
77mali- Donating Member
- Street Cred : 62
Re: 1977 Chevelle Malibu Classic Progress Photo's aka Mali
![]() by 77mali Sun Jul 22, 2012 8:32 pm
by 77mali Sun Jul 22, 2012 8:32 pm
77mali- Donating Member
- Street Cred : 62
Re: 1977 Chevelle Malibu Classic Progress Photo's aka Mali
![]() by ant7377 Sun Jul 22, 2012 9:58 pm
by ant7377 Sun Jul 22, 2012 9:58 pm
ant7377- G3GM Addict

- Street Cred : 36
Re: 1977 Chevelle Malibu Classic Progress Photo's aka Mali
![]() by 77mali Thu Jul 26, 2012 7:02 pm
by 77mali Thu Jul 26, 2012 7:02 pm
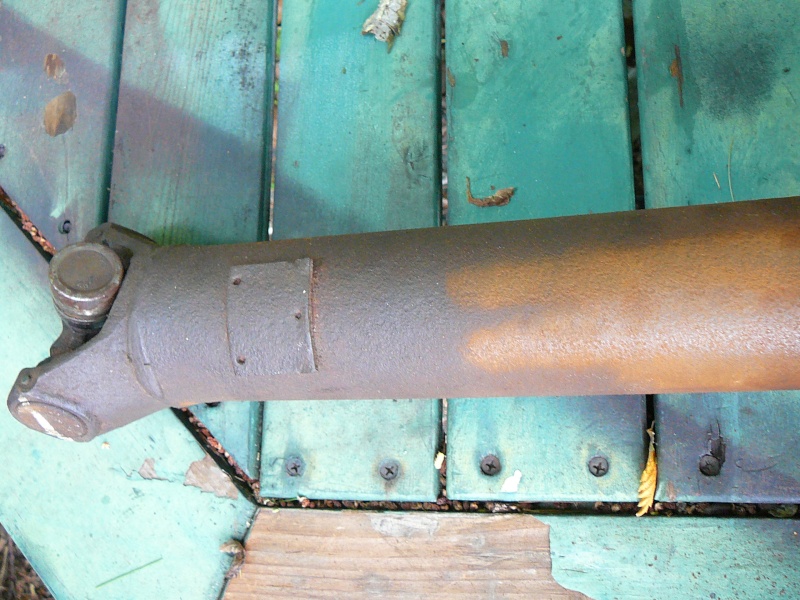
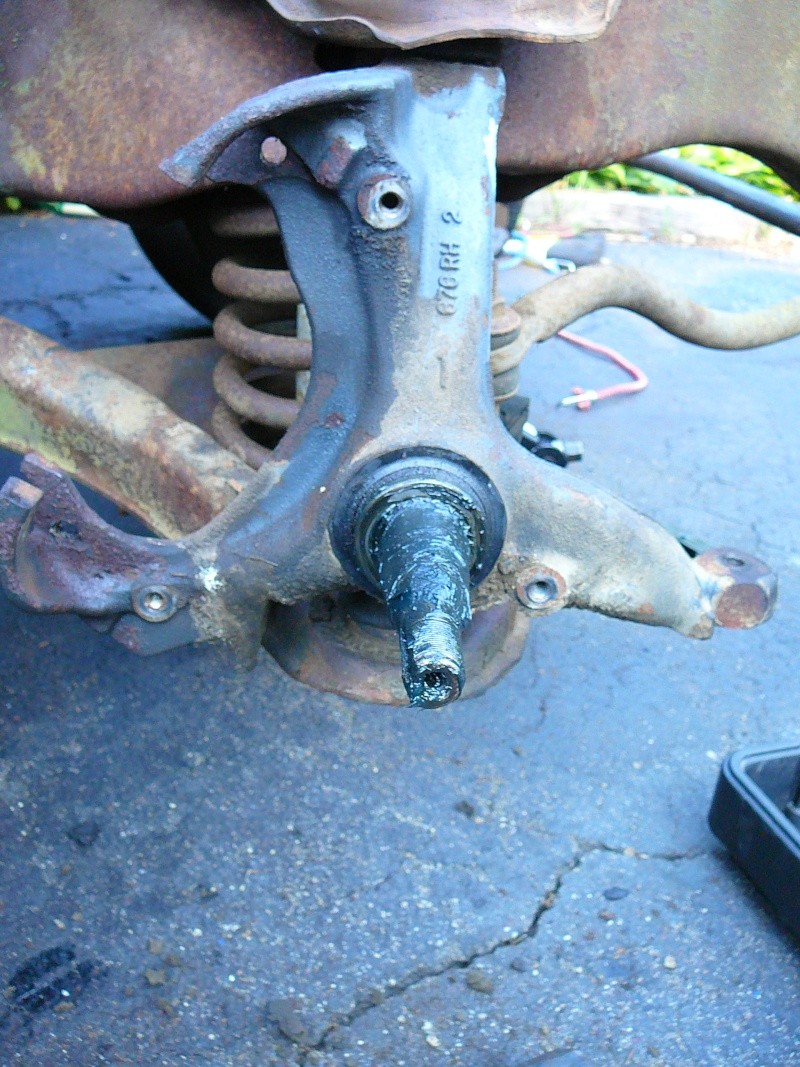
Playing around again with the 3M Scotchbrite discs. They're awesome started the prop/drive shaft with them. Almost ready for painting, just a solvent wipe down and Por15 over the clean rust. Also started braking down the suspension...have to fashion a tool to separate the joints in the control arm. I was surprised that Autozone has many of the suspension and steering items avail to ship for the 77...(i.e. bushings etc...) at decent prices too.


77mali- Donating Member
- Street Cred : 62
Re: 1977 Chevelle Malibu Classic Progress Photo's aka Mali
![]() by 1973 454 MONTE Thu Jul 26, 2012 10:12 pm
by 1973 454 MONTE Thu Jul 26, 2012 10:12 pm
1973 454 MONTE- Donating Member
- Street Cred : 36
Re: 1977 Chevelle Malibu Classic Progress Photo's aka Mali
![]() by ant7377 Thu Jul 26, 2012 10:14 pm
by ant7377 Thu Jul 26, 2012 10:14 pm
ant7377- G3GM Addict
- Street Cred : 36
Re: 1977 Chevelle Malibu Classic Progress Photo's aka Mali
![]() by 77mali Thu Jul 26, 2012 10:29 pm
by 77mali Thu Jul 26, 2012 10:29 pm
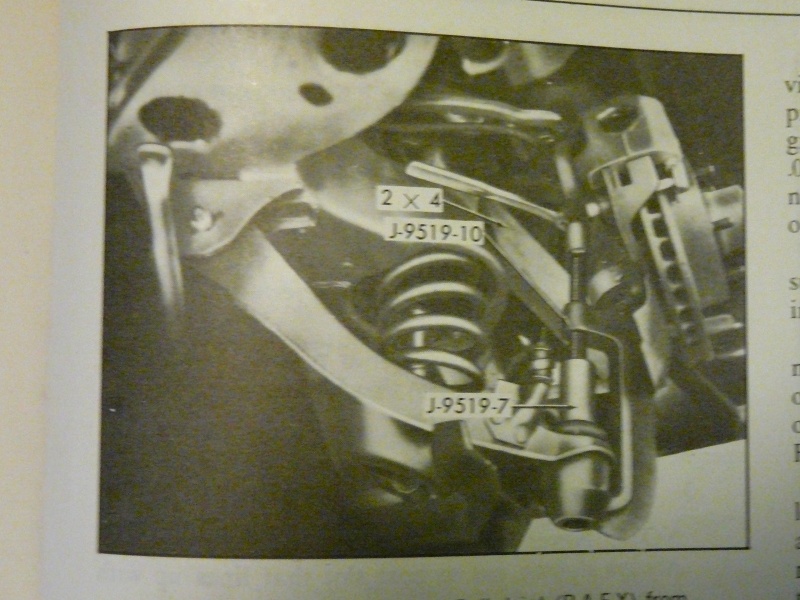
I'll try & post a pic of the page in the 77 service manual tomorrow, there is a GM tool they reference & you can make almost the same thing with a threaded bolt, nut and a socket. I may be wasting time a bit as they will prob need to be replaced anyway but figure I'll at least try it that way.
77mali- Donating Member
- Street Cred : 62
Re: 1977 Chevelle Malibu Classic Progress Photo's aka Mali
![]() by 77mali Fri Jul 27, 2012 3:26 pm
by 77mali Fri Jul 27, 2012 3:26 pm

This is the pressing tool (Autozone has similar loaners. Saw one today about $125.00 to rent & 100% refundable).
Last edited by 77mali on Sat Aug 04, 2012 8:26 am; edited 1 time in total (Reason for editing : info added)
77mali- Donating Member
- Street Cred : 62
Re: 1977 Chevelle Malibu Classic Progress Photo's aka Mali
![]() by Joe73 Fri Jul 27, 2012 3:48 pm
by Joe73 Fri Jul 27, 2012 3:48 pm
Air chisel http://www.harborfreight.com/super-duty-air-hammer-with-chisels-47868.html
Manual ball/tie joint splitter http://www.harborfreight.com/16-inch-tie-rod-separator-1759.html
Air chisel ball joint splitter http://www.harborfreight.com/15-16-inch-pneumatic-ball-joint-separator-66315.html
Chisel tips to knock the rivets off http://www.harborfreight.com/4-piece-short-air-chisel-set-68277.html
With minimum investment, less than $30, you can pop both joints and chisel the top one out, all in less than 15 minutes. I just did it on the frame I bought. The air chisel will also be used to replace your upper and lower control are bushings, which should be replaced as well. Then tap the new ones in with a socket.
The new uppers come with a nut and bolt to replace the rivets, so thats a real easy install. You can rent a "C" clamp type press to install the lowers but a pipe of the same diameter of the lowers works real good as well.

Joe73- Donating Member
- Street Cred : 83
Re: 1977 Chevelle Malibu Classic Progress Photo's aka Mali
![]() by 77mali Fri Jul 27, 2012 5:44 pm
by 77mali Fri Jul 27, 2012 5:44 pm
77mali- Donating Member
- Street Cred : 62
Re: 1977 Chevelle Malibu Classic Progress Photo's aka Mali
![]() by 1973 454 MONTE Fri Jul 27, 2012 7:25 pm
by 1973 454 MONTE Fri Jul 27, 2012 7:25 pm
77mali wrote:Maybe you guys are right...I was kinda hoping to keep the rivets on (they are original) because I don't know if a nut/bolt is necessarily as good as how they came from the factory. I suppose that there are enough connections on them that it will be ok structurally & @ 30+ years old the probability is high that they are toast. Thanks for the tips. The parts are cheap enough and yes I do have a compressor.
than dont second guess yourself and 'just do it"
1973 454 MONTE- Donating Member
- Street Cred : 36
Re: 1977 Chevelle Malibu Classic Progress Photo's aka Mali
![]() by 77mali Fri Jul 27, 2012 7:31 pm
by 77mali Fri Jul 27, 2012 7:31 pm
77mali- Donating Member
- Street Cred : 62
Page 10 of 27 • 1 ... 6 ... 9, 10, 11 ... 18 ... 27 ![]()

 Similar topics
» Looking for an In-Dash Tic-tock Tach for my 1977 Chevelle Classic,
» '73 Chevelle coupe progress
G3GM :: Media :: G3 Project Pictures
|
|
|
» Rusty's progress Done stuff again LOL
» 1973 4 door laguna frame same as 1973 2 door chevelle
» Anyone good at photoshop?
» '77 Monte Carlo Landau - Parting out - 61k miles on car
» Dash assembly for 73-77 Malibu/Monte/El Camino,etc.
» Window louvers
» 1973 Chevelle SS 1 Family
» 1973 Chevelle SS, 350, 4spd. build
» Who works on 73-77 "soft" steering wheels?