1975 Chevelle build
+5
Hawk03
Damon23
Showtime73
pila
Roadcaptain S3
9 posters
G3GM :: Media :: G3 Project Pictures
Page 1 of 1
 1975 Chevelle build
Figured I would start a build thread to track progress, I wish I would have taken more "before" pictures though. I found this '75 in the Spring nearly identical to the one I had in high school a few years ago. Ok, 30 years ago but who's counting... Anyway it was a one family owner since new vehicle, the guy I bought it from was 80 and his mother bought it new. It sat a lot, outside unfortunately, and only has 112k on it. The paint and interior are pretty beat up from the sun but not a ton of rust, just the usual stuff along the rockers and back of the wheel wells. It ran ok, stock 350/350 2 barrel, I put in new plugs/wires/oil and tires just to drive it this summer and go on the Hot Rod Power Tour. Now that the weather is crap I'm starting with the interior, changing it from blue to black, bench to bucket seat conversion, floor shifter and will build my own console. I painted the lower dash and most of the plastic trim, put in a rear deck and dash cap, and will be putting in ACC carpet, all black. I have a 5.3 LS and 200-4R waiting for me after the interior is done, and also front and rear suspension, going to lower it and level it out.
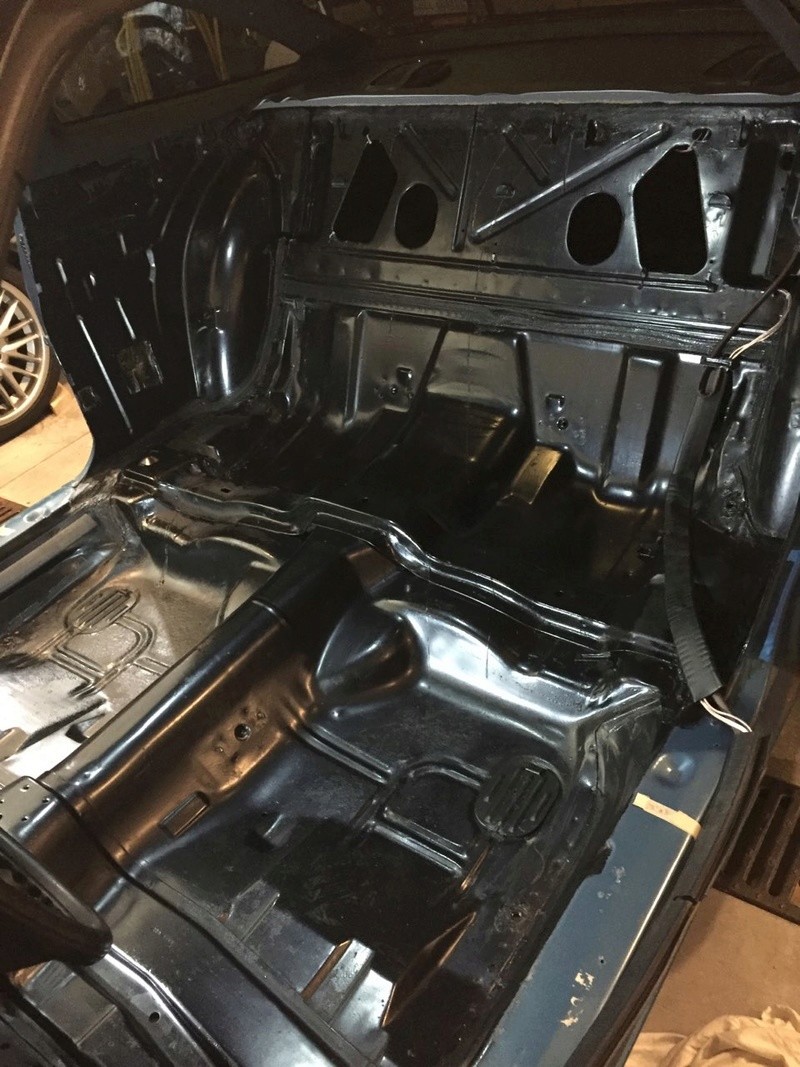
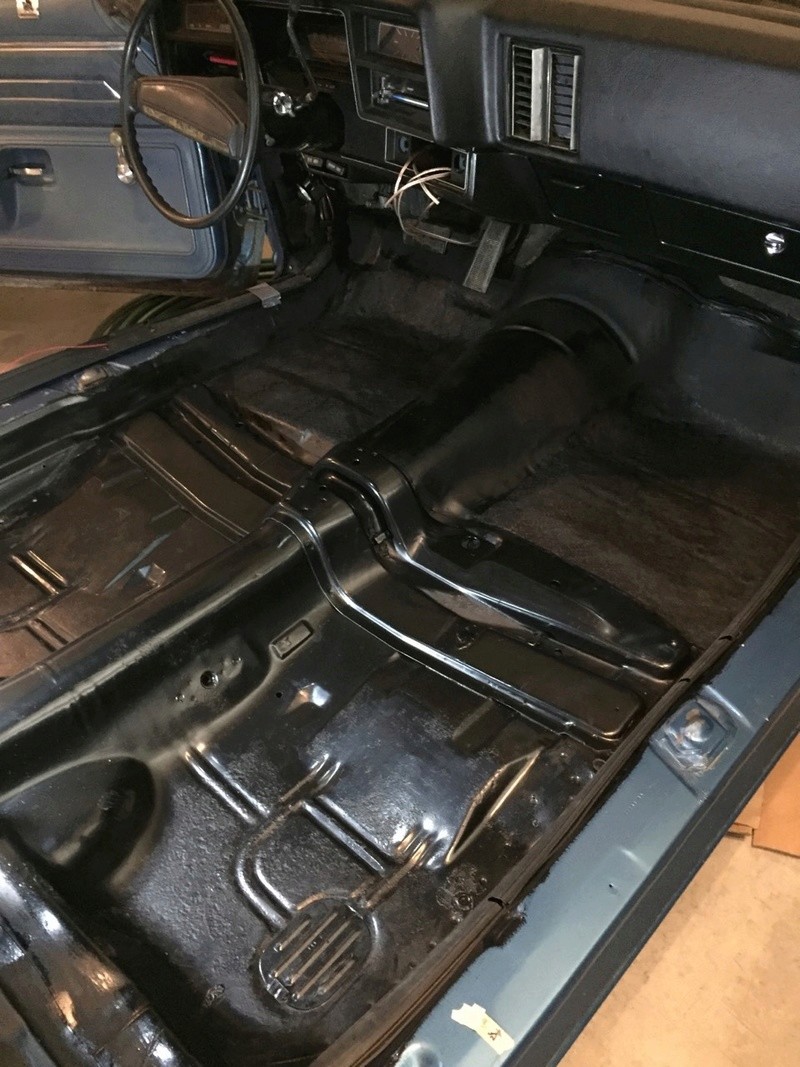
The trunk was in excellent condition, I scuffed it and painted POR-15 on the whole thing, everywhere I could reach. The floors had some surface rust, I coated everywhere with POR-15 and laid in the fiberglass mesh in the front floor boards for a little extra strength, the mesh is only $12 so not a lot of added cost there.
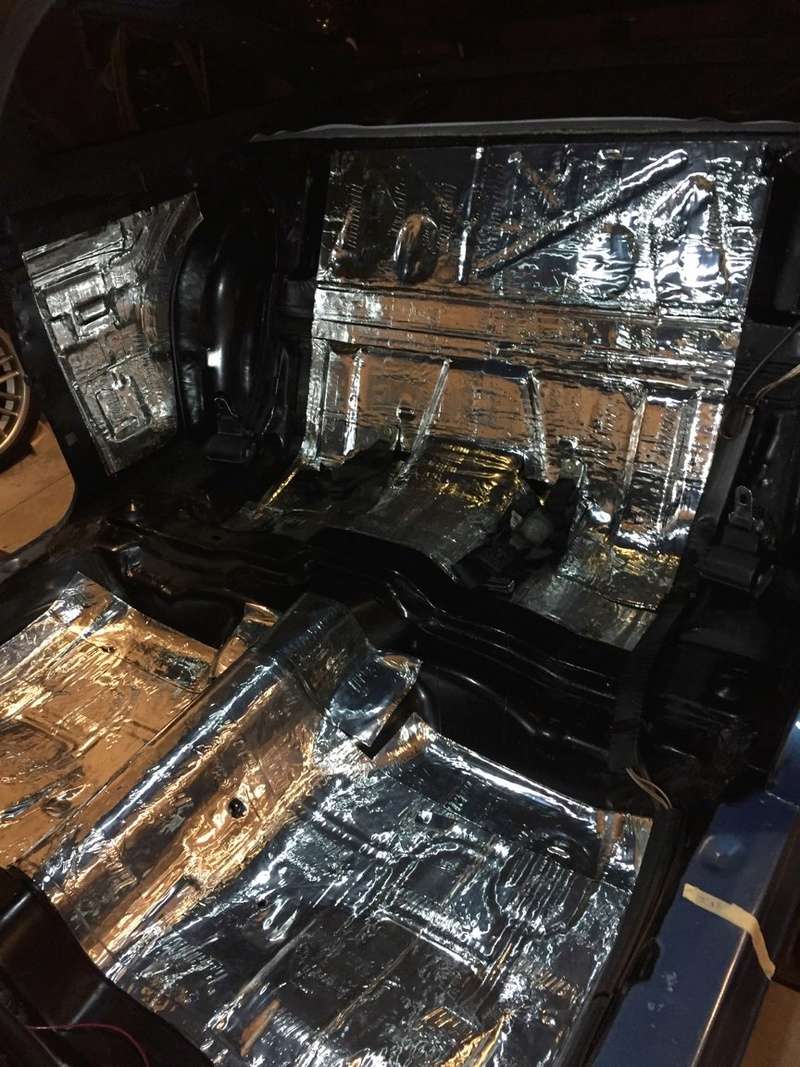
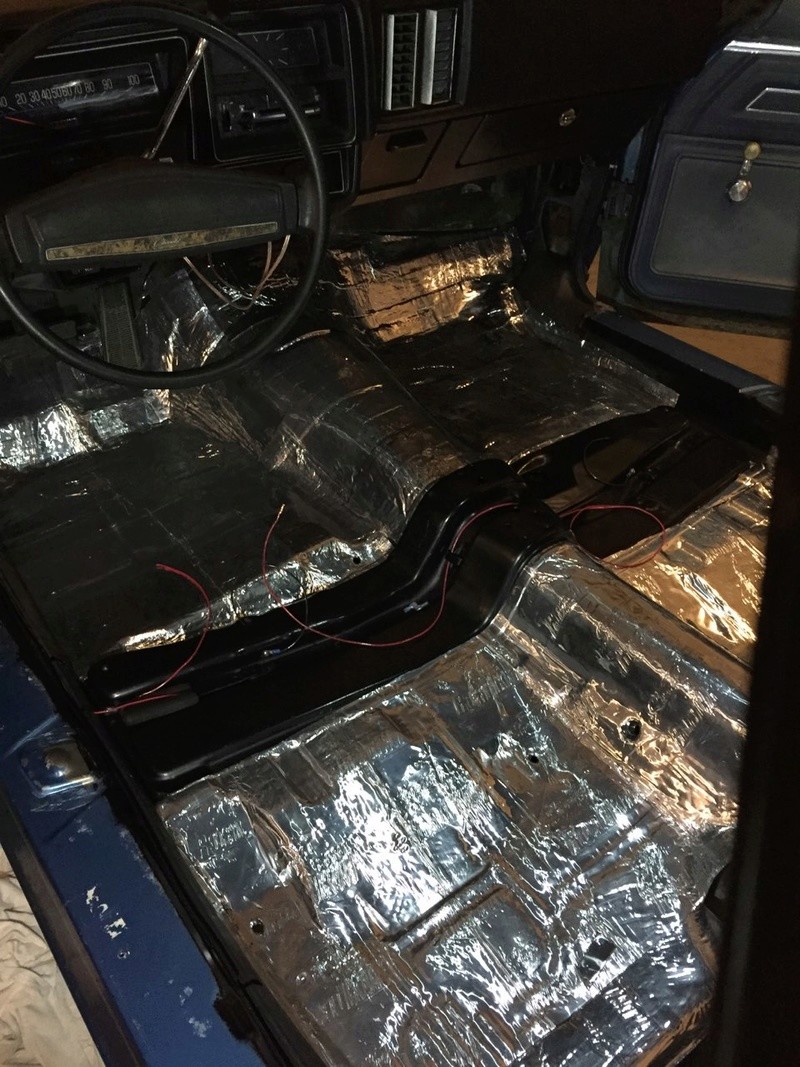
Then laid down some sound deadener.
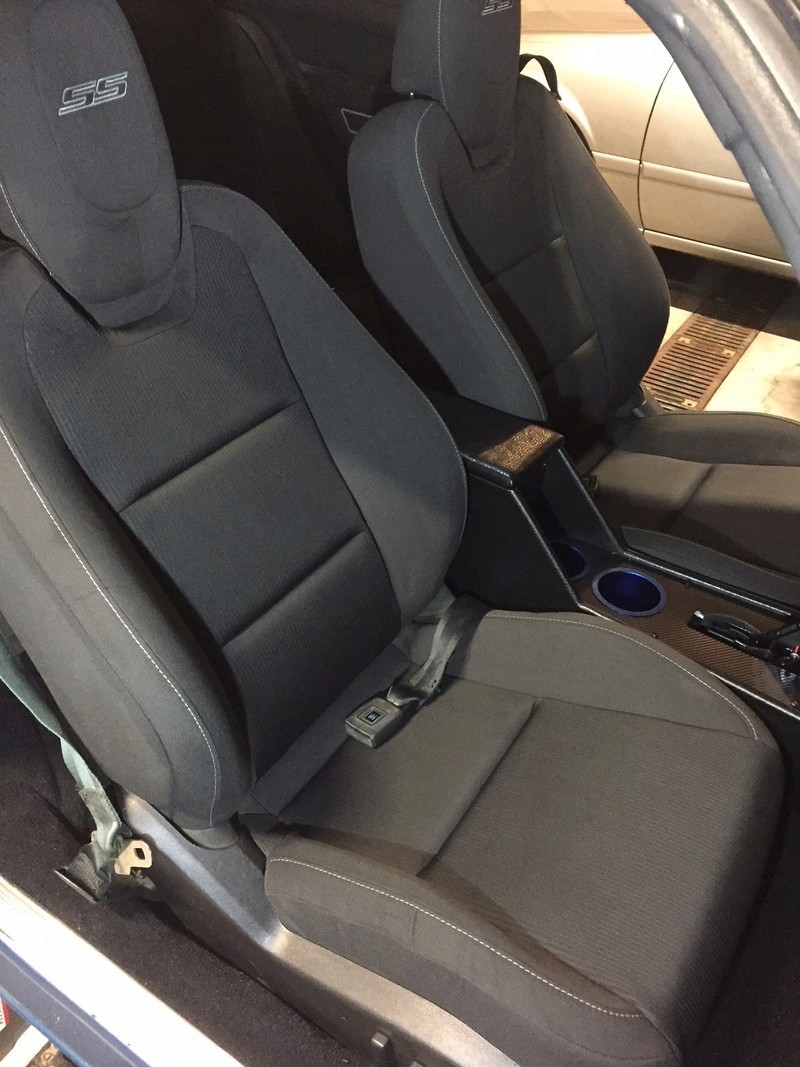
I picked up front and rear seats from a wrecked Camaro SS, the front seats are both electric with airbags (which I disconnected so they don't accidentally explode). I fabricated my own brackets, the seats fit in great in the front, the rear had to come up about 3-4 inches and the floor pans aren't level so it took a little work. The seat rails have these goofy hooks on the front and pegs on the back that you have to grind off. Not sure yet if I'm going to try to get the rear seat to fit, it's going to take some work. The top section is about 6" narrower and a couple inches taller than the factory seat. I'll just put that on my "when I get done with everything else" list, for now I just have truck seat covers on the original rear seat.

It's fun working on these cars but it sucks trying to find parts! I'll try to keep updating this thread as I go but it's slow, the only time I get to work on it is getting up super early in the morning before the wife and kids wake up.
The trunk was in excellent condition, I scuffed it and painted POR-15 on the whole thing, everywhere I could reach. The floors had some surface rust, I coated everywhere with POR-15 and laid in the fiberglass mesh in the front floor boards for a little extra strength, the mesh is only $12 so not a lot of added cost there.


Then laid down some sound deadener.


I picked up front and rear seats from a wrecked Camaro SS, the front seats are both electric with airbags (which I disconnected so they don't accidentally explode). I fabricated my own brackets, the seats fit in great in the front, the rear had to come up about 3-4 inches and the floor pans aren't level so it took a little work. The seat rails have these goofy hooks on the front and pegs on the back that you have to grind off. Not sure yet if I'm going to try to get the rear seat to fit, it's going to take some work. The top section is about 6" narrower and a couple inches taller than the factory seat. I'll just put that on my "when I get done with everything else" list, for now I just have truck seat covers on the original rear seat.

It's fun working on these cars but it sucks trying to find parts! I'll try to keep updating this thread as I go but it's slow, the only time I get to work on it is getting up super early in the morning before the wife and kids wake up.

Iguy- G3GM Member

- Street Cred : 3
 Re: 1975 Chevelle build
Nice work! I love out of the box thinking. 


thatfnthing- Donating Member

- Street Cred : 65
 Re: 1975 Chevelle build
Nice work, and it appears to be in great shape to begin with !! Enjoy !! 
pila- Donating Member

- Street Cred : 43
 Re: 1975 Chevelle build
What parts are you looking for? I found just about everything for mine.
Showtime73- Donating Member

- Street Cred : 1
 Re: 1975 Chevelle build
A fellow powertour'r with a 75 I see. I didn't participate this year but the rumors of the route are very favorable for me taking the Malibu for '18. You have my interest with the Camaro seat install as I will part with my bench seat for a bucket set up soon.
Damon23- G3GM Member

- Street Cred : 5
 Re: 1975 Chevelle build
Finally got my console finished. I've never really built one before so I probably spent way too much time on it. Originally I was just going to build a short box under the dash for the stereo head unit and speakers, and have the shifter out in the open mounted to the floor. But then I decided I really like having an armrest and cupholders so I brought it back beyond the front seats. Funny how these cars have 3 ashtrays and no cupholders, haha. The armrest part has a hinged console lid with some storage in it.
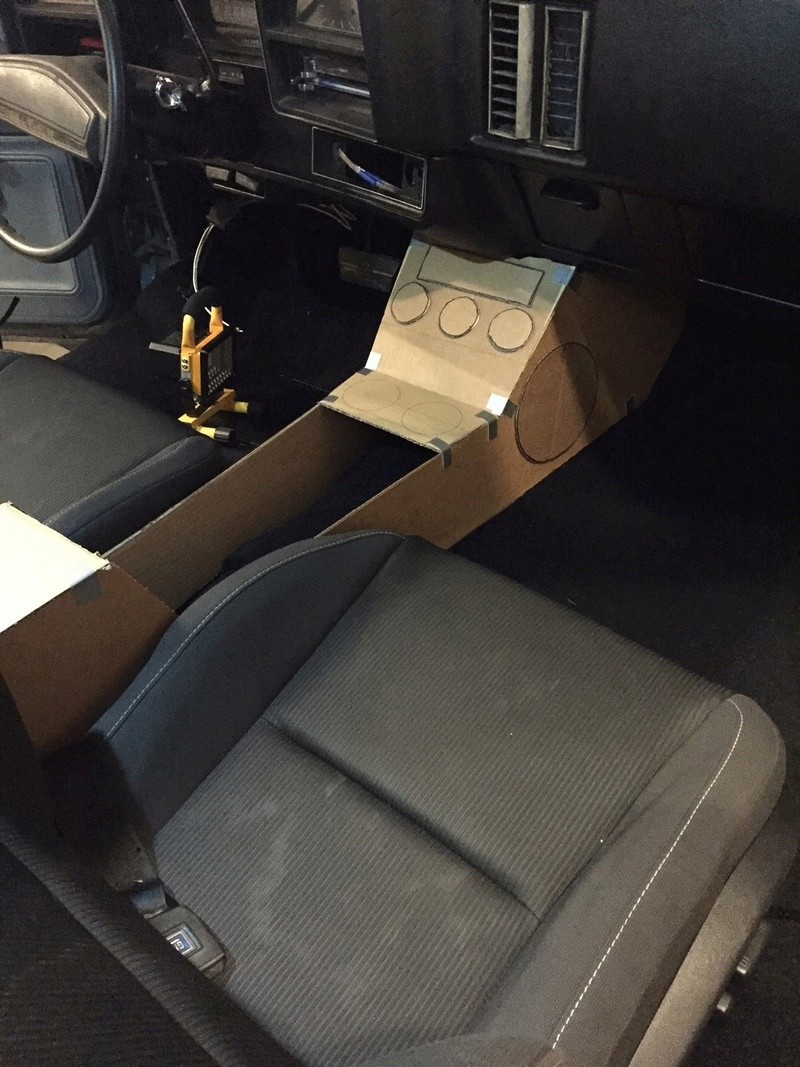
First I used cardboard and duct tape to figure out where it would sit and get the feeling of how it would look and feel.
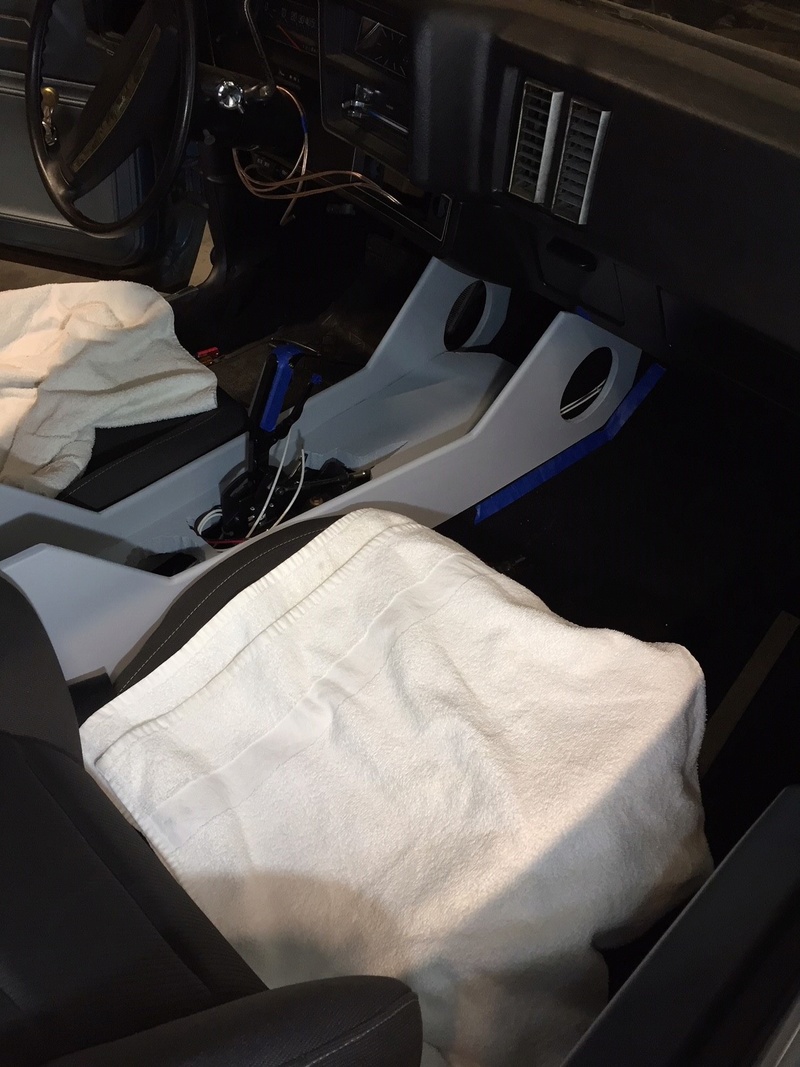
After getting the cardboard template I cut out the sides from 1/2" plywood and cut a center section out of 1.5" MDF, glued and screwed together, it's solid. The part between the seats by the armrest is nearly parallel and then tapers out towards the front of the car. Put on a couple coats of primer and sanded smooth.
Then I wrapped the sides in fake black leather. The top surfaces are ABS plastic with carbon fiber wrap. Screwed the whole thing to the floor with L brackets front and rear.
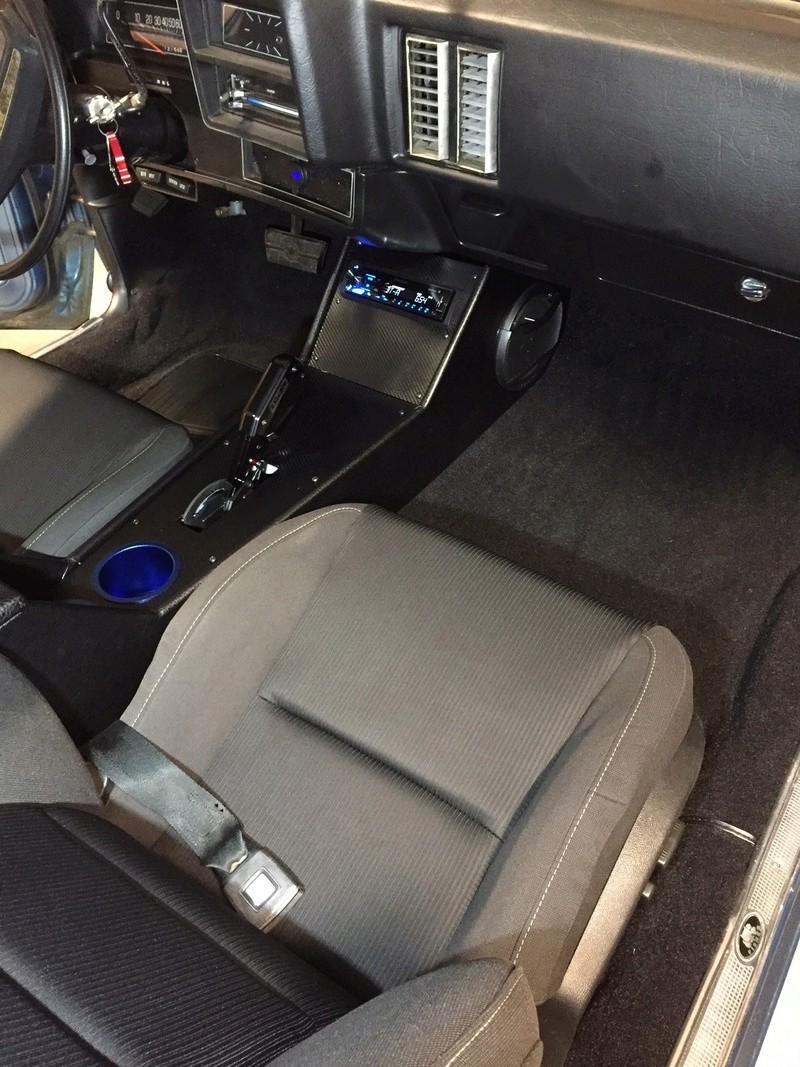

The shifter is wired for reverse lights and neutral safety switch, I still need to take out the column shifter. Eventually I'll put gauges under the stereo, that's why there is a gap underneath it.
First I used cardboard and duct tape to figure out where it would sit and get the feeling of how it would look and feel.

After getting the cardboard template I cut out the sides from 1/2" plywood and cut a center section out of 1.5" MDF, glued and screwed together, it's solid. The part between the seats by the armrest is nearly parallel and then tapers out towards the front of the car. Put on a couple coats of primer and sanded smooth.

Then I wrapped the sides in fake black leather. The top surfaces are ABS plastic with carbon fiber wrap. Screwed the whole thing to the floor with L brackets front and rear.


The shifter is wired for reverse lights and neutral safety switch, I still need to take out the column shifter. Eventually I'll put gauges under the stereo, that's why there is a gap underneath it.

Iguy- G3GM Member

- Street Cred : 3
 Re: 1975 Chevelle build
Very nice work!
I did mine similarly, only I used 1/4" hardboard and went a bit larger (even enclosing the ashtray door) since I needed to put the TPI computer and a bunch of other stuff in there. I also used 1/8" thick insulation tape under the vinyl so it has a padded feel. Still have to finish up the shifter opening, though.
I did mine similarly, only I used 1/4" hardboard and went a bit larger (even enclosing the ashtray door) since I needed to put the TPI computer and a bunch of other stuff in there. I also used 1/8" thick insulation tape under the vinyl so it has a padded feel. Still have to finish up the shifter opening, though.

thatfnthing- Donating Member

- Street Cred : 65
 Re: 1975 Chevelle build
Looks great!
Thanks for the visual, I want to do something similar with mine at some point.
Thanks for the visual, I want to do something similar with mine at some point.

Hawk03- G3GM Enthusiast

- Street Cred : 18
 Re: 1975 Chevelle build
Looking very good. You are about at the same stage I am. I just finished the sound deadner in the trunk and interior. I built a custom package tray for my angled 6x9's and now I am going to finish my trunk with two amp racks and my sub box. I will be building door pods that hold two 6.5 coaxial speakers each. After I cut my floor to get the T56 Magnum in I will start on my console. I like the work you did there.

REVINKEVIN / Mr. 600+HP- G3GM Senior Member

- Street Cred : 20
 Re: 1975 Chevelle build
Thanks guys, let me know if you have any questions when you start building a console. The biggest problem is the floor isn't flat from front to back so you have to account for that. For the most part I cut the bottom straight and grooved out a section in the middle where the double support humps are and then angled up slightly towards the front where the transmission widens. In my case, black on black hides a lot of little gaps at the carpet. Funny thing is while in the process I changed my mind 50 times on how I wanted it to look, and already thinking about building a different one, haha! I have too many other things to do first though.

Iguy- G3GM Member

- Street Cred : 3
 Re: 1975 Chevelle build
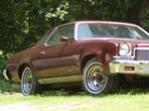
I haven't done much to the car since I finished the suspension work in April because I wanted to drive it this summer. I got the 18" wheels new in box from a friend who was getting a divorce and needed money. I took this shot walking out of the grocery store a few days ago, the paint looks way better in the pic than in real life, haha!

Currently I'm having a 200-4R transmission built by a local shop and I'm gathering parts for the LS swap, hope to start tearing into it this fall and have it done by Spring.

Currently I'm having a 200-4R transmission built by a local shop and I'm gathering parts for the LS swap, hope to start tearing into it this fall and have it done by Spring.

Iguy- G3GM Member

- Street Cred : 3
G3GM :: Media :: G3 Project Pictures
Page 1 of 1
Permissions in this forum:
You cannot reply to topics in this forum|
|
|


» Q-Jet Tuning
» PARTS NEED TO GO FOR OUR MOVE I DONT WANNA TAKE WITH
» Need driver side bucket seat 73 Laguna
» Laguna NOSE
» Virtual Ink from this weekend
» 1973 Chevelle SS Station Wagon
» Elcofest 2023
» Wanted drip rails for 1975 four-door Chevelle Malibu-Thanks!
» Parts please