


Vintage Air Retrofit
Page 1 of 4 • 1, 2, 3, 4 ![]()

Vintage Air Retrofit
![]() by thatfnthing Mon Apr 02, 2012 8:36 pm
by thatfnthing Mon Apr 02, 2012 8:36 pm
And any kibitzing along the way would be welcome.
Mark

thatfnthing- Donating Member

- Street Cred : 65
Re: Vintage Air Retrofit
![]() by 77mali Mon Apr 02, 2012 8:46 pm
by 77mali Mon Apr 02, 2012 8:46 pm

77mali- Donating Member
- Street Cred : 62
Re: Vintage Air Retrofit
![]() by 74Malibu383 Tue Apr 03, 2012 11:30 am
by 74Malibu383 Tue Apr 03, 2012 11:30 am

74Malibu383- Donating Member
- Street Cred : 26
Re: Vintage Air Retrofit
![]() by thatfnthing Tue Apr 03, 2012 3:29 pm
by thatfnthing Tue Apr 03, 2012 3:29 pm
I thought about the Gen II, but the rep at VA told me the IV was needed for a cabin as large as ours. Does it cool sufficiently? Also, having seen the placement of the outlets on the II, didn't you run into an issue hitting the underside of the cowl when trying to run the ducts?
Mark
thatfnthing- Donating Member
- Street Cred : 65
Re: Vintage Air Retrofit
![]() by 74Malibu383 Tue Apr 03, 2012 3:36 pm
by 74Malibu383 Tue Apr 03, 2012 3:36 pm
Vintage Air 037030-OVR
It's 28" x 16" and is massive. It cools just fine. As for the outlets, I just used the flexible ducting they sell. Obviously, I'm not using any of the factory ductwork, and the "crotch vents" aren't functional, but I was able to route everything pretty well.
74Malibu383- Donating Member
- Street Cred : 26
Re: Vintage Air Retrofit
![]() by thatfnthing Tue Apr 03, 2012 9:46 pm
by thatfnthing Tue Apr 03, 2012 9:46 pm
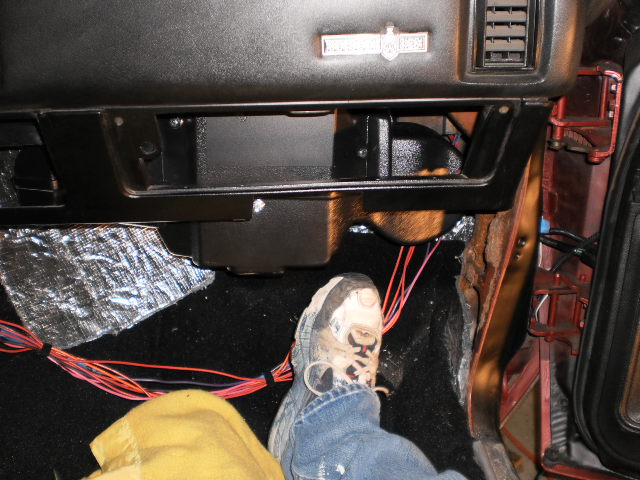
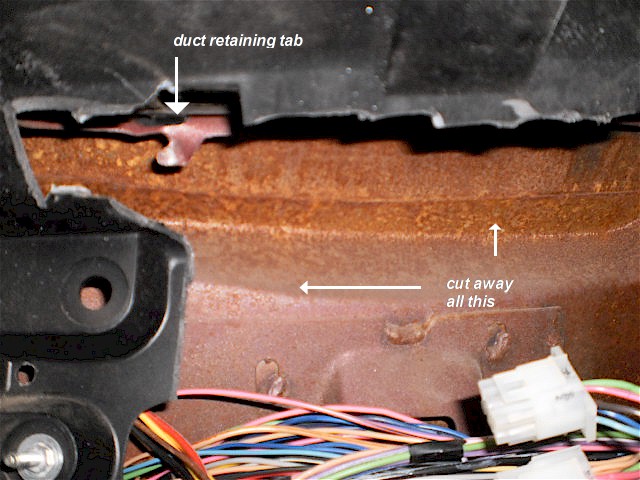
Unfortunately, to get that much foot clearance I had to do this to the underside of the cowl:

I would have gone for even more, but past this point the servos on the left side of the unit touch the underside of the cowl in the neighborhood of the right windshield wiper,and I wasn't about to endanger wiper operation.
Here's the firewall bracket mounted...
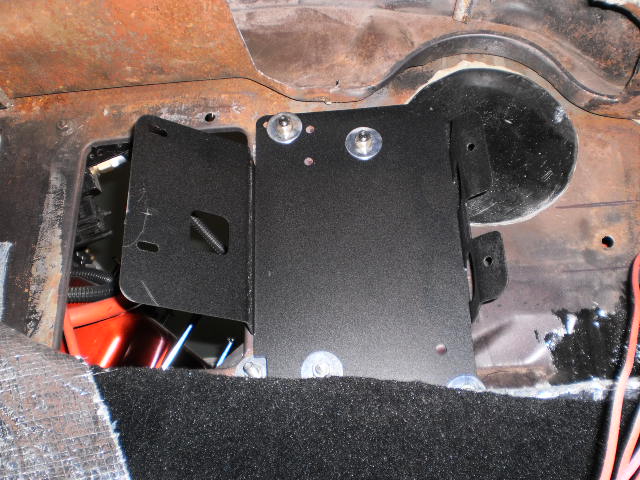
...and the flat face of the front bracket needed the top portion bent to a dog leg. Would have been prettier if I had a sheetmetal brake, but I had to make do with a vise and hammer:

More soon...
thatfnthing- Donating Member
- Street Cred : 65
Re: Vintage Air Retrofit
![]() by 74Malibu383 Wed Apr 04, 2012 12:12 pm
by 74Malibu383 Wed Apr 04, 2012 12:12 pm
I looked through all my photos, but don't seem to have one of how far the Evaporator hangs down. I know it's not much though.
74Malibu383- Donating Member
- Street Cred : 26
Re: Vintage Air Retrofit
![]() by 77mali Wed Apr 04, 2012 3:38 pm
by 77mali Wed Apr 04, 2012 3:38 pm
& maybe swapping from another Gen Chevy. Had no idea this company even existed.
77mali- Donating Member
- Street Cred : 62
Re: Vintage Air Retrofit
![]() by 74Malibu383 Wed Apr 04, 2012 4:47 pm
by 74Malibu383 Wed Apr 04, 2012 4:47 pm
Vintage Air has been around for quite some time. Their products are top notch, and they have a lot of cool stuff. Unfortunately for us, they don't have any "kits" for our year cars. They do however make it very easy to build a custom system from universal parts. It actually works out better because you can route your hoses exactly where you want them. Just takes a little more time.
74Malibu383- Donating Member
- Street Cred : 26
77mali- Donating Member
- Street Cred : 62
Re: Vintage Air Retrofit
![]() by thatfnthing Wed Apr 04, 2012 8:01 pm
by thatfnthing Wed Apr 04, 2012 8:01 pm
thatfnthing- Donating Member
- Street Cred : 65
Re: Vintage Air Retrofit
![]() by thatfnthing Wed Apr 04, 2012 8:26 pm
by thatfnthing Wed Apr 04, 2012 8:26 pm
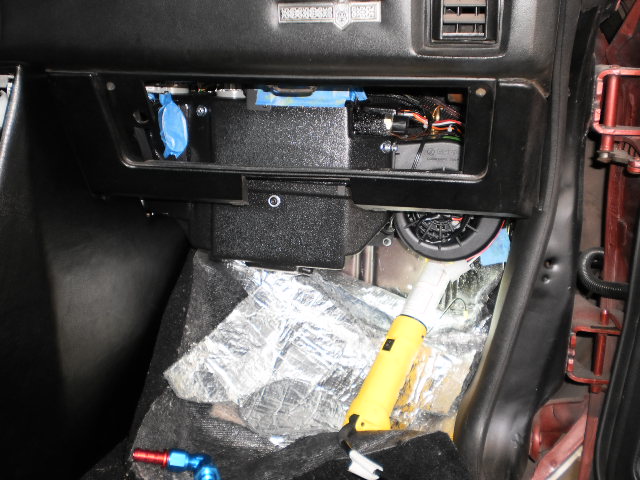
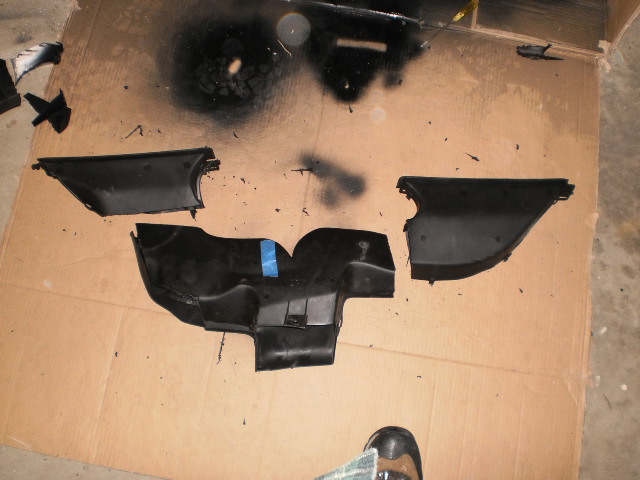
And here's where the problems start:

The blue tape covers the evaporator defrost ducts to keep any errant garbage out while I do this, but you can already see they don't come anywhere near where the whale-tail-shaped stock duct opening is. In fact the stock duct housing actually blocks the evaporator A/C vents, which come directly out the left end of the unit. What's more, the stock center A/C vent box is the wrong size, shape, and location to work here -- it opens directly where the VA defrost opening are. Lost of mods to do here...
Last edited by thatfnthing on Wed Apr 04, 2012 8:31 pm; edited 1 time in total
thatfnthing- Donating Member
- Street Cred : 65
Re: Vintage Air Retrofit
![]() by ant7377 Wed Apr 04, 2012 8:31 pm
by ant7377 Wed Apr 04, 2012 8:31 pm
ant7377- G3GM Addict

- Street Cred : 36
Re: Vintage Air Retrofit
![]() by thatfnthing Wed Apr 04, 2012 8:42 pm
by thatfnthing Wed Apr 04, 2012 8:42 pm
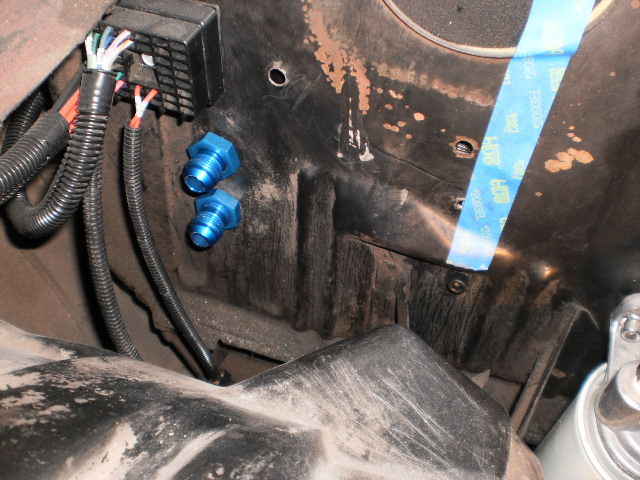
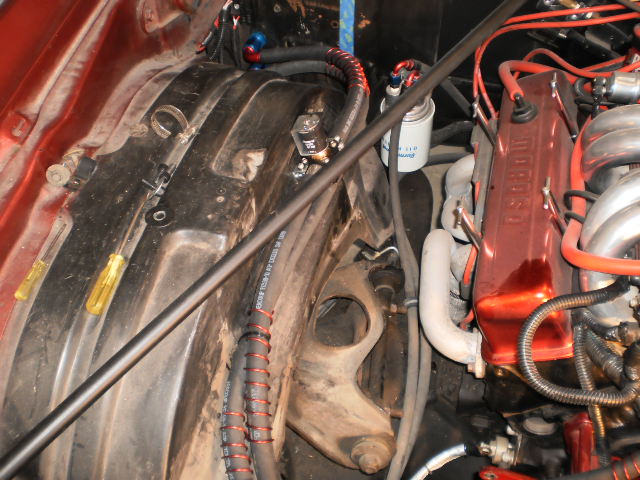
Here's the back (firewall side) of the evap with the bracket attached, which I discovered you have to attach before hanging the unit because the two aluminum coolant tubes run through holes in the side of the bracket and cannot be attached afterward. The two coolant tubes are too long, however, so I had to slice them where the black marks indicate and re-bead them.

Note the copper fitting just above the top coolant tube -- this is the high-pressure -6 refrigerant input line which poses its own upcoming hassle because the fitting faces downward (you can just see the black end cap peeking out from behind the top coolant tube) and can't be adjusted.
And here we are with the interior heater lines run and the unit mocked up in place again. I used Aeroquip -10 hose & socketless fittings.

And here we are from the engine bay side:
Okay, now back to the hard stuff...
thatfnthing- Donating Member
- Street Cred : 65
Re: Vintage Air Retrofit
![]() by thatfnthing Wed Apr 04, 2012 8:48 pm
by thatfnthing Wed Apr 04, 2012 8:48 pm
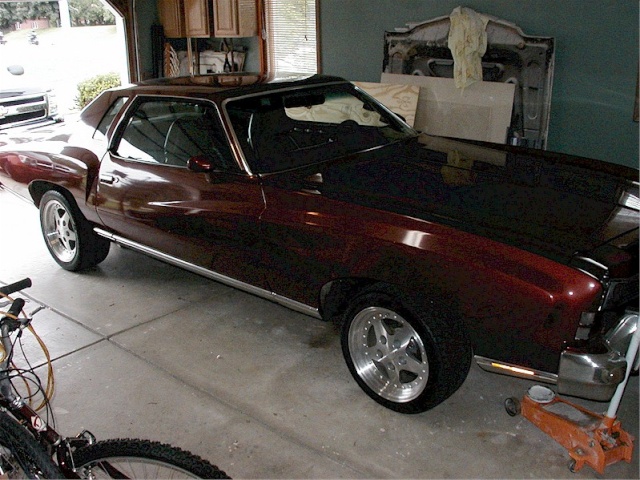
ant7377 wrote:Lets see some pics of the whole car ! Looks nice ! Im just going to put new compressor in mine and call it a day.
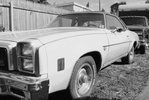
Thanks! I actually don't have many shots of the whole car, since she has a 10-foot paint job, and I'm trying to decide what to do about that. Here's one where the lighting (or lack thereof) was just right:
thatfnthing- Donating Member
- Street Cred : 65
Re: Vintage Air Retrofit
![]() by 77mali Wed Apr 04, 2012 9:08 pm
by 77mali Wed Apr 04, 2012 9:08 pm
77mali- Donating Member
- Street Cred : 62
Re: Vintage Air Retrofit
![]() by thatfnthing Wed Apr 04, 2012 9:16 pm
by thatfnthing Wed Apr 04, 2012 9:16 pm
Mark
thatfnthing- Donating Member
- Street Cred : 65
ant7377- G3GM Addict
- Street Cred : 36
Re: Vintage Air Retrofit
![]() by Jedediah Thu Apr 05, 2012 3:25 am
by Jedediah Thu Apr 05, 2012 3:25 am

Jedediah- G3GM Member

- Street Cred : 4
Re: Vintage Air Retrofit
![]() by thatfnthing Thu Apr 05, 2012 10:59 am
by thatfnthing Thu Apr 05, 2012 10:59 am
I can only really speak to what I'm encountering here, and the fit problem primarily arises from the fact that the underside of the cowl behind the dash slopes pretty low on the passenger side where the factory equipment drew fresh air from -- hence the amount I had to cut away on the previous page. This bought me 3 inches in height and allows me to have passengers with normal-sized feet.Jedediah wrote:I was wondering what are the differences from our cars to the earlier years and the later years that makes these such a tight fit?
Mark
thatfnthing- Donating Member
- Street Cred : 65
Re: Vintage Air Retrofit
![]() by thatfnthing Sun Apr 08, 2012 5:58 pm
by thatfnthing Sun Apr 08, 2012 5:58 pm
First, the defrost ducts must come out to be modified. As I mentioned previously, they are a one-piece unit shaped like a whale tail, and they are retained very simply by 4 bent metal tabs at the top of the dash, one on each end of each duct. I was able to access 3 easily, but the first tab on the left duct was completely hidden behind the plastic panel directly behind the instrument cluster. What's more, the duct was clearly installed before the rest of the dash, as it could not be removed at all until I cut away a fairly large large section of the panel:
Now that it's out, I only need the ducts themselves, so the middle section gets cut out and tossed:
These next two shots show the stock ducts (taken apart) with their built-in diffusers, versus the frankly cheapo VA ducts:
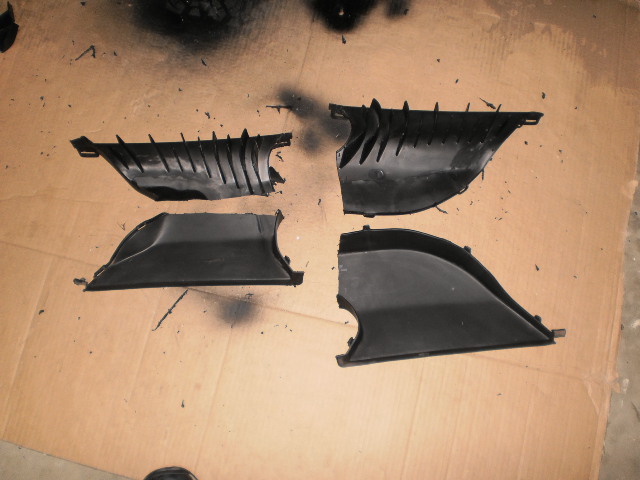

However, a little work with the Dremel, a heat gun, and some epoxy, and the VA duct inlets attached nicely to the stock ducts:
Both of these can now get some duct tape to stop any leaks and go right back where they came from and I can attach the 2" hose directly to each.
thatfnthing- Donating Member
- Street Cred : 65
Re: Vintage Air Retrofit
![]() by thatfnthing Sun Apr 08, 2012 6:21 pm
by thatfnthing Sun Apr 08, 2012 6:21 pm

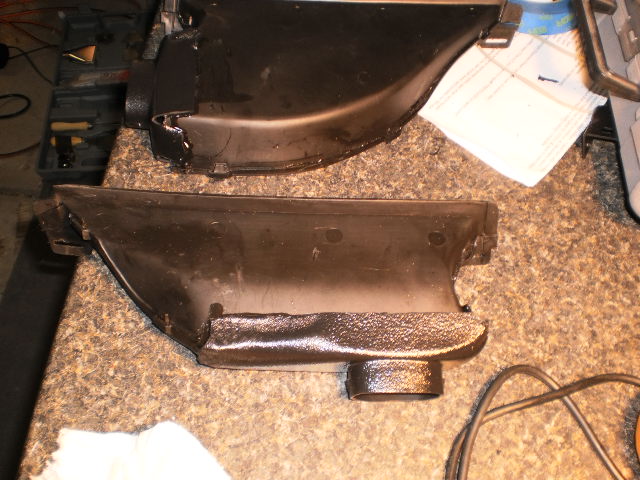
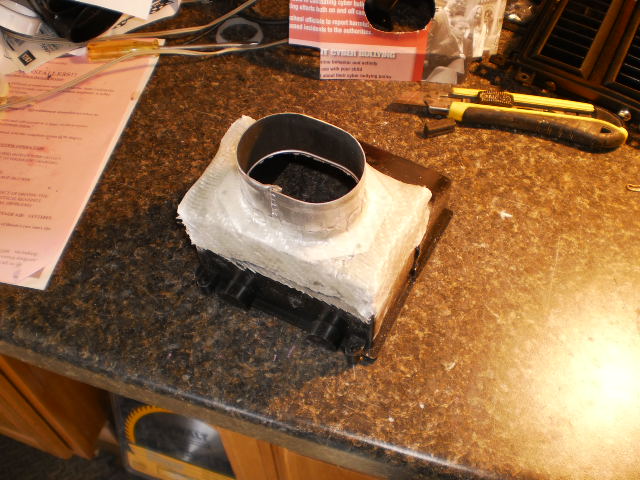
For the center duct, I had to cut away a lot of the housing, and I found these 2.5" metal openings in the gutters section at Home Depot:

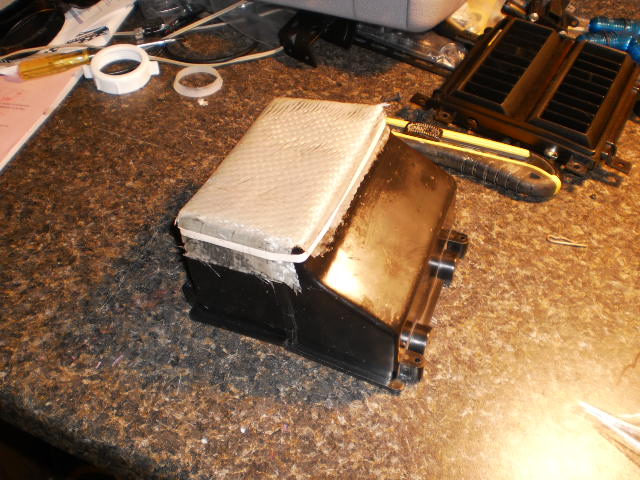
Time to break out the Percy's Hyperfiber and start fabricating. If you've never used it, it's fiberglass mat impregnated with the same stuff that dentists use for fillings these days that cures when exposed to UV light. So I made a cardboard pattern for the end of the vent box, transferred it to the HF, secured the HF to the box with a rubber band and let it sit in the sun for 30 minutes:
More soon...
thatfnthing- Donating Member
- Street Cred : 65
Re: Vintage Air Retrofit
![]() by thatfnthing Wed May 09, 2012 12:06 am
by thatfnthing Wed May 09, 2012 12:06 am
Cut the appropriate hole with the Dremel and sandwich the duct opening between the first and second layer of hyperfiber. Once cured, sand smooth, paint inside, and cover outside with duct or gaffers tape to prevent any leaks. I was then able to reinstall vents back in the dash.
Next up, heater feed and return lines. I came across this brass & copper drain at Lowes, with a 1.5" main and 5/8" inlet tube -- perfect for a junction for the return line from the evaporator to the water pump. So I cut it down...
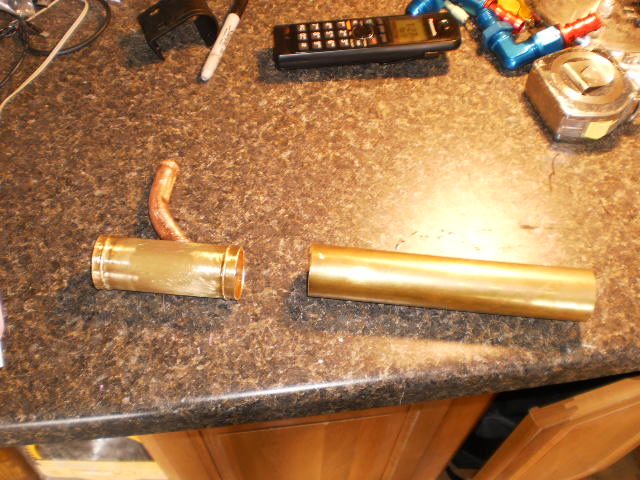
...rebeaded it and painted it black...
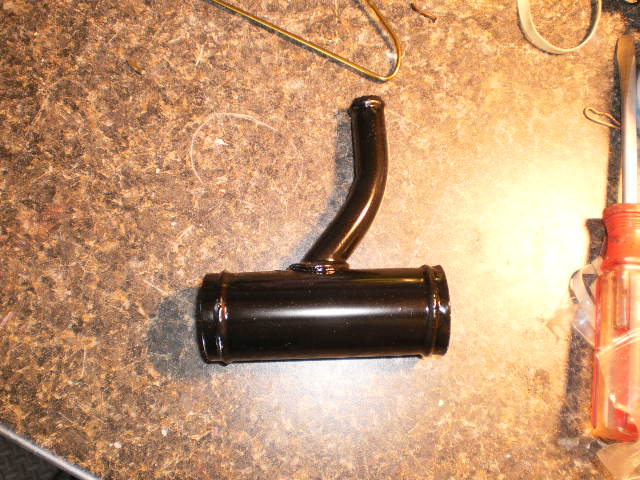
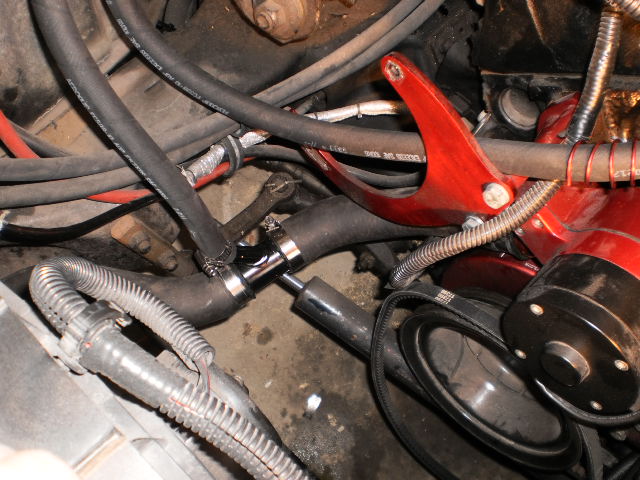
... and spliced it into the lower radiator hose.
The water control valve needs to be placed somewhere in the feed line from the intake to the evaporator, and the best place wound up being the inner fender. The hose connection is plastic, so I wanted to find the spot that would have the hose exerting the least amount of force on it -- i.e. not on a curve. Last thing I'll need is to have the thing crack off while I'm driving.
The connection to the manifold turned out to be a problem. I had intended to use -10 AN fittings here like the rest of it (for looks as well as a hard 90 degree turn), but it turned out that the person who installed the steel hose nipple into the aluminum TPI manifold hadn't been overly-concerned with anti-seize. The fitting and manifold have welded themselves together, and last thing I needed to do was break anything just for the sake of appearance, so I reused it as-is. This completes the heater lines.

Next up, mount the compressor so I can determine hose routing for refrigerant lines and condenser placement. Note the size (and weight) difference between the Sanden compressor and the old factory monster:
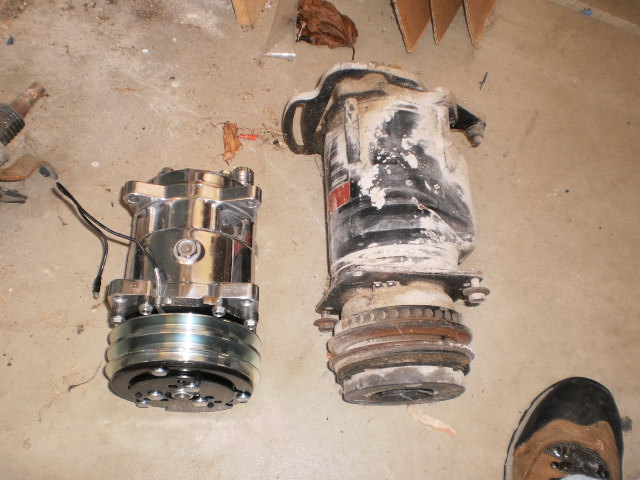
The factory had the original compressor on the driver side, but I really want it on the passenger side to minimize hose routing hassle and clutter. However, in addition to the electric water pump problem, the alternator will not work in any position on the passenger side with the compressor, so the alt will have to get relocated to the driver side. So the next step will be to find a set of brackets that will allow me to accomplish this...
thatfnthing- Donating Member
- Street Cred : 65
Re: Vintage Air Retrofit
![]() by thatfnthing Sun May 20, 2012 1:04 pm
by thatfnthing Sun May 20, 2012 1:04 pm
Anyway, after a lot of searching, it looks like Alan Grove Brackets will come to my rescue. While there are certainly prettier brackets out there (March, Billet Specialties, etc), and AGB doesn't specifically have a bracket combo for what I'm trying to do, their stuff is by far the most amenable to modifications, and I expect to have plenty.
I started by mocking up the passenger-side A/C bracket:
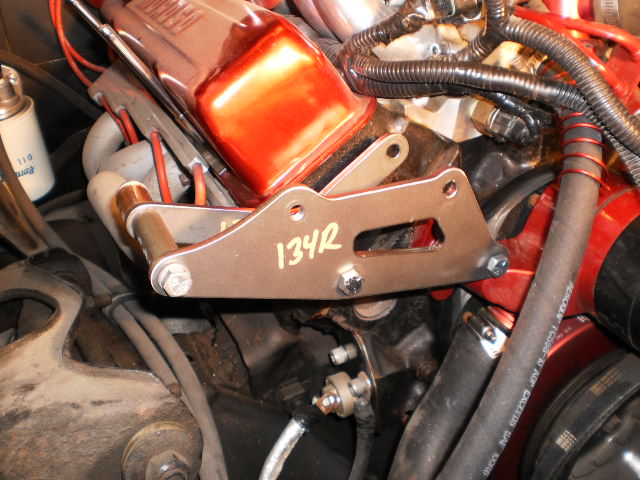
First mod -- the bracket contacts the Proform water pump, so the marked amount of material on the water pump ear of the bracket must be removed.
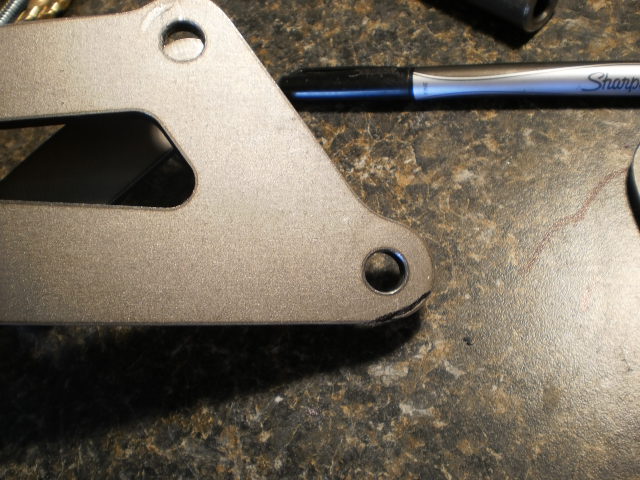
I'm currently using pre-87 heads that lack the inboard mounting hole, so I'm going to have to drill and tap. AGB offers brackets that work without this hole, but for stability they attach to both water pump bolts (instead of just one here) and the header. Knowing I was looking at significant mods already, I didn't need the hassle of modifying the header mount also, and I don't really want header heat being transmitted directly to the compressor via the bracket.
In order to get the hole in the right place and at the right angle, I started the hole with a 3/8" bit lined up through the two bracket holes...
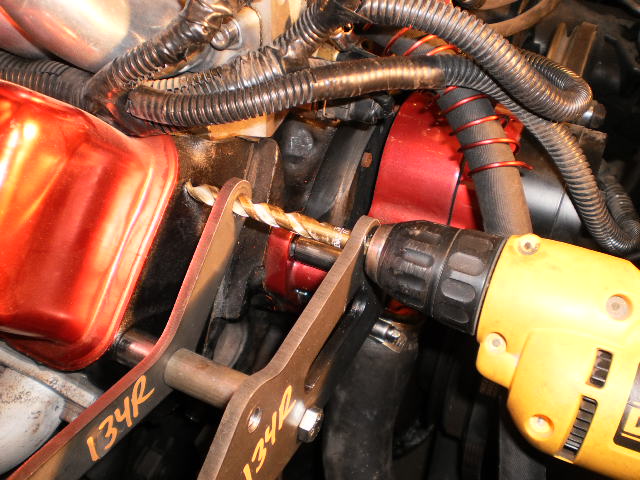
... and then drill the hole proper with the 5/16" bit to leave enough material for tapping. The blue tape tells me where to stop (3/4" deep). Note the two brackets had to be repositioned closer together because the bit wasn't quite long enough, but I still wanted both to keep me aligned properly during drilling.

Finally, tap the hole for 3/8-16 threads. I only needed one bracket to keep me lined up here.

Once done, I put the compressor on and mocked up a belt with some cord-type weatherstripping from Lowe's. The problem with the electric pump is, of course, that the belt will contact it. Luckily, some of my hare-brained ideas actually work -- like tensioner pulley I added in the middle of the bracket. It will need about 1/8" of a shim behind it, and some trimming to the steel bracket, but it's in the perfect spot and gets me about 5/8" clearance below the water pump motor. The heater hose will also be tucked inside the bracket during final installation.
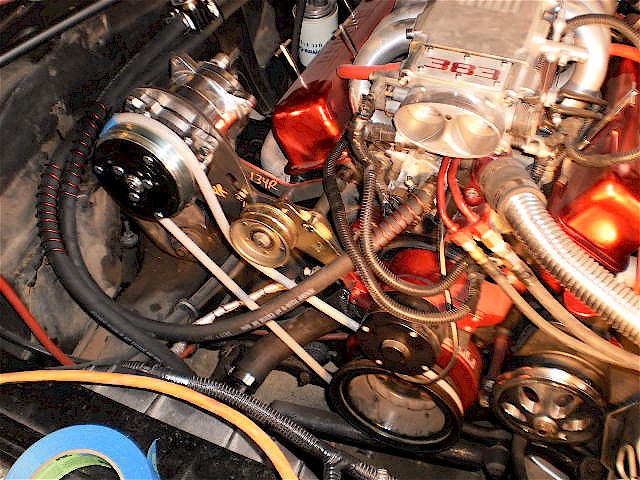
Let's check the alignment -- I want it to go to the middle groove on the crank pulley (P/S for the inner groove, and alt for the larger outer groove). Looks good here if I use the inner groove on the compressor and shim the tensioner...

... but on the P/S side I hit a snag: the pulley wants to line up with the same crank pulley groove as the A/C:
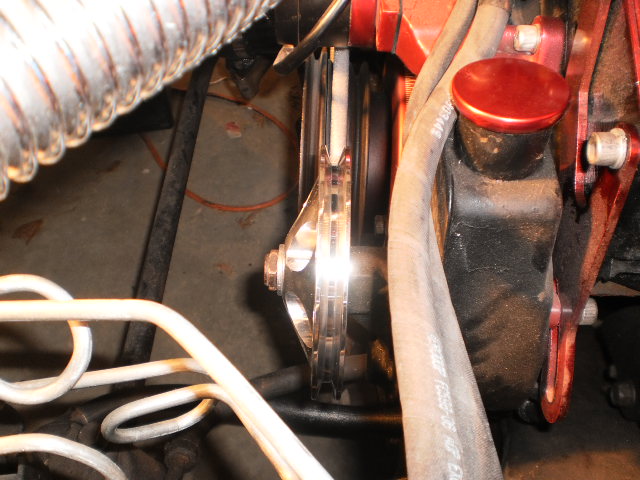
So the solution here will be a 3/4" spacer for the crank pulley, which should line up the P/S, and then use the forward A/C compressor groove and shim the tensioner a little more.
Meantime, just to get an idea what issues the alternator was going to pose, I mocked up that side also. That bracket is mostly a mirror-image of the A/C bracket, but frankly, I'm not sure how AGB had it planned. They say these are for a long water pump configuration, but the alt pulley alignment was the worst of the three, not coming up anywhere even close to the outer crank pulley groove while that pulley is still in its stock location. It actually was slightly rearward of the innermost groove on the crank pulley. Oh well, I expected I was going to have to move stuff around anyway. Here's a shot of an experiment to move it 2 1/4" forward to line up with where the correct crank groove will be after the P/S fix.
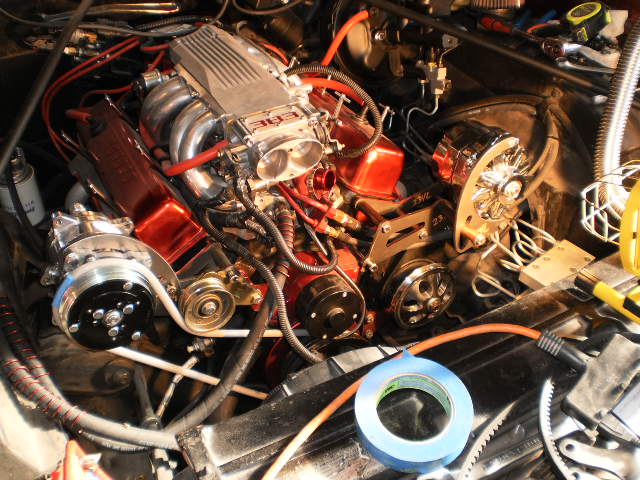
While this particular arrangement for the alt won't work, it did give me an idea that will. Got more parts to order -- stay tuned.
thatfnthing- Donating Member
- Street Cred : 65
77mali- Donating Member
- Street Cred : 62
Page 1 of 4 • 1, 2, 3, 4 ![]()


|
|
|
» Rusty's progress Carpet Chevk now onto floor replacement
» PARTS NEED TO GO FOR OUR MOVE I DONT WANNA TAKE WITH
» Need driver side bucket seat 73 Laguna
» Laguna NOSE
» Virtual Ink from this weekend
» 1973 Chevelle SS Station Wagon
» Elcofest 2023
» Wanted drip rails for 1975 four-door Chevelle Malibu-Thanks!
» Parts please