


Hawk03 Redo
G3GM :: Media :: G3 Project Pictures
Page 3 of 7 •  1, 2, 3, 4, 5, 6, 7
 ![]()
Re: Hawk03 Redo
![]() by Limey SE Mon Dec 01, 2014 1:12 pm
by Limey SE Mon Dec 01, 2014 1:12 pm
thatfnthing wrote:Ditto, it's coming along.
I wouldn't worry about the front ride height yet -- you still have a lot more weight to put back on it like the hood and front bumper, so it will drop a little more yet. Get it all back together first, then see if it's too high.
yea would have to agree on this you have a lot of weight to put back on yet and also get the front end off the dollies, it throws the look off a little bit.

Limey SE- Management

- Street Cred : 98
Re: Hawk03 Redo
![]() by dynchel Mon Dec 01, 2014 1:16 pm
by dynchel Mon Dec 01, 2014 1:16 pm

dynchel- Donating Member

- Street Cred : 40
Re: Hawk03 Redo
![]() by thatfnthing Mon Dec 01, 2014 1:18 pm
by thatfnthing Mon Dec 01, 2014 1:18 pm
dynchel wrote:Limey, I have to say I lol every time I see your current avatar.
x2, Limey, it's your best one yet!

thatfnthing- Donating Member
- Street Cred : 65
Re: Hawk03 Redo
![]() by Limey SE Mon Dec 01, 2014 3:07 pm
by Limey SE Mon Dec 01, 2014 3:07 pm
thatfnthing wrote:dynchel wrote:Limey, I have to say I lol every time I see your current avatar.
x2, Limey, it's your best one yet!
Thanks Guys LOL feeling like that a lot lately with the cold weather my bones just cant take it anymore, I think that in the next two years we will be in the south.
Limey SE- Management
- Street Cred : 98
Re: Hawk03 Redo
![]() by Hawk03 Mon Dec 01, 2014 3:33 pm
by Hawk03 Mon Dec 01, 2014 3:33 pm

Hawk03- G3GM Enthusiast

- Street Cred : 18
77mali- Donating Member
- Street Cred : 62
Re: Hawk03 Redo
![]() by Hawk03 Mon Dec 29, 2014 2:33 pm
by Hawk03 Mon Dec 29, 2014 2:33 pm
I'll need to bolt a seat down and once the brakes and exhaust are hooked up I will be able to take it for a test drive but that won't be until spring. Its getting closer and that is always a good sign.
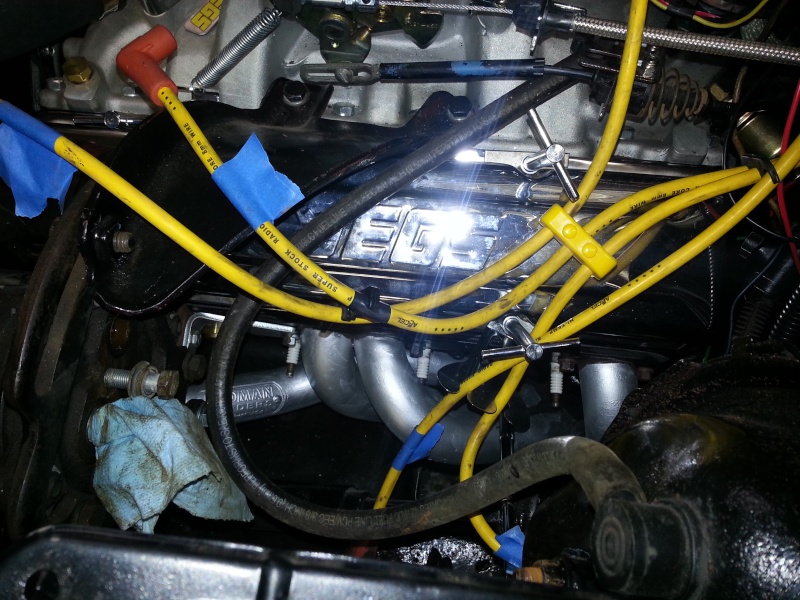

Once things are buttoned up I will make sure the engine bay is a little neater.
Hawk03- G3GM Enthusiast
- Street Cred : 18
Re: Hawk03 Redo
![]() by 77mali Mon Dec 29, 2014 5:00 pm
by 77mali Mon Dec 29, 2014 5:00 pm
Get some 3/8" OD (which has 1/4” ID) clear plastic tubing from your local hardware store or home supply. There are also black plastic T fittings (that are specific for use with this clear tubing) that will connect the various lengths that you will need to cut & then re-connect. Also there are small black plastic clips that will hold the tubing onto the bleeder screws as well as the fittings.
I ran two lengths between the rear wheels & connected those to a T fitting and then ran another longer length down towards the front wheels. I also ran two more lengths from each of the front wheels and made the final connection to a 4 way plastic connector. You have to use the clips mentioned everywhere that the tubing connects to a fitting and the bleeders- make sure they’re nice & tight. It will help if you have a slight downward flow from the rear to the front of the car- nothing too drastic but just enough to have gravity lend you a hand.
The extra port on the four way connector will be your connection for your hand operated brake bleeder tool- that you can get at any auto parts supply, harbor freight, etc.
All you need to do after that is make sure the master cylinder never falls below 2/3 full. Have a friend help & keep checking & adding to the level of brake fluid as you pump. Also-Make sure you get the correct fluid for the car. You will see the brake fluid flow through the tubing and make its way through the pump and into the pumps reservoir and you will also see any bubbles (air) going through the lines. (You may have to empty the pump reservoir a few times- depending on how much air you’ve got in the system). Have your buddy pop inside the car after you use about half of a new bottle of brake fluid and pump the brakes as well to feel for pedal resistance. Keep going until the pedal feels firm and the master cylinder is full. Tighten your bleeder screws, remove the tubes & done.
I’ll try and get a picture of what it all looks like for you. It takes a while to set up but in my opinion- well worth the effort. I wasted half a day doing it how the manual says with no luck at all.
I should add also that all this is assuming your master cylinder has been bench bled (if new or went dry), your proportioning valve is working properly and nothing is wrong with any brake lines/connections or bleeder valves.
77mali- Donating Member
- Street Cred : 62
Re: Hawk03 Redo
![]() by thatfnthing Mon Dec 29, 2014 6:29 pm
by thatfnthing Mon Dec 29, 2014 6:29 pm
thatfnthing- Donating Member
- Street Cred : 65
Re: Hawk03 Redo
![]() by 77mali Mon Dec 29, 2014 6:35 pm
by 77mali Mon Dec 29, 2014 6:35 pm
http://shop.advanceautoparts.com/p/mityvac-automotive-tune-up-and-brake-bleeding-kit-mitmv8000/22973736-P?searchTerm=brake+bleeder+tool
77mali- Donating Member
- Street Cred : 62
Re: Hawk03 Redo
![]() by Hawk03 Mon Jan 12, 2015 4:56 pm
by Hawk03 Mon Jan 12, 2015 4:56 pm
Hawk03- G3GM Enthusiast
- Street Cred : 18
thatfnthing- Donating Member
- Street Cred : 65
Re: Hawk03 Redo
![]() by 77mali Thu Jan 15, 2015 11:46 pm
by 77mali Thu Jan 15, 2015 11:46 pm
77mali- Donating Member
- Street Cred : 62
Re: Hawk03 Redo
![]() by Hawk03 Fri Jan 16, 2015 9:05 am
by Hawk03 Fri Jan 16, 2015 9:05 am
Hawk03- G3GM Enthusiast
- Street Cred : 18
Re: Hawk03 Redo
![]() by 77mali Fri Jan 16, 2015 9:36 am
by 77mali Fri Jan 16, 2015 9:36 am
77mali- Donating Member
- Street Cred : 62
Re: Hawk03 Redo
![]() by Hawk03 Sun Feb 08, 2015 8:01 pm
by Hawk03 Sun Feb 08, 2015 8:01 pm
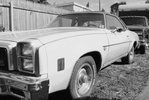
'74 front end on
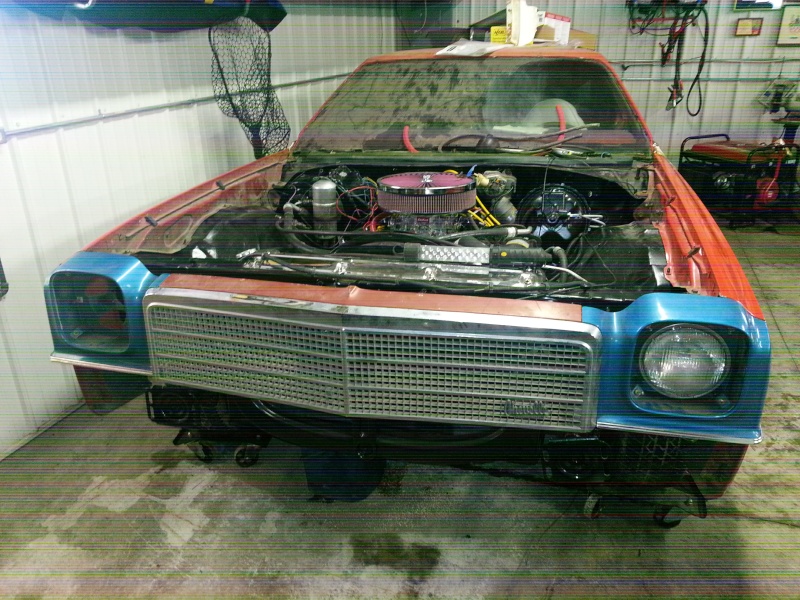
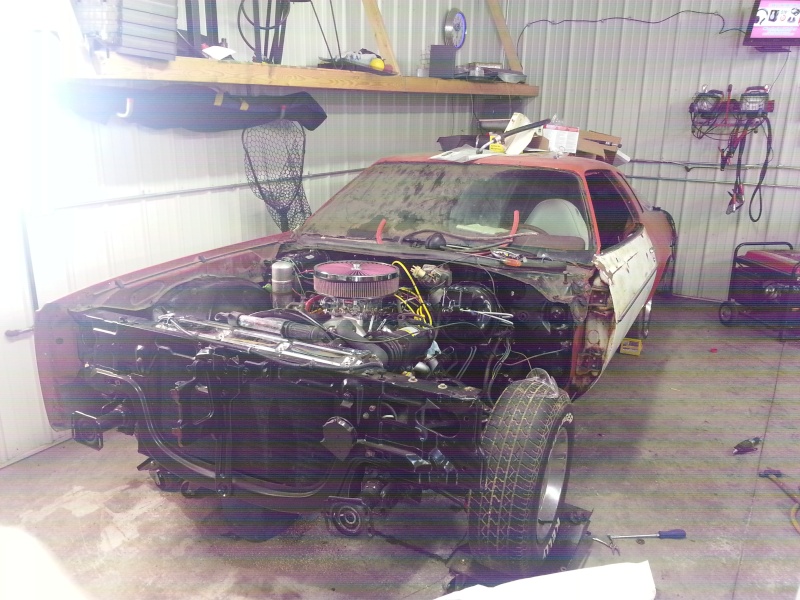
Gotta love the multiple colors.

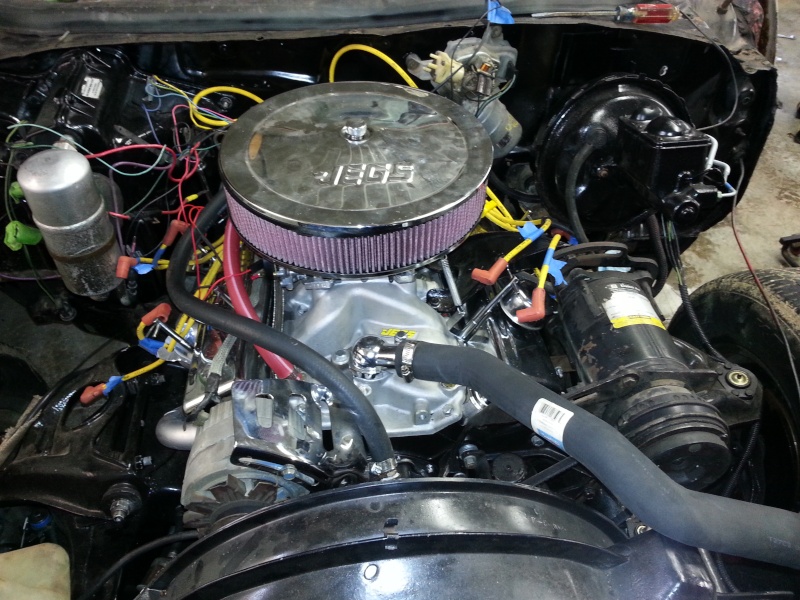
Dash with bezel and new steering wheel.

Hawk03- G3GM Enthusiast
- Street Cred : 18
Re: Hawk03 Redo
![]() by dynchel Mon Feb 09, 2015 7:04 pm
by dynchel Mon Feb 09, 2015 7:04 pm
dynchel- Donating Member
- Street Cred : 40
Re: Hawk03 Redo
![]() by Roadcaptain S3 Mon Feb 09, 2015 7:50 pm
by Roadcaptain S3 Mon Feb 09, 2015 7:50 pm

Roadcaptain S3- Donating Member
- Street Cred : 26
Re: Hawk03 Redo
![]() by Hawk03 Tue Feb 10, 2015 9:31 am
by Hawk03 Tue Feb 10, 2015 9:31 am
dynchel wrote:Red white & blue, very patriotic. Nice work, I like the '74 "face"
Thanks, hopefully I'll be able to drive it by the 4th of July.
Roadcaptain wrote:
Ha, it will in due time. Its one of those things I'll get to when the interior is getting updated. I'm excited about what is going to go where the radio goes, I will post pics when its complete in a few months.
Hawk03- G3GM Enthusiast
- Street Cred : 18
Re: Hawk03 Redo
![]() by 77mali Tue Feb 10, 2015 6:06 pm
by 77mali Tue Feb 10, 2015 6:06 pm
BTW- Red, White, Blue and Maroon???
77mali- Donating Member
- Street Cred : 62
Re: Hawk03 Redo
![]() by Hawk03 Wed Feb 11, 2015 9:25 am
by Hawk03 Wed Feb 11, 2015 9:25 am
Hawk03- G3GM Enthusiast
- Street Cred : 18
Re: Hawk03 Redo
![]() by Roadcaptain S3 Wed Feb 11, 2015 9:28 am
by Roadcaptain S3 Wed Feb 11, 2015 9:28 am
What color will it be then?
Roadcaptain S3- Donating Member
- Street Cred : 26
Re: Hawk03 Redo
![]() by Hawk03 Wed Feb 11, 2015 9:47 am
by Hawk03 Wed Feb 11, 2015 9:47 am
I think I am going with a darker red than what the drivers side fender is, which was the original color I painted the first time around and I think the factory color. I haven't started looking at any samples, I didn't want to get ahead of myself too much. I want to put it together and get some miles on it and see if there are any mechanical adjustments that need to be made before it goes in for paint.
Last edited by Hawk03 on Wed Feb 11, 2015 4:41 pm; edited 1 time in total
Hawk03- G3GM Enthusiast
- Street Cred : 18
Re: Hawk03 Redo
![]() by 77mali Wed Feb 11, 2015 11:57 am
by 77mali Wed Feb 11, 2015 11:57 am
Hawk03 wrote:Now I'm thinking I should have put on the black drivers side fender...
LOL- there was maroon though, right or are my eyes going?
There was a real nice Red in the Pontiac Line, don't know what they call it.

77mali- Donating Member
- Street Cred : 62
Re: Hawk03 Redo
![]() by Hawk03 Wed Feb 11, 2015 8:16 pm
by Hawk03 Wed Feb 11, 2015 8:16 pm
77mali wrote:Hawk03 wrote:Now I'm thinking I should have put on the black drivers side fender...
LOL- there was maroon though, right or are my eyes going?
There was a real nice Red in the Pontiac Line, don't know what they call it.
Thanks for pic that is a nice color. There is maroon, two shades of it. The header panel is a different color than the passenger side fender which is also a maroon - not sure if the body is the same as the color as the either one. The hood and the trunk lid are the same color as the driver side fender so at least there will be some flow to it. Its a mish-mash of body parts from several different cars and the hood and trunk are the only body parts going on from my original car.
Hawk03- G3GM Enthusiast
- Street Cred : 18
Page 3 of 7 • 1, 2, 3, 4, 5, 6, 7 ![]()


G3GM :: Media :: G3 Project Pictures
|
|
|
» Rusty's progress Carpet Chevk now onto floor replacement
» PARTS NEED TO GO FOR OUR MOVE I DONT WANNA TAKE WITH
» Need driver side bucket seat 73 Laguna
» Laguna NOSE
» Virtual Ink from this weekend
» 1973 Chevelle SS Station Wagon
» Elcofest 2023
» Wanted drip rails for 1975 four-door Chevelle Malibu-Thanks!
» Parts please