75 el camino project.
+24
Iggy
impalamonte
73ss
REVINKEVIN / Mr. 600+HP
tgaetto
fasrnur
bigredlaguna
Hawk03
Hs1973
Limey SE
thatfnthing
DaveFury
Joe73
chevellelaguna
Mcarlo77
knightfan26917
77mali
tropdeprojet
dynchel
pila
wunderlich_33
driveit
Dinomyte
JB2wheeler
28 posters
G3GM :: Media :: G3 Project Pictures
Page 10 of 11
Page 10 of 11 •  1, 2, 3 ... , 9, 10, 11
 Re: 75 el camino project.
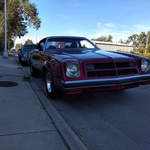
If I remember right, the factory choke wire should be purple and will probably go through an oil pressure switch.
bigredlaguna- G3GM Senior Member

- Street Cred : 53
 Re: 75 el camino project.
looked through the one book for the wiring diagrams and it says its a blue wire coming from the oil pressure switch like bigredlaguna said. so gonna mess with that over the weekend I think.
also ordered a hood pad and it came in but nothing lines up the way it should. gotta find one that works, got it from the parts place but they said that is what it should be. not sure if Ill make it work or try and find the proper one.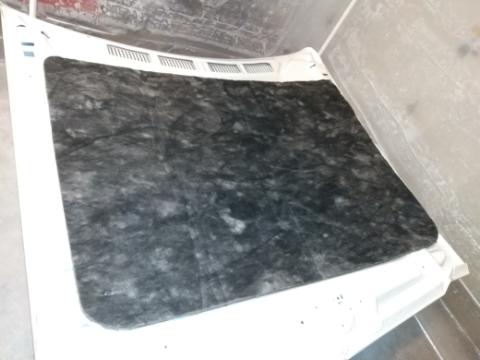
also ordered a hood pad and it came in but nothing lines up the way it should. gotta find one that works, got it from the parts place but they said that is what it should be. not sure if Ill make it work or try and find the proper one.


riddick75- G3GM Member

- Street Cred : 6
 Re: 75 el camino project.
so finally got the hood painted. and mounted on the car, just need to align it.
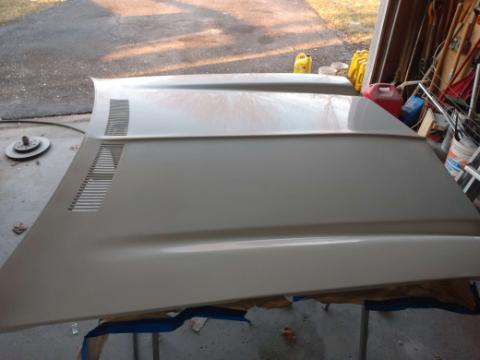
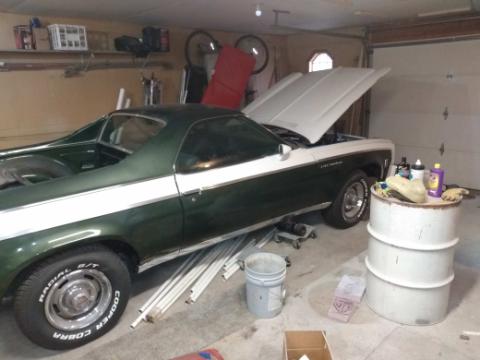
tried a little but already chipped the fender some so took a break. so got a few questions:
lowering the hood is basically a whole ab work out. any advise on how to get it to move smoothly down or how they are supposed to operate. I know you shouldnt need force.
where the hinges mount on the fender should any shims be needed? I have the front clip all lined up:fenders to front facia and light buckets, but the hood seems too wide in the front to fit down
is all the hood adjustment done in the top part of the hinges or is there some done down by the fenders?
how much gap on the sides and front when the hood is down does everyone seem to have?
and finally when the hood is open is there play up and down in the hinges?

riddick75- G3GM Member

- Street Cred : 6
 Re: 75 el camino project.
Riddick ,
I do not have any pointers for getting the hood on the car. But , with the weight of these...it is a struggle especially when attempting to not chip new paint. I used no shims. All the adjustment is at the rear of the hood. Only thing up front is going to be the height of the hood " bumpers" on the core support adjusted either up/down.
As for he hinges though. There should be no play.
I had mine rebuilt by this guy:
Willie Wilson
willie@hoodhingerepair.com | 434-258-2606
With machines running most of the time, we don’t always hear the phone ring. Please leave a message and we promise to return your call, ASAP.
Wilson Antique Car Parts
1067 Clearview Drive
Forest, VA 24551
(Ship core parts here)
I would also not suggest buying the "China" produced aftermarket units. Wilson custom makes the rivets to put the units you send in back together. I am glad I went with him.
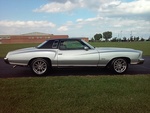
impalamonte- G3GM Enthusiast

- Street Cred : 18
 Re: 75 el camino project.
When installing newly painted panels its always a good idea to use masking tape on all edges of the panels you are working with. I lay down 3 layers of tape for added protection. The alignment of the hood is done with both the mounting hardware that bolts to the hood itself as well as the bolts to the inner fenders. The ones on the hood are for lateral adjustment and the ones on the inner fender are for height adjustment near the back of the hood. As far as the stiffness of your hinges go, I would spray them at the pivot points with a good silicone spray and then push each corner of the front of the hood back towards the windshield a little at a time until you get it to close. As you push back, it will inherently want to go down in its closed position. If you can't get them to loosen up are several cycles, then you have the option of buy a good used set (hard to find) or a reproduction set from Goodmark. I've heard mixed things about the reproductions so do some research before you buy if you go that route. Also, some vehicles are almost impossible to get the hood "square" with the fenders and front header as the front header really has no adjustment for width. I have this issue with my Laguna which has a urethane nose. When I get to painting it in the near future I'll have to build up the sides of the front nose to make it slightly wider to match the fenders when they are adjusted square with the hood. I will probably also have to enlarge several of the mounting holes in the fenders/core support/front nose to make it all work. Hope this gives you a better idea of how to move forward on your.

g3chevy / Mr Pontiac- Donating Member

- Street Cred : 35
 Re: 75 el camino project.
thanks, those are some good ideas, when I didn't have the springs on they seemed to move relatively easy, and the rivets were tight with no slop. it could be that I just need some more lube in there. and after the first chip on the fender I put some painters tape but Ill add some more like you said for safety. so it basically is just fiddly to get the hood to sit right, once I get the joints freed up better it might make things easier.

riddick75- G3GM Member

- Street Cred : 6
 Re: 75 el camino project.
I had alot off issues with mine ( 75 chevelle.) i Found that mixing years is bad. Like my 73 fenders and 75 hood. My right fender sits perfect, but the left just dont fit wery Well. I can only say it is wise to test fit it all before paint. Also i have noticed that if the hinges are to hard to close, the hood can actually bend if one is not careful. My experience is it is best to start with the doors and work forward one piece at a time. But its very time consuming and can be frustrating. Patience is key. Good luck and beautiful car.

Hs1973- G3GM Enthusiast

- Street Cred : 14
 Re: 75 el camino project.
ok so I got the hinges lubed up AND it moves so much easier. so on to the new issue. still trying to allign this damn thing, passenger side is tight in the front light bucket when I pivot it away from the passenger fender. driver side is all the way back, and front of the hood has about a 1/4 inch or better space from the light bucket, also noticed a bend in the hood...typical bend from closing hood, got it that way because this is the first time I had the hood on the hinges, car came with the hood strapped down. also both sides of the back of the hood, don't stay down/level with the fenders. what locks down the rear of the hood from pulling up? there are the two bolts but I never messed with the height and they dont even touch the hood when I push it level.

riddick75- G3GM Member

- Street Cred : 6
 Re: 75 el camino project.
The hood hinges are adjustable up and down. Just loosen the bolts that attached the hinges to the inner fender. But only loosen them enough so they are still somewhat snug. Then when you get them adjusted correctly you can carefully open the hood and tighten them up without them moving during that process.

g3chevy / Mr Pontiac- Donating Member

- Street Cred : 35
 Re: 75 el camino project.
Hi. Also make sure there is no play in the rivets in the hinges. Or Else that could be why the hood sits High in the back. Otherwise it helps having a stick to keep the hood, then i loosen the bolts just enough till the hinges start to move. Then tighten them up and see how things look. A little adjustment at a time and patience.
I usually remove the headlight buckets or leave them off till the hood and fenders sit right and Line up. Then i put them on last. My 75 is wery tight in the drivers side hood to bucket. And im guessing they are just that Way. However its made from potmetal and are easy to grind on the edge so it fits better. ( easy to repaint a headlight bucket if need be) also the headlight buckets and front headder seams to want to pul the fenders together, and out of alignment. I fixed mine with shims between headder and bucket and by enlarging the holes in the fenders.
Also the back off the hood can st so low to the windshield, that the drivers side wiperarm grind on the hood moulding. So beware the the fender and hood dont sit to low on the Cowl. If the wiper hits the moulding on the hood when in use. There is only one solution and that is to lift the doors and fender up till it cleares. Again patience and no play in hinges for hood or doors are key. Good luck.

Hs1973- G3GM Enthusiast

- Street Cred : 14
 Re: 75 el camino project.
ok messed around more trying to get the hood alligned, my dad came in and we spent about a week trying to get it right, turns out it did matter how I put the body back on, we shoved over the body the best we could (lots of weight and only a few jacks) not perfect but the hood closes better, or rather closes. also got a new distributor because the old one seemed a little tired and the vacuum advance didn't work at all. so now I fired it up and got it base timed at 6 before, runs ok but I hear a knocking, one thought that has been a concern is a rod knock. also when looking around I found the spark wires are burning at the boots from the headers, so it might just be spark leaking out before firing causing the issue. want to start there before tearing into the motor again. so does anyone have a solution to the boots melting from headers? better wires/protection. also I was using https://www.amazon.com/Protect-Thermal-Protection-Insulator-Titanium/dp/B07QZR765H/ref=sr_1_1_sspa?crid=1I7HC0S9132H3&dchild=1&keywords=spark+plug+protect+boot&qid=1620064276&s=automotive&sprefix=protect+a+boot+%2Cautomotive%2C182&sr=1-1-spons&psc=1&spLa=ZW5jcnlwdGVkUXVhbGlmaWVyPUEyWk5WRVBHVlBSRVgyJmVuY3J5cHRlZElkPUEwMTcwNTgyMzFBQ09SREFPU0g5OSZlbmNyeXB0ZWRBZElkPUEwMDE3NDQyWEFGVE9CVlBUUlQ2JndpZGdldE5hbWU9c3BfYXRmJmFjdGlvbj1jbGlja1JlZGlyZWN0JmRvTm90TG9nQ2xpY2s9dHJ1ZQ== and they still turned into putty.

riddick75- G3GM Member

- Street Cred : 6
 Re: 75 el camino project.
Glad to hear you got your hood alignment to a point you can close it. As far as the spark plug boot goes, the high temp boot sleeves you have a link to is what I've used on several vehicles with headers with good results. The next set up is a wire set with ceramic boots. They are expensive but work well. The "rod knock" could be several different things. Could be the spark jumping from the melted boot but that usually is more of a snapping sound. Another thing is the valves could be adjusted too tight and the valve is hitting the top of the piston. One other possibility is that the baffle in the valve cover could be tweaked and is hitting a rocker arm. Had that happen on one of my engines a long while back after changing the valve cover gaskets. Sounded just like a rod knock. What work have you done to your engine? That might help narrow down what the noise is.

g3chevy / Mr Pontiac- Donating Member

- Street Cred : 35
 Re: 75 el camino project.
the engine is out of a 1981 camaro. it ran before I tore it down. took it to a machine shop to have everything honed and milled. the heads were replaced because the valve seats were cracked. new cam was installed. hydrolic flat tappet lifters, stock intake, new msd distributor. new valve covers. basically a stock motor rebuilt. I did the break in procedure for the cam. i figure I would start with the wires being they are burned, not sure if it was just from the initial burn in or if its a constant thing. when I was poking around with the stethoscope and it sounded like it was on the driver side around 1 or 3, 1 was one of the burned boots. when did valve lash I went 3/4 turn,

riddick75- G3GM Member

- Street Cred : 6
 Re: 75 el camino project.
The knock sound could be piston slap from the dead cylinder. If it goes away after the wire change, that is probably what it is.
Did you listen for the noise from underneath? A true rod knock will be unmistakable to you when your ears are under the front bumper.
Did you listen for the noise from underneath? A true rod knock will be unmistakable to you when your ears are under the front bumper.

bigredlaguna- G3GM Senior Member

- Street Cred : 53
 Re: 75 el camino project.
yea I listened all around, even with the stethoscope. I figure I would do the simple fixes first. going to order the accel wires with the ceramic covers. if that don't hold up to the temp I don't know what would.

riddick75- G3GM Member

- Street Cred : 6
 Re: 75 el camino project.
ok update time, got the new wires, the accell 9000 ones with the ceramic plug boot. gotta say I do like these just for the ease of them clicking on the plug evan at tight spaces by the headers. also put on the titanium wrap about 6 inches where they would be by the headers. 4 of the 8 plugs were melted at the boots. now it fired right up, no knocking sound, a little bit of a miss every so often but that might be due to certain plugs not firing right all that time. guess 4 out of 8 not working makes the engine not happy. I even took it on its first voyage to the gas station. only died twice, with the air cleaner on the idle might be a little too low, did everything with out it on for ease. still gotta mess with the choke, seems to cool down too fast compared to the motor, its an electric on a rochester. just needs a little more tinkering. I also wired the choke off the idle solenoid, off the oil sensor with one terminal it triggered the light on all the time.

riddick75- G3GM Member

- Street Cred : 6
Limey SE, bigredlaguna and tgaetto like this post
 Re: 75 el camino project.
figured out most of the knocking sound was from the carb leaking fuel, making dead cylinders. got a new carb and it ran better. even took it out a few times
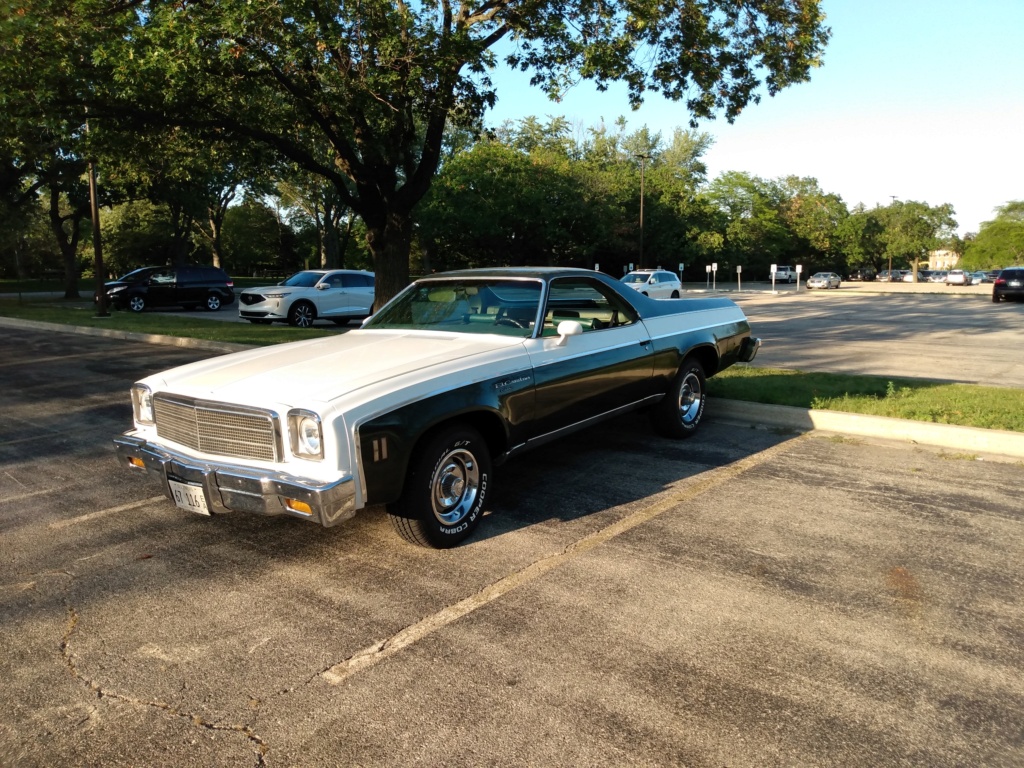
got an adjustable timing light and as far as I can tell my total timing is about 23 drgrees. it seems to run well at that, 800 rpm in park and about 600 in drive, couple things Im having trouble with is cold starts take a few tries, not sure if its a timing problem or a choke problem. other thing I found out is after brake torquing it to about 1000 rpm and letting off it either comes close to dying or does die. kinda like having to make a sudden stop in traffic. leads me to believe the timing might need some more advancement. right now i have it at 6 degrees base timing with vacuum advance.

got an adjustable timing light and as far as I can tell my total timing is about 23 drgrees. it seems to run well at that, 800 rpm in park and about 600 in drive, couple things Im having trouble with is cold starts take a few tries, not sure if its a timing problem or a choke problem. other thing I found out is after brake torquing it to about 1000 rpm and letting off it either comes close to dying or does die. kinda like having to make a sudden stop in traffic. leads me to believe the timing might need some more advancement. right now i have it at 6 degrees base timing with vacuum advance.

riddick75- G3GM Member

- Street Cred : 6
 Re: 75 el camino project.
Looking good! Sounds like you may have a fuel pump putting out too much pressure. Look down your carb and see if you see it dripping gas from the primary venturies when its idling. I've had 2 factory replacement fuel pumps that I bought in the last couple of years that put out over 8 psi at idle which is too much pressure for the factory carbs and some aftermarket carbs. Like you, I thought I had a bad carb and bought a new one to replace it, only to find out it was doing the same thing. Then I swapped out the new fuel pump (Spectra) for a different brand (Orielly House Brand) and it fixed the issue. Ran perfect from that point on. Hope this helps. Keep the updates coming!

g3chevy / Mr Pontiac- Donating Member

- Street Cred : 35
 Re: 75 el camino project.
the mixture screws are about a little less than 3/4 turns out each. I turned them in because it was kicking out alot of white smoke that smelled like gas, enough to make your eyes water in a doors wide open garage. turning them in got rid of the smoke, but the fuel pump might be worth checking. I did put a brand new on on from advance auto.

riddick75- G3GM Member

- Street Cred : 6
 Re: 75 el camino project.
Could have also been a stuck float. But I'm leaning more towards the fuel pump putting out too much pressure. I put a gauge on my Can Am last week when it was choking on fuel and the new Carter fuel pump was putting out 8 psi. Too much for a Rochester carb. So I temporarily installed a Mr Gasket fuel pressure regulator and turned it to 5.5 psi and now it runs like a champ. Also, you might play around a little more with the mixture screws. I put a vacuum gauge on and dialed it in when I reached max vacuum at idle. That ended up being almost 2 full turns out on the mixture screws. Hope this helps.

g3chevy / Mr Pontiac- Donating Member

- Street Cred : 35
 Re: 75 el camino project.
Ok finally found all the fittings I needed to hook up the pressure gauge. Came in on start up around 8 with cranking running high idle got it to 9 and revving the engine pegged it at 10 and that was as high as the gauge went. Off to order the Mr gasket regulator. Fingers crossed that's the problem but it does make sense how it would die on high idle on start up if I didn't keep burping the throttle.

riddick75- G3GM Member

- Street Cred : 6
 Re: 75 el camino project.
Cool, that sounds like your culprit. Are you running a quadrajet? I think the specs on these carbs is 6 psi max at idle. Dialing it down to 5.5 psi with the Mr Gasket pressure regulator fixed mine and ran good enough to take it to the local car show this past weekend. Let us know how this plays out for you.

g3chevy / Mr Pontiac- Donating Member

- Street Cred : 35
 Re: 75 el camino project.
Yea running quadrajet. Bought a remaned one because mine was leaking into the throat. So hooked up the regulator and the numbers don't mean what it puts out. 5 was 10 or no regulating so I got it on 3 for 5.5 on guage. Now I'm going back to trying to time it using an adjustable timing light. Was at 25 advance at 2500 rpm so I brought it up to 34 at 2500 rpm. Now it will die in gear. But at 25 it didnt die. Now I gotta take a break from the fumes. And still having the unburned gas issue. Even at minimal mixture any less it won't run.

riddick75- G3GM Member

- Street Cred : 6
 Re: 75 el camino project.
I didn't take the time to read through the previous nine pages of posts so if what I'm about to say has been addressed, please forgive the redundancy.
All carbs rely on good vacuum to work properly. You'd be amazed at just how sensitive they are to even the slightest vacuum leak. Same goes for the vacuum advance on the distributor. As far back as the 1960s, manufacturers added a distributor vacuum thermal switch that would switch the source of distributor between ported carburetor and manifold depending on engine temperature for cars equipped with A/C.
With that said, have you verified you don’t have any vacuum leaks? An easy way to check if your setup isn’t affected by a vacuum leak is to isolate all circuits other than distributor advance; by the way, make sure your advance diaphragm isn't leaking. Remove all the vacuum lines attached to the manifold and cap the manifold nipples, remove and cap the break booster vacuum source, cap all the vacuum ports on the carb including the PCV system. This may seem extreme but it isolates your engine/carb/ignition setup from all errant sources of vacuum leaks. With that done, see how it runs. If nothing changes then you know you don’t have a random vacuum leak. If there’s a marked improvement then reconnect the PCV valve and check engine operation again. The next thing to reconnect would be the transmission vacuum line then recheck engine operation. Continue reconnecting vacuum lines one at a time from most critical (like emissions if you have any) to least critical (like four seasons AC system if so equipped). If you have a vacuum leaks, this should help isolate it.

zucchi- G3GM Member

- Street Cred : 4
 Re: 75 el camino project.
I concur with Zucchi. Sounds like a vacuum leak. I quick way to test it is to put your hand on top of the carb where the choke flap is and let just a little air into the primaries. If the engine speeds up significantly, you have a vacuum leak. My first suspect would be the reman carb. Most are not rebuilt correctly and have excessive play in the throttle shafts which causes a vacuum leak. Also to much torque on the carb mounting bolts will warp the carb creating issues as well. Good luck and keep us posted on the progress.

g3chevy / Mr Pontiac- Donating Member

- Street Cred : 35
Page 10 of 11 •  1, 2, 3 ... , 9, 10, 11
 Similar topics
» 73 El Camino Restomod project
» MY DAILY DRIVER/PROJECT 73 EL CAMINO SS
» Classic Car Restoration Club: 1977 El Camino Project Car-Overview
» MY DAILY DRIVER/PROJECT 73 EL CAMINO SS
» Classic Car Restoration Club: 1977 El Camino Project Car-Overview
G3GM :: Media :: G3 Project Pictures
Page 10 of 11
Permissions in this forum:
You cannot reply to topics in this forum|
|
|


» Rusty's progress Carpet Chevk now onto floor replacement
» PARTS NEED TO GO FOR OUR MOVE I DONT WANNA TAKE WITH
» Need driver side bucket seat 73 Laguna
» Laguna NOSE
» Virtual Ink from this weekend
» 1973 Chevelle SS Station Wagon
» Elcofest 2023
» Wanted drip rails for 1975 four-door Chevelle Malibu-Thanks!
» Parts please