


1973 Chevelle SS, 350, 4spd. build
G3GM :: Media :: G3 Project Pictures
Page 6 of 17 •  1 ... 5, 6, 7 ... 11 ... 17
 ![]()
Re: 1973 Chevelle SS, 350, 4spd. build
![]() by ant7377 Thu Aug 25, 2016 9:34 pm
by ant7377 Thu Aug 25, 2016 9:34 pm
ant7377- G3GM Addict

- Street Cred : 36
Re: 1973 Chevelle SS, 350, 4spd. build
![]() by Joe73 Fri Aug 26, 2016 7:46 am
by Joe73 Fri Aug 26, 2016 7:46 am

Joe73- Donating Member

- Street Cred : 83
Re: 1973 Chevelle SS, 350, 4spd. build
![]() by Joe73 Thu Sep 01, 2016 7:41 pm
by Joe73 Thu Sep 01, 2016 7:41 pm
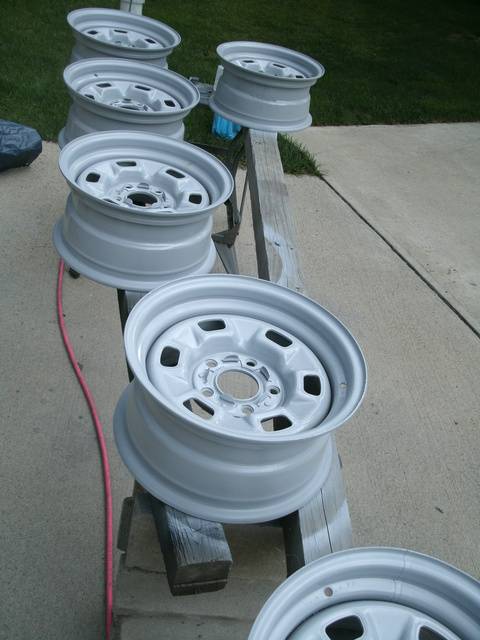
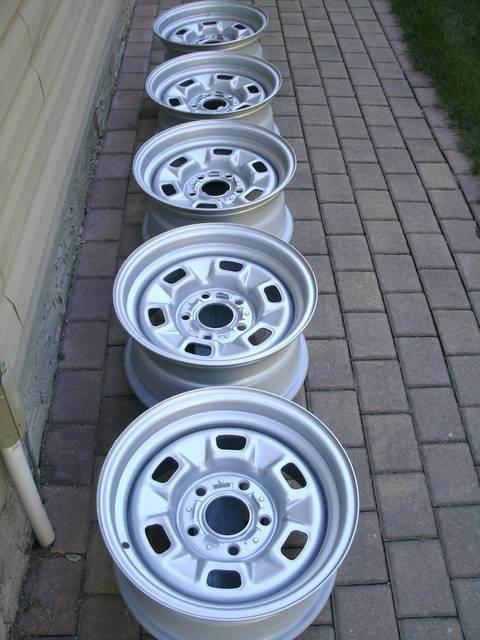
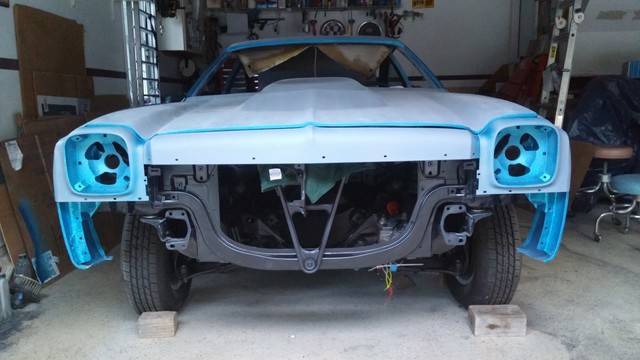
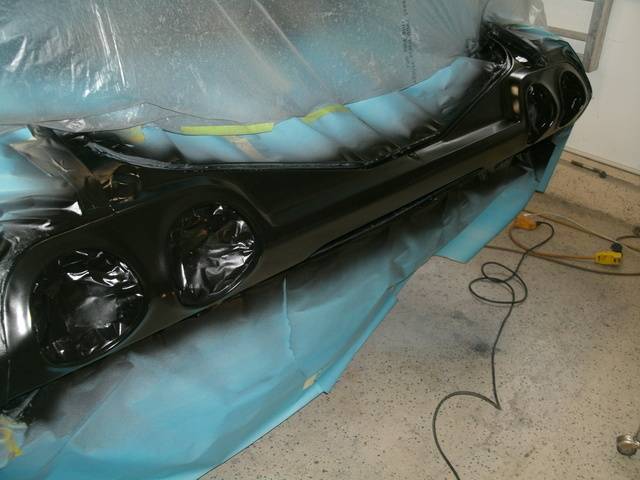
The olds wheels were shot with black epoxy since thats the way they came from the factory. They will be getting Argent Silver on the front along with mine tomorrow morning. Two coats on everything with SPI epoxy.
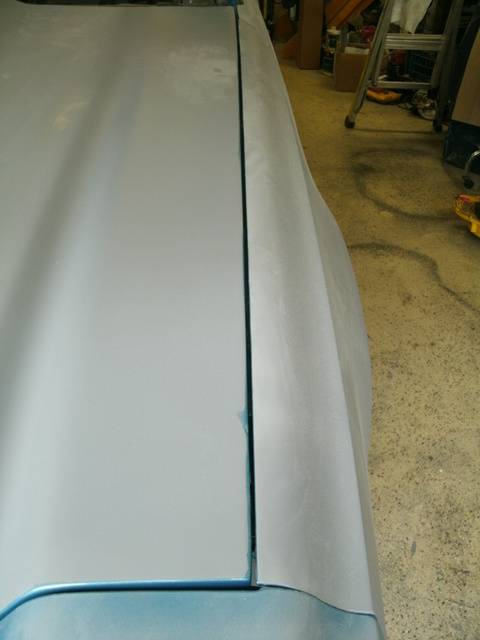
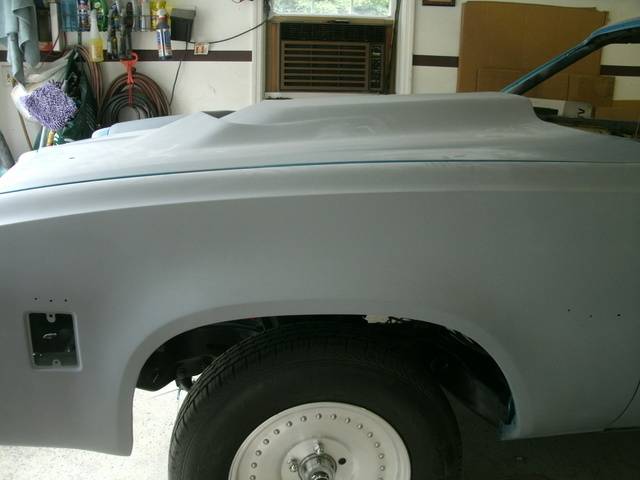
I also shot my quarters with their final coat of primer this morning. I just have to glass blast my mounting bolts for the fenders and I"ll be reassembling the doors, fenders, hood and trunk lid. I have some Zolatone Black/Aqua coming to shoot the inside of the trunk like factory. No clear coat required on the zolatone and its real durable.
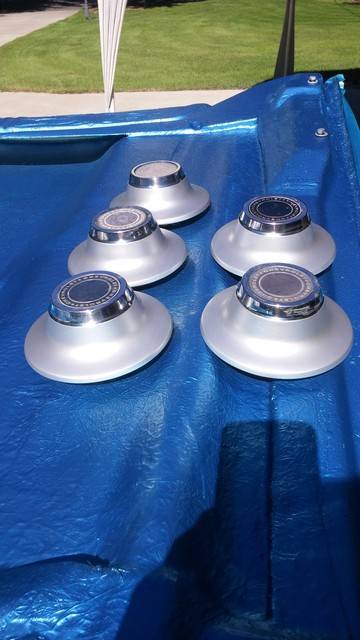
I also taped off and glass blasted my center caps and shot them with Argent Silver.


Joe73- Donating Member
- Street Cred : 83
Re: 1973 Chevelle SS, 350, 4spd. build
![]() by Limey SE Fri Sep 02, 2016 10:12 am
by Limey SE Fri Sep 02, 2016 10:12 am

___________________________________________
1977 Chevelle SE x2
One Mild original
one Wild NON original
Anthony

Limey SE- Management

- Street Cred : 98
Re: 1973 Chevelle SS, 350, 4spd. build
![]() by Joe73 Fri Sep 02, 2016 11:13 am
by Joe73 Fri Sep 02, 2016 11:13 am
Just shot the stock wheels this morning. Just have to re-mount up my G70-14 on the spare, shoot the zolatone and put the jack back in the trunk. The other (4) wheels and center caps are going into storage. Clanceman, just in case you want to know. The automotive paint company Pro-Spray (Argent Silver) and U-Pol 808 spray cans are an exact match to our factory wheels and to each other. Just FYI.
Joe73- Donating Member
- Street Cred : 83
Re: 1973 Chevelle SS, 350, 4spd. build
![]() by clanceman427 Fri Sep 02, 2016 3:10 pm
by clanceman427 Fri Sep 02, 2016 3:10 pm
clanceman427- G3GM Enthusiast

- Street Cred : 16
1975 S3- Donating Member
- Street Cred : 5
Re: 1973 Chevelle SS, 350, 4spd. build
![]() by fasrnur Mon Sep 05, 2016 1:15 pm
by fasrnur Mon Sep 05, 2016 1:15 pm
Of course we all know our cars do not bring, or command the price of an older Chevelle, unless it's a super rare one. Instead we build ours to be enjoyed by ourselves and in hopes of putting a smile on some faces and bring back memories of times gone by to others.
We do this all for the love of the car, and the hobby it represents.
Keep up the good work Joe, and all others here on this forum.
Jeff
fasrnur- G3GM Enthusiast
- Street Cred : 9
Re: 1973 Chevelle SS, 350, 4spd. build
![]() by Joe73 Mon Sep 05, 2016 5:56 pm
by Joe73 Mon Sep 05, 2016 5:56 pm
Its just fun for me. I took alot of rippin from some of my buddies when I told them I was stripping it to bare metal AGAIN. But I did the bottom too this time. For me, I think its coming out beautifully. This is definitely the last time I'm doing it. LOL.
The only other mod that may come way down the road would be an Auto Gear overdrive box. The 4.10s are not very streetable and definitely no highway. But boy is it fun punching it.
Joe73- Donating Member
- Street Cred : 83
Re: 1973 Chevelle SS, 350, 4spd. build
![]() by Joe73 Mon Sep 05, 2016 5:59 pm
by Joe73 Mon Sep 05, 2016 5:59 pm
Joe73- Donating Member
- Street Cred : 83
Re: 1973 Chevelle SS, 350, 4spd. build
![]() by Hs1973 Wed Sep 07, 2016 2:27 pm
by Hs1973 Wed Sep 07, 2016 2:27 pm
I cant wait to see your car done it is going to be Nice, and it makes me want to do mine again. Keep up the Nice work.

Hs1973- G3GM Enthusiast
- Street Cred : 14
Joe73- Donating Member
- Street Cred : 83
Re: 1973 Chevelle SS, 350, 4spd. build
![]() by Limey SE Sun Sep 11, 2016 11:12 pm
by Limey SE Sun Sep 11, 2016 11:12 pm


___________________________________________
1977 Chevelle SE x2
One Mild original
one Wild NON original
Anthony
Limey SE- Management
- Street Cred : 98
Re: 1973 Chevelle SS, 350, 4spd. build
![]() by Joe73 Sun Sep 18, 2016 4:26 pm
by Joe73 Sun Sep 18, 2016 4:26 pm
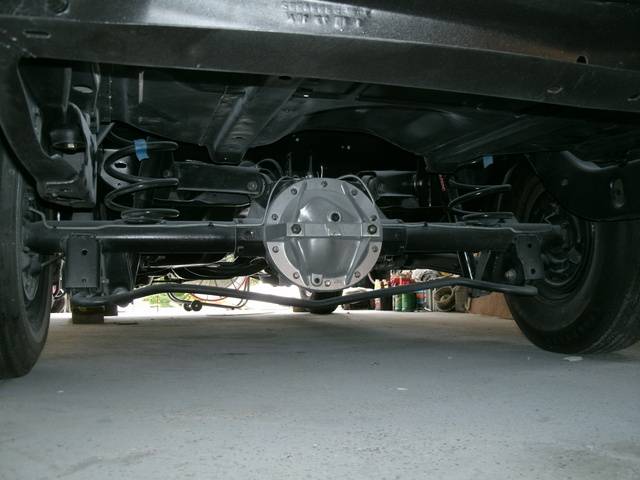
I sanded and re-shot the satin black on the tail panel and it looks real nice.
Then I took a quick shot of the underneath from the rear. Alot of dust everywhere. Tape on the rear springs are for me to eyeball spring pig tail orientation. Cut ends are supposed to parallel to the centerline of the car and pointing to the passenger side.
Just have to put in the door latches and strikers then I will be building the paint booth. Getting close.
Joe73- Donating Member
- Street Cred : 83
Re: 1973 Chevelle SS, 350, 4spd. build
![]() by Joe73 Sun Sep 25, 2016 1:30 pm
by Joe73 Sun Sep 25, 2016 1:30 pm
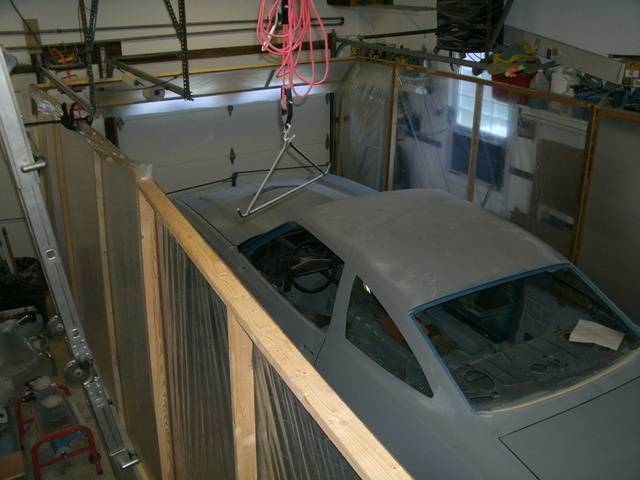
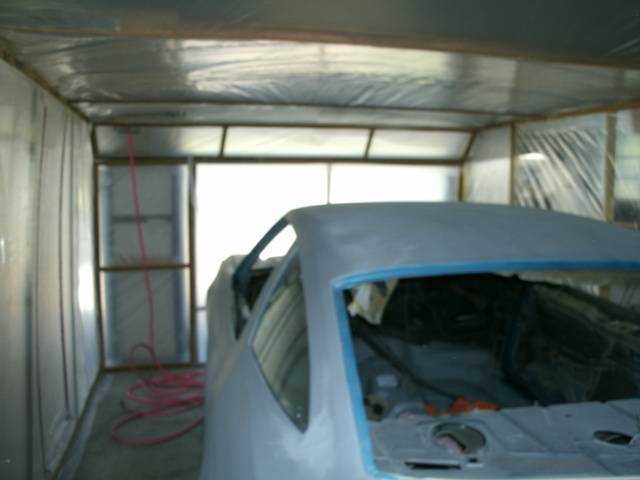
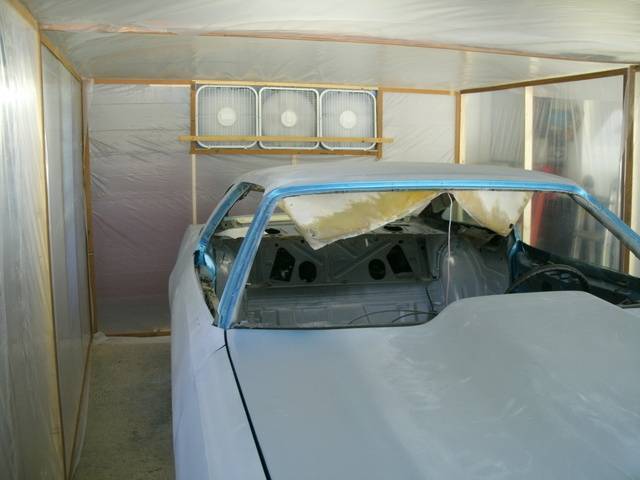
There are intake AND exhaust filters. I did not use the pleated house style filters that most guys use. I purchased actual paint booth filter material 24" roll from Amazon. These paint booth filters are slightly tacky and can catch particles as they try to pass. But as they collect particles they do no restrict air flow which is what I was looking for. I used 3 pieces of it so I have one piece left over in case I need to change one out which I doubt.
This is a pressure style booth which has (3) 20" fans (with filter material on their intake side) blowing INTO the booth to pressurize it. Fans are located high on the rear wall.
Exhaust filter is located low on the front wall.
It pressurizes nicely and you can feel the air current as it moves along the booth. You can also feel air coming out of the exhaust filter on the outside. I actually checked the air flow by using some of my "wind indicator" powder that I use for bow hunting. Basically like an eye dropper bottle with talc in it. You squeeze it and it puffs fine talc into the air. Tells you which way the air is moving. And its moving nicely in the booth.
The booth is made in panels so it will be easy to take apart, stack side by side, and screw a piece of wood on the top and bottom to make a pack for easy transport. The roof is not a panel but normal 4 mil plastic with 2 support cross braces.
There is a zipper kit installed (red vertical lines on the plastic) for easy in and out. I doubled up the plastic on the bottom of the zippered area for extra strength but to also add a little weight to the door. The extra plastic overhangs the bottom of the door so when the fans are on the door seals nicely.
If anyone is local to the New York area, I will be selling this booth after I'm done. If anyone wants to come take a look at it and see how it works, just PM me. I have a pick up truck and I am willing to meet up for people driving longer distances.
Now I just have to do a last block sand, mask off and I can shoot. Spraying should take about 3 days to allow time for masking of the stripes. Then I plan to let the clear sit at least 3 days and I'll be block sanding it out again and shooting 2-3 flow coats for the final gloss.
Here's some pics. The pics are with the fans running and the booth pressurized !!


Joe73- Donating Member
- Street Cred : 83
Re: 1973 Chevelle SS, 350, 4spd. build
![]() by fasrnur Sun Sep 25, 2016 2:49 pm
by fasrnur Sun Sep 25, 2016 2:49 pm
My hat is off to you sir. Can't wait to see it in color and finished.
Jeff
fasrnur- G3GM Enthusiast
- Street Cred : 9
Re: 1973 Chevelle SS, 350, 4spd. build
![]() by Joe73 Sun Sep 25, 2016 3:03 pm
by Joe73 Sun Sep 25, 2016 3:03 pm
Joe73- Donating Member
- Street Cred : 83
Re: 1973 Chevelle SS, 350, 4spd. build
![]() by 1975 S3 Sun Sep 25, 2016 8:11 pm
by 1975 S3 Sun Sep 25, 2016 8:11 pm
regards Dave
1975 S3- Donating Member
- Street Cred : 5
Re: 1973 Chevelle SS, 350, 4spd. build
![]() by Joe73 Sun Sep 25, 2016 8:23 pm
by Joe73 Sun Sep 25, 2016 8:23 pm
Joe73- Donating Member
- Street Cred : 83
Re: 1973 Chevelle SS, 350, 4spd. build
![]() by dine73ss Sun Sep 25, 2016 11:41 pm
by dine73ss Sun Sep 25, 2016 11:41 pm

dine73ss- Donating Member
- Street Cred : 2
Re: 1973 Chevelle SS, 350, 4spd. build
![]() by Limey SE Mon Sep 26, 2016 12:28 am
by Limey SE Mon Sep 26, 2016 12:28 am
1975 S3 wrote:Fantastic job Joe, I cant wait to see the finished product. Before you paint please make sure you have not used any lubricants that contain silicone in your shop or on your car as well as any deodorants/aftershave etc for yourself, even a small airborne cross contamination can cause problems. I'm sure you know this already but thought I better say something just incase.
regards Dave
Yea I can Atest to this Joe remember that Cutlass I had that Had the primer / paint issue I had to take it back to bare metal.... My fiance later confessed she put armor all on a Rag in the garage quite liberally on the rag and silicone was the culprit I WAS MIFFED I couldnt figure it out for weeks till She confessed LOL That stuff gets everywhere
___________________________________________
1977 Chevelle SE x2
One Mild original
one Wild NON original
Anthony
Limey SE- Management
- Street Cred : 98
Re: 1973 Chevelle SS, 350, 4spd. build
![]() by fasrnur Mon Sep 26, 2016 12:28 am
by fasrnur Mon Sep 26, 2016 12:28 am
https://www.opgi.com/chevelle/1973/sheet-metal-body-panels/floor-pans/C241127/
fasrnur- G3GM Enthusiast
- Street Cred : 9
Re: 1973 Chevelle SS, 350, 4spd. build
![]() by dine73ss Mon Sep 26, 2016 1:17 am
by dine73ss Mon Sep 26, 2016 1:17 am
dine73ss- Donating Member
- Street Cred : 2
Re: 1973 Chevelle SS, 350, 4spd. build
![]() by Joe73 Mon Sep 26, 2016 6:37 am
by Joe73 Mon Sep 26, 2016 6:37 am
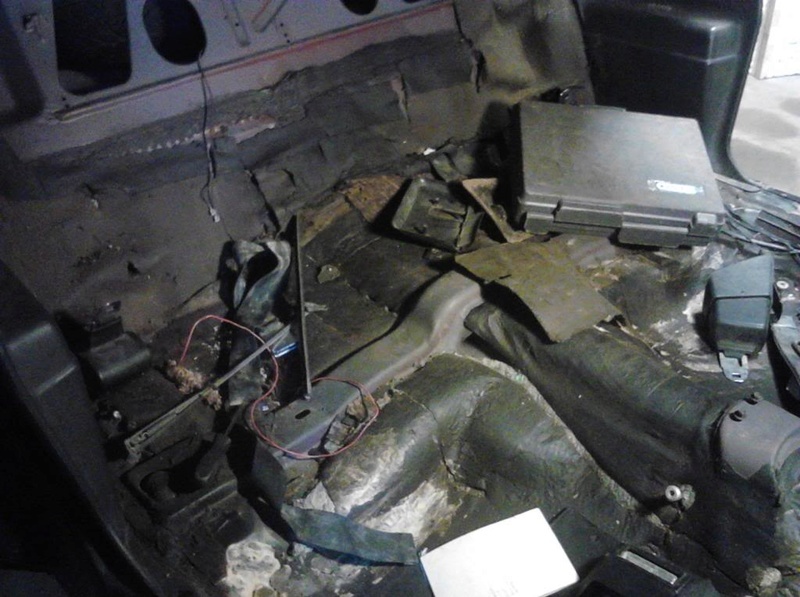
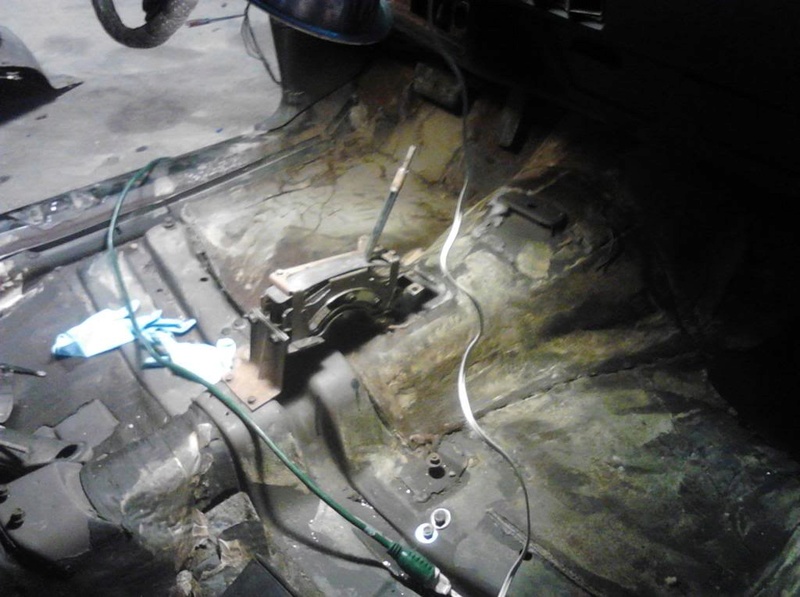
Someone on the board posted a pic of All the swivel mounts. The rear ones near the trans tunnel are on a plate that lays over the trans tunnel in the back.
Joe73- Donating Member
- Street Cred : 83
Re: 1973 Chevelle SS, 350, 4spd. build
![]() by Limey SE Mon Sep 26, 2016 7:41 am
by Limey SE Mon Sep 26, 2016 7:41 am
dine73ss wrote:Cool i can get the hump. Would like to see how it looks installed. Also like to see about location of swivel bucket seat floor mounts. Know one side where seat belt mount and front will work but the inside bolt or hole locations near the console.
THese pics are from a Swivel seat console car MY OLD ONE
___________________________________________
1977 Chevelle SE x2
One Mild original
one Wild NON original
Anthony
Limey SE- Management
- Street Cred : 98
Page 6 of 17 • 1 ... 5, 6, 7 ... 11 ... 17 ![]()


G3GM :: Media :: G3 Project Pictures
|
|
|
» Rusty's progress Carpet Chevk now onto floor replacement
» PARTS NEED TO GO FOR OUR MOVE I DONT WANNA TAKE WITH
» Need driver side bucket seat 73 Laguna
» Laguna NOSE
» Virtual Ink from this weekend
» 1973 Chevelle SS Station Wagon
» Elcofest 2023
» Wanted drip rails for 1975 four-door Chevelle Malibu-Thanks!
» Parts please