


1975 Monte Carlo
G3GM :: Media :: G3 Project Pictures
Page 5 of 11 •  1, 2, 3, 4, 5, 6 ... 9, 10, 11
 ![]()
Re: 1975 Monte Carlo
![]() by JB2wheeler Sat Jun 25, 2011 6:32 pm
by JB2wheeler Sat Jun 25, 2011 6:32 pm

JB2wheeler- G3GM Fanatic

- Street Cred : 28
Re: 1975 Monte Carlo
![]() by Fishgrinder Mon Jul 18, 2011 4:39 pm
by Fishgrinder Mon Jul 18, 2011 4:39 pm
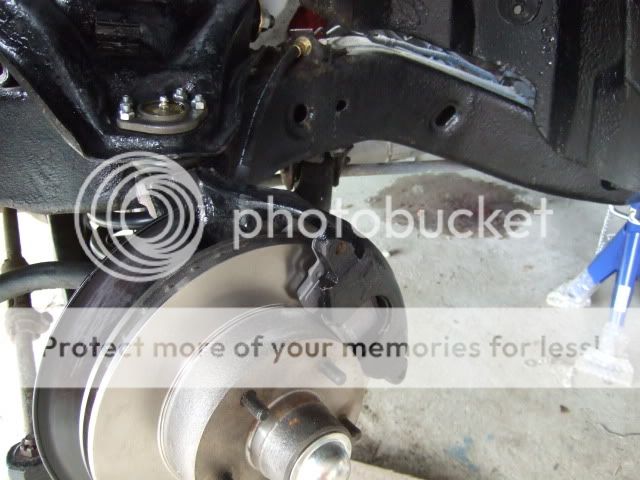
Finally got the front breaks completed, and bled.

I decided to try to restore the side marker lights. Picture is from before I started. What I basically did, was to
use the same procedure as 3M's headlight restoration kit. That is sanding with 500 dry, and then the following steps wet; 800-1000-1200-1500-2000-3000. In the end I simply put some plain turtle wax on them and wiped it off.

And this is after. Maybe it doesn't show that well in the picture, but I really think they got the "fresh look" in real life.

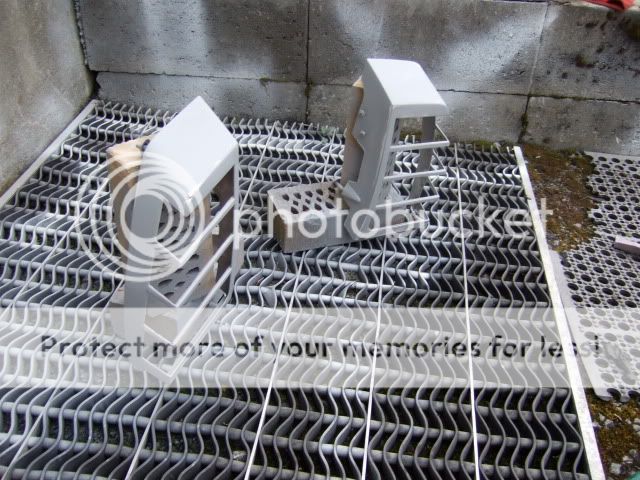
Then i started putting the bezels together
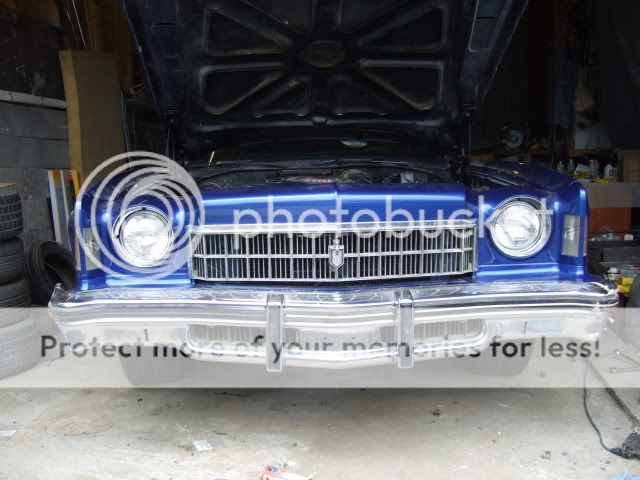
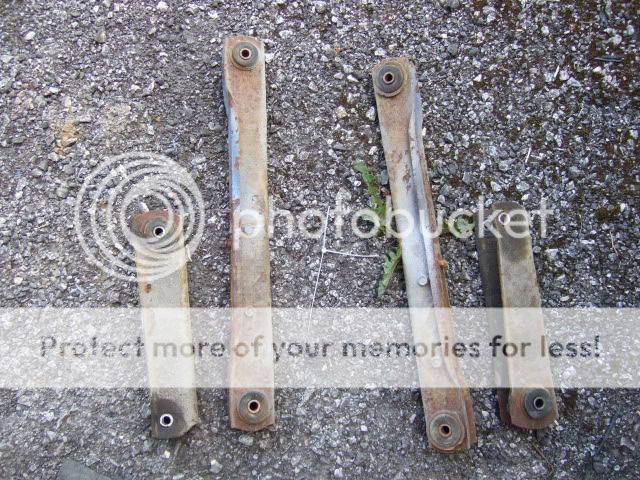
And the front. I found out there are two brackets supporting the bezels and center piece, which I wasn't aware of before. Fortunately I found them in the parts heap. This made aligning everything a hell lot easier lol
Starting to look quite complete now

Here I've put on butyl tape to seal between chrome trim and gasket rail. Almost got the driver side together before I had to quit.
Fishgrinder- G3GM Member

- Street Cred : 4
Re: 1975 Monte Carlo
![]() by 74MonteCarlo Mon Jul 18, 2011 4:45 pm
by 74MonteCarlo Mon Jul 18, 2011 4:45 pm
I'm freaky for blue.
74MonteCarlo- G3GM Fanatic
- Street Cred : 17
Re: 1975 Monte Carlo
![]() by Limey SE Mon Jul 18, 2011 6:12 pm
by Limey SE Mon Jul 18, 2011 6:12 pm
___________________________________________
1977 Chevelle SE x2
One Mild original
one Wild NON original
Anthony

Limey SE- Management

- Street Cred : 98
Re: 1975 Monte Carlo
![]() by ant7377 Mon Jul 18, 2011 9:25 pm
by ant7377 Mon Jul 18, 2011 9:25 pm
ant7377- G3GM Addict

- Street Cred : 36
Re: 1975 Monte Carlo
![]() by Fishgrinder Tue Jul 19, 2011 7:56 am
by Fishgrinder Tue Jul 19, 2011 7:56 am
I've been trying to find the power rating of my 430 export engine for a long time without much luck. But today I stumbled over this amazing site which lists specs for cars built for the European market (and the North American).
http://www.automobile-catalog.com/
I've compared both engines here:
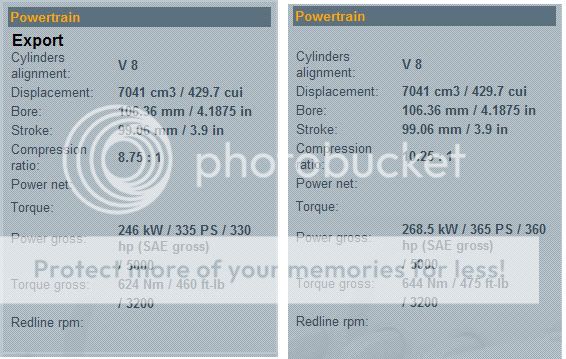
Very cool if this is correct!
Fishgrinder- G3GM Member
- Street Cred : 4
JB2wheeler- G3GM Fanatic
- Street Cred : 28

1973montec- Donating Member

- Street Cred : 17
Re: 1975 Monte Carlo
![]() by Fishgrinder Tue Jul 26, 2011 4:15 pm
by Fishgrinder Tue Jul 26, 2011 4:15 pm
Spent like 5 hours TRYING to remove the bushing in the passenger side ear of the rear axle, but the thing is stuck. I'm about to go insane, but will make a new attempt tomorrow.
Just a quick question:
The old rear springs are taller than then new ones. Is this compensated by the new design and higher springrate? Not good if the car sags in the rear.
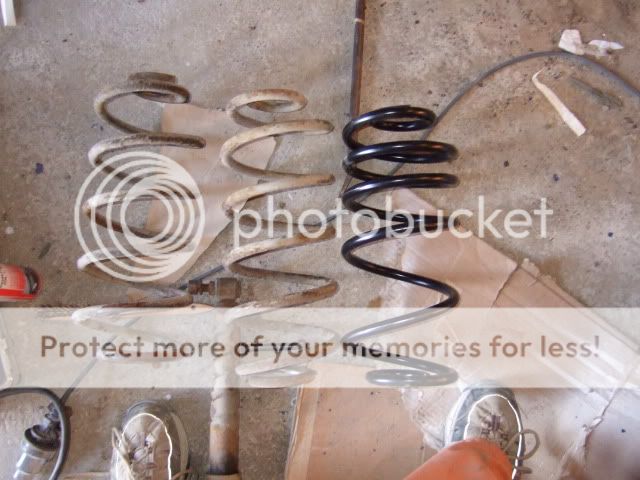
Specs:
Summit Racing Part Number MOG-CC507
Spring Rate (lbs/in) 158 lbs./in.
Progressive Rate Spring Yes
Spring Finish Black vinyl coated
Fishgrinder- G3GM Member
- Street Cred : 4
Re: 1975 Monte Carlo
![]() by 1973 454 MONTE Tue Jul 26, 2011 4:23 pm
by 1973 454 MONTE Tue Jul 26, 2011 4:23 pm
1973 454 MONTE- Donating Member
- Street Cred : 36
Re: 1975 Monte Carlo
![]() by Limey SE Tue Jul 26, 2011 4:36 pm
by Limey SE Tue Jul 26, 2011 4:36 pm
Springs, Rear Coil, Cargo Control, Buick, Chevy, Oldsmobile, Pontiac, Pair
___________________________________________
1977 Chevelle SE x2
One Mild original
one Wild NON original
Anthony
Limey SE- Management
- Street Cred : 98
Re: 1975 Monte Carlo
![]() by Fishgrinder Tue Jul 26, 2011 4:59 pm
by Fishgrinder Tue Jul 26, 2011 4:59 pm
So this will lower the car as hell in the rear? If that's the case I have to get the "right" ones.
Fishgrinder- G3GM Member
- Street Cred : 4
Re: 1975 Monte Carlo
![]() by bigredlaguna Tue Jul 26, 2011 8:59 pm
by bigredlaguna Tue Jul 26, 2011 8:59 pm
I bet you will be satisfied with these springs, and if not- at least they are easy to change out.

bigredlaguna- G3GM Senior Member

- Street Cred : 53
Re: 1975 Monte Carlo
![]() by 1973 454 MONTE Tue Jul 26, 2011 9:18 pm
by 1973 454 MONTE Tue Jul 26, 2011 9:18 pm
Limey wrote:yes sir them coils you have are cargo coils even per there site with that part number you supplied Fishgrinder
Springs, Rear Coil, Cargo Control, Buick, Chevy, Oldsmobile, Pontiac, Pair
i gave him the NAPA # that i used. even chris got regular springs.
but seeing that the # was not crossed into something he could get. he went with what the dealer thought would fit.
1973 454 MONTE- Donating Member
- Street Cred : 36
Re: 1975 Monte Carlo
![]() by Fishgrinder Thu Jul 28, 2011 3:03 pm
by Fishgrinder Thu Jul 28, 2011 3:03 pm
However the springs are not my main concern now.
I got that damn differential bushing out yesterday, and put the new ones in the freezer over night. Today I started with the driver side one, and was able to drive it in after 1 1/2 hours with constant hammering. After that I spent like 4 hours hammering on the passenger side, but it still is 1/4 inch from setting against the flange. Seems like it is not moving at all.
I'm seriously about to go insane. This ridiculous thing has set me back 2 days already

Any tips? Maybe a freezing spray will help.
Fishgrinder- G3GM Member
- Street Cred : 4
Re: 1975 Monte Carlo
![]() by bigredlaguna Fri Jul 29, 2011 12:01 am
by bigredlaguna Fri Jul 29, 2011 12:01 am
bigredlaguna- G3GM Senior Member
- Street Cred : 53
Re: 1975 Monte Carlo
![]() by 74Malibu383 Fri Jul 29, 2011 12:13 pm
by 74Malibu383 Fri Jul 29, 2011 12:13 pm
FYI - I have a set of almost new stock rear springs (1,500 miles on them). I replaced them when I put the coil-over's in. PM if interested.
74Malibu383- Donating Member
- Street Cred : 26
Re: 1975 Monte Carlo
![]() by ant7377 Fri Jul 29, 2011 11:09 pm
by ant7377 Fri Jul 29, 2011 11:09 pm
ant7377- G3GM Addict
- Street Cred : 36
Re: 1975 Monte Carlo
![]() by Fishgrinder Sun Jul 31, 2011 5:42 pm
by Fishgrinder Sun Jul 31, 2011 5:42 pm
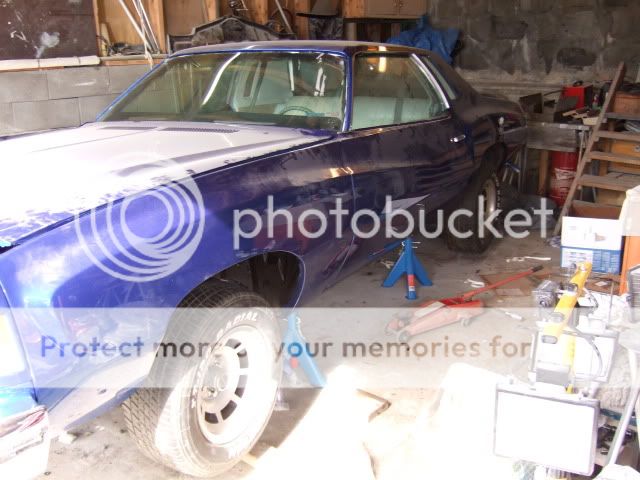
First I got the car up on support jacks

Then I snapped bolts on both sides for the sway bar. I should have loosened the bracket itself instead as
the bolts for it turned around very easily. But of course I didn't think that far..

Shocks and control arms out

Pressed in new bushings and painted them
Then I ran in to the issue with the stuck ear bushing which is posted above. Got help here, and it was
pressed in. We then assembled the whole rear again.


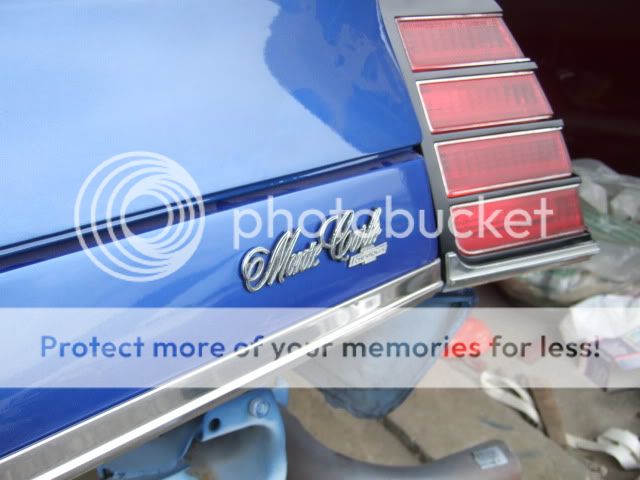
Painted the tail lights black. I actually decided on this the day I bought the car hehe.

Same with the drums

I thought the electric fuel pump was broken, and bought a mechanical pump
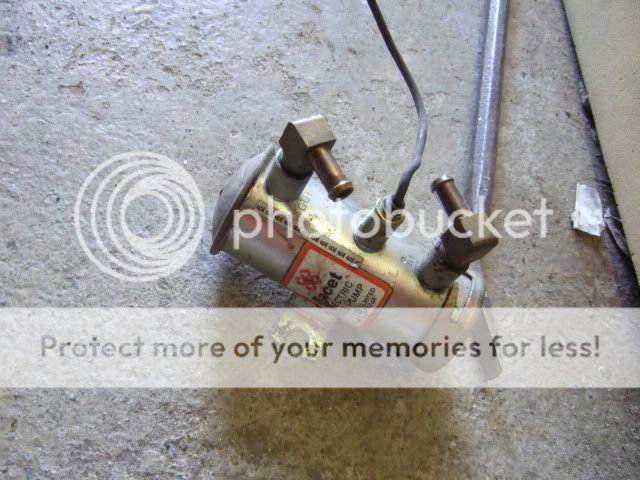
However, I found out a connection had fallen out under the hood, and the pump actually worked lol. But
I prefer a mechanical pump for less noise and power consumption


Spent some time routing new fuel hoses for the pump. Have to find a more permanent solution next time

Put the Lokar kickdown in. Waiting for a bracket to connect it to the carburetor
Any Idea what this leak could be? Very slow dripping
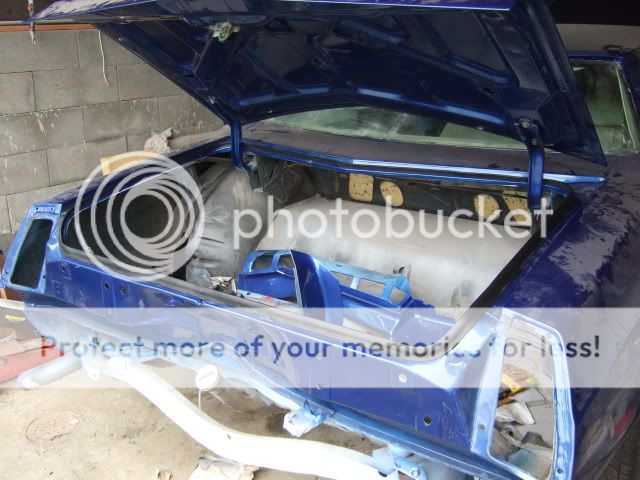
Glued in the trunk gasket. Struggled a little here to find out how it should sit in the rail
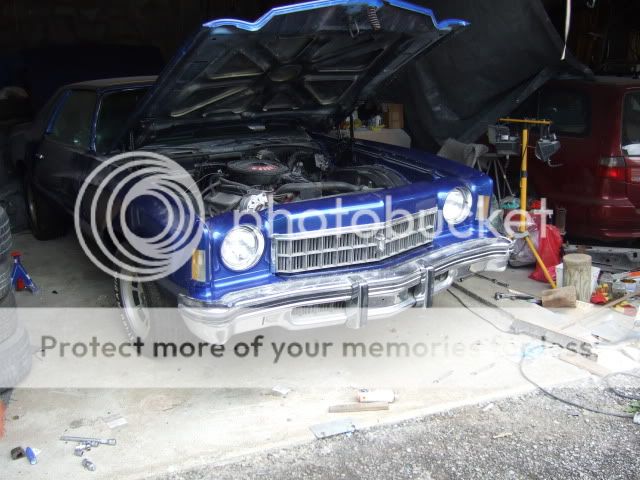
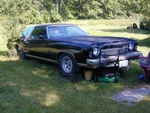
Then it was all set for a startup, the first one in two years. With aid from some Start Spray it fired almost immediately. I had also put fresh oil in it prior to this.
Pictures from the (second) test drive


I dont think the rear looks too low actually, rather the front. Maybe the 275's will change the look a little.
What do you think?
Fishgrinder- G3GM Member
- Street Cred : 4
Re: 1975 Monte Carlo
![]() by Limey SE Sun Jul 31, 2011 6:37 pm
by Limey SE Sun Jul 31, 2011 6:37 pm
___________________________________________
1977 Chevelle SE x2
One Mild original
one Wild NON original
Anthony
Limey SE- Management
- Street Cred : 98
74MonteCarlo- G3GM Fanatic
- Street Cred : 17
Re: 1975 Monte Carlo
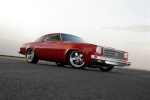
![]() by bigredlaguna Mon Aug 01, 2011 1:40 am
by bigredlaguna Mon Aug 01, 2011 1:40 am
I like the stance. The advantage with these springs is you can load up the car with some friends (and a couple of kegs in the trunk!) and you won't be scraping frame on any speed bumps.
bigredlaguna- G3GM Senior Member
- Street Cred : 53
Re: 1975 Monte Carlo
![]() by JiMi_DRiX Sun Aug 07, 2011 1:18 am
by JiMi_DRiX Sun Aug 07, 2011 1:18 am

JiMi_DRiX- G3GM Enthusiast

- Street Cred : 3
Re: 1975 Monte Carlo
![]() by 77mali Sun Aug 07, 2011 11:30 am
by 77mali Sun Aug 07, 2011 11:30 am
77mali- Donating Member
- Street Cred : 62
Re: 1975 Monte Carlo
![]() by Fishgrinder Mon Aug 08, 2011 2:13 am
by Fishgrinder Mon Aug 08, 2011 2:13 am
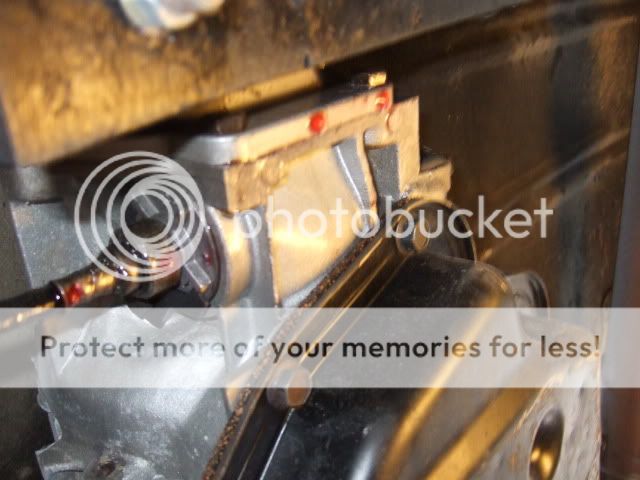
JiMi_DRiX wrote:Can you take a couple more pics of the trunk weather strip? It looks like a different style than what I have, I just wanted to check it out
Sure!


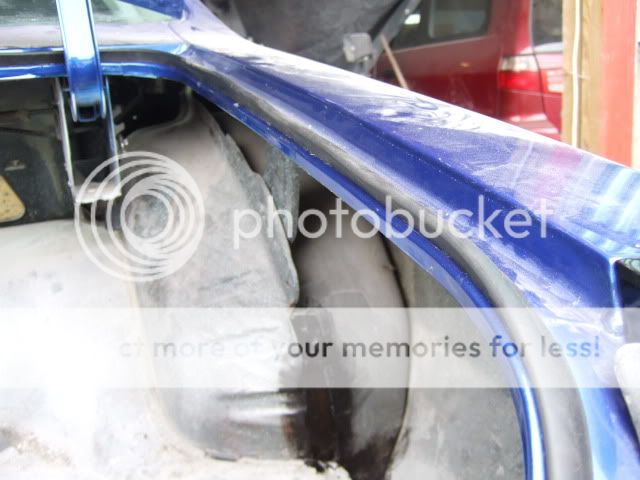
There was trying and failing before we found out how it should be installed. No instructions came with the kit, and the old gasket went to the garbage dump 2 years ago. At least we think the way it is no is the correct way lol
Kit is Metro Supersoft RKB1900-111
Fishgrinder- G3GM Member
- Street Cred : 4
Page 5 of 11 • 1, 2, 3, 4, 5, 6 ... 9, 10, 11 ![]()

 Similar topics
» 1975 Monte Carlo header panel bracket
» 1975 monte Carlo Window trim clips
G3GM :: Media :: G3 Project Pictures
|
|
|
» Q-Jet Tuning
» PARTS NEED TO GO FOR OUR MOVE I DONT WANNA TAKE WITH
» Need driver side bucket seat 73 Laguna
» Laguna NOSE
» Virtual Ink from this weekend
» 1973 Chevelle SS Station Wagon
» Elcofest 2023
» Wanted drip rails for 1975 four-door Chevelle Malibu-Thanks!
» Parts please