


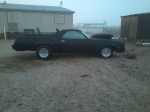
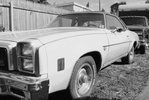
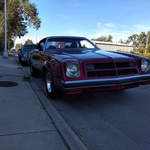
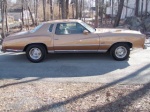
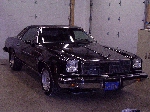
1977 Chevelle Malibu Classic Progress Photo's aka Mali
G3GM :: Media :: G3 Project Pictures
Page 19 of 27 •  1 ... 11 ... 18, 19, 20 ... 23 ... 27
 ![]()
Re: 1977 Chevelle Malibu Classic Progress Photo's aka Mali
![]() by Bruisr Mon Apr 22, 2013 8:50 pm
by Bruisr Mon Apr 22, 2013 8:50 pm
Bruisr- G3GM Member

- Street Cred : 8
Re: 1977 Chevelle Malibu Classic Progress Photo's aka Mali
![]() by 77mali Mon Apr 22, 2013 9:08 pm
by 77mali Mon Apr 22, 2013 9:08 pm
I'll double check it however. My brain has a habit of thinking something & then it gets lost sometimes on the way to my hands, LOL.
Thanks.
77mali- Donating Member

- Street Cred : 62
Re: 1977 Chevelle Malibu Classic Progress Photo's aka Mali
![]() by bigredlaguna Tue Apr 23, 2013 12:29 am
by bigredlaguna Tue Apr 23, 2013 12:29 am
bigredlaguna- G3GM Senior Member

- Street Cred : 53
Re: 1977 Chevelle Malibu Classic Progress Photo's aka Mali
![]() by 77mali Tue Apr 23, 2013 6:44 am
by 77mali Tue Apr 23, 2013 6:44 am
77mali- Donating Member
- Street Cred : 62
Re: 1977 Chevelle Malibu Classic Progress Photo's aka Mali
![]() by bigredlaguna Tue Apr 23, 2013 12:30 pm
by bigredlaguna Tue Apr 23, 2013 12:30 pm
I've had a couple of engines that I thought were lined up, but had to advance/retard so far, that I actually had to remove the wires from the cap and move them over to the next post. Those engines behaved like yours just did, turning over, but nothing happening.
bigredlaguna- G3GM Senior Member
- Street Cred : 53
Re: 1977 Chevelle Malibu Classic Progress Photo's aka Mali
![]() by bigredlaguna Tue Apr 23, 2013 12:34 pm
by bigredlaguna Tue Apr 23, 2013 12:34 pm
bigredlaguna- G3GM Senior Member
- Street Cred : 53
Re: 1977 Chevelle Malibu Classic Progress Photo's aka Mali
![]() by 77mali Tue Apr 23, 2013 12:38 pm
by 77mali Tue Apr 23, 2013 12:38 pm
The rotor was pointed @ #1 TDC- what I failed to do was adjust the cap a little bit. The rotor was in between two cap terminals, so I had to move the bottom of the Dist so that the designated cap terminal (for the #1 wire) was right on top of the rotor pointing to the cylinder...DUH.
So I did this early this am & Kaboom...so there is now spark. I did not turn it over all the way yet to run it because as I was cranking the motor the other day she got flooded. I'm waiting for evaporation & most of the plugs drying off
77mali- Donating Member
- Street Cred : 62
Re: 1977 Chevelle Malibu Classic Progress Photo's aka Mali
![]() by ant7377 Tue Apr 23, 2013 11:31 pm
by ant7377 Tue Apr 23, 2013 11:31 pm
P.S.
Paul.off topic but do you have one of those Boston accents? Calling a car a Caah? Baston and so forth? Laabstah? LOL
ant7377- G3GM Addict

- Street Cred : 36
Re: 1977 Chevelle Malibu Classic Progress Photo's aka Mali
![]() by Limey SE Wed Apr 24, 2013 12:43 am
by Limey SE Wed Apr 24, 2013 12:43 am
ant7377 wrote:Didja fix it? ! Did you cut the holes in the hood for the glass packs to stick out of?
P.S.
Paul.off topic but do you have one of those Boston accents? Calling a car a Caah? Baston and so forth? Laabstah? LOL
Funny you ask him that ..... For when I was listening to Online Police scanner whilst the terrorist thing and there accents were making me crack up

Limey SE- Management

- Street Cred : 97
Re: 1977 Chevelle Malibu Classic Progress Photo's aka Mali
![]() by 77mali Wed Apr 24, 2013 5:44 am
by 77mali Wed Apr 24, 2013 5:44 am
Waddaya got one-a them friggin New York accents there Ant? Whenya say Paul does it sound like Powl? Where's the middle finger emote on this thing?????? Here's a moon then....(_!_)
77mali- Donating Member
- Street Cred : 62
Re: 1977 Chevelle Malibu Classic Progress Photo's aka Mali
![]() by thatfnthing Wed Apr 24, 2013 9:28 am
by thatfnthing Wed Apr 24, 2013 9:28 am
77mali wrote:So- ya friggin bastahds got nothin betta ta do than razz on my accent? I said the friggin spahk plugs ah dryin out, right? Go pahk ya cahs in the yahd & bite me. LOL
Waddaya got one-a them friggin New York accents there Ant? Whenya say Paul does it sound like Powl? Where's the middle finger emote on this thing?????? Here's a moon then....(_!_)
I so needed a chuckle this morning. Thank you very much!
P.S. Who fahted?
(Sorry, couldn't resist)

thatfnthing- Donating Member
- Street Cred : 65
Re: 1977 Chevelle Malibu Classic Progress Photo's aka Mali
![]() by 77mali Wed Apr 24, 2013 12:18 pm
by 77mali Wed Apr 24, 2013 12:18 pm
Yeah we really do talk that way.
77mali- Donating Member
- Street Cred : 62
Re: 1977 Chevelle Malibu Classic Progress Photo's aka Mali
![]() by 77mali Thu Apr 25, 2013 7:01 pm
by 77mali Thu Apr 25, 2013 7:01 pm
I know for a fact that the timing gear is lined up & gone over everything else twice now- even took the valve cover off to confirm the rotors alignment w/ #1. Plenty of power coming out of the dist on cranking- getting 12 volts on the multimeter coming "out" of the module so the dist is good. I even cleaned the damn thing with CRC electrical parts spray solvent. There seems to be spark- it is popping & I'm getting spent fumes out of the secondaries on the carb.
Couple of thoughts:
The other thing too might be the starter I guess...it seems that after the crank rotates more than two turns it looses a bit of umph.
Maybe I'll try to realign that a bit. It's contacting fine but seems like a bit of a tight fit on the flywheel.
I wonder if I should try an extra ground? I've seen people use extra ground wires connected to one of the smaller thread holes on the back of the manifold. Also I've read that if you get rid of the gasket that it will ground better directly on the block- which would eliminate the need for the extra ground wire. Anyone using & extra ground & if so where did you connect it on the distributor?
Thoughts? Thanks!
77mali- Donating Member
- Street Cred : 62
Re: 1977 Chevelle Malibu Classic Progress Photo's aka Mali
![]() by jerry46765 Thu Apr 25, 2013 11:39 pm
by jerry46765 Thu Apr 25, 2013 11:39 pm
Is that the whole car loom and usig the steering column to start it?
Sorry, if this has already been discussed...
I guess you are testing everything, so once you have all the issues sorted out, it will be golden in the car.
So it won't start? Does it pop, spudder, freewheel, what while starting?
If the distributor is in the block, it's grounded.
Put a battery charger on it and leave it on until you go in at night to sleep.
I am not sure about a tight starter. If it engages/disengages, doesn't make a ringing sound on the starter ring, it's not too close. Just make sure it's not cocked out of alignment. Is it a mini-starter or OEM style?
Go through the wiring connections again...
I made a test stand 20 years ago for one specific engine. My dad took it, cleaned it all up, sorted out some stuff, and made it pretty easy to use. Every fuel injected motor through my shop goes across it. It's amazing what you find. Funny, when my kid was younger, he was always disappointed because we would never ride it around the yard...
jerry46765- Donating Member
- Street Cred : 20
Re: 1977 Chevelle Malibu Classic Progress Photo's aka Mali
![]() by jerry46765 Fri Apr 26, 2013 12:14 am
by jerry46765 Fri Apr 26, 2013 12:14 am
You have fuel & spark?
Try this ---
Pull #1 spark plug out,
disconnect power from HEI,
hold your thumb over the #1 spark plug hole,
crank the engine until, you feel compression (piston coming up),
stop cranking,
pull distributor cap off and make sure rotor is right before #1 in the cap,
if not adjust it...
Install #1 plug, connect HEI power, start engine, enjoy...
jerry46765- Donating Member
- Street Cred : 20
Re: 1977 Chevelle Malibu Classic Progress Photo's aka Mali
![]() by bigredlaguna Fri Apr 26, 2013 1:32 am
by bigredlaguna Fri Apr 26, 2013 1:32 am
jerry46765 wrote:Ok, I went back and read up to date.
You have fuel & spark?
Try this ---
Pull #1 spark plug out,
disconnect power from HEI,
hold your thumb over the #1 spark plug hole,
crank the engine until, you feel compression (piston coming up),
stop cranking,
pull distributor cap off and make sure rotor is right before #1 in the cap,
if not adjust it...
Install #1 plug, connect HEI power, start engine, enjoy...
I agree with this. It is always the basics that get you, especially in a delayed action build like this.
bigredlaguna- G3GM Senior Member
- Street Cred : 53
Re: 1977 Chevelle Malibu Classic Progress Photo's aka Mali
![]() by 77mali Fri Apr 26, 2013 6:44 am
by 77mali Fri Apr 26, 2013 6:44 am
And yes Jerry- I'm sorting it all out before the damn thing is back in the car. Despite the problem I'm currently having- it's much easier to work on it off the car like this. I hate doing 180* yoga stretches over/under engine bays with things in my way. My bad back is at least thanking me for this. LOL
Thanks for the reply's guys.
77mali- Donating Member
- Street Cred : 62
Re: 1977 Chevelle Malibu Classic Progress Photo's aka Mali
![]() by pila Fri Apr 26, 2013 10:43 am
by pila Fri Apr 26, 2013 10:43 am
A piston stop is is the easy/simple way to locate TDC.
Easier to do it now than later....
So, with #1 on compression stroke (thumb in the spark plug hole)......back it off about 45 degrees before top center. Remove all plugs. screw piston stop in #1 plug hole. Rotate engine clockwise by hand until piston stops. Mark balancer.
Then. rotate in opposite direction until piston hits the stop. Mark balancer.
Halfway between your marks on the balancer is top-dead center, which you can find my measuring, and that is where the timing mark should be, if it isn't. Older balancer rings sometimes slip on the rubber mounting.
Without knowing where TDC is, timing will be a guessing game to some degree...
pila- Donating Member
- Street Cred : 43
Re: 1977 Chevelle Malibu Classic Progress Photo's aka Mali
![]() by 77mali Fri Apr 26, 2013 12:29 pm
by 77mali Fri Apr 26, 2013 12:29 pm
If the Balancer mark is off- I'll definitely be doing this. (I Might even buy a timing compass thingy.) I did opt for a new harmonic balancer with the rebuild. The sealant in the old one was failing for some strange reason. This new balancer looks identical to my old one & looks like a rebuilt/resealed unit.
I'm going to try again later or this weekend hopefully. Going to see if the starter makes more torque with minor adjustments. I'm going into half-shim mode in order to try & get it perfect. It was sticking (or staying on after like 2 turns) but only very slightly. I think it had to do with the old flywheel. I replaced the starter last season but the old wheel was still on & it no doubt formed itself on the small starter wheel becuse it was beat up. I had to use a full 1/16" + half of a 1/32" & it looks better- another half 1/16" should get me there. We'll see if that will make a difference.
THANKS EVERYONE FOR THE REPLIES!!!! Much appreciated.
77mali- Donating Member
- Street Cred : 62
Re: 1977 Chevelle Malibu Classic Progress Photo's aka Mali
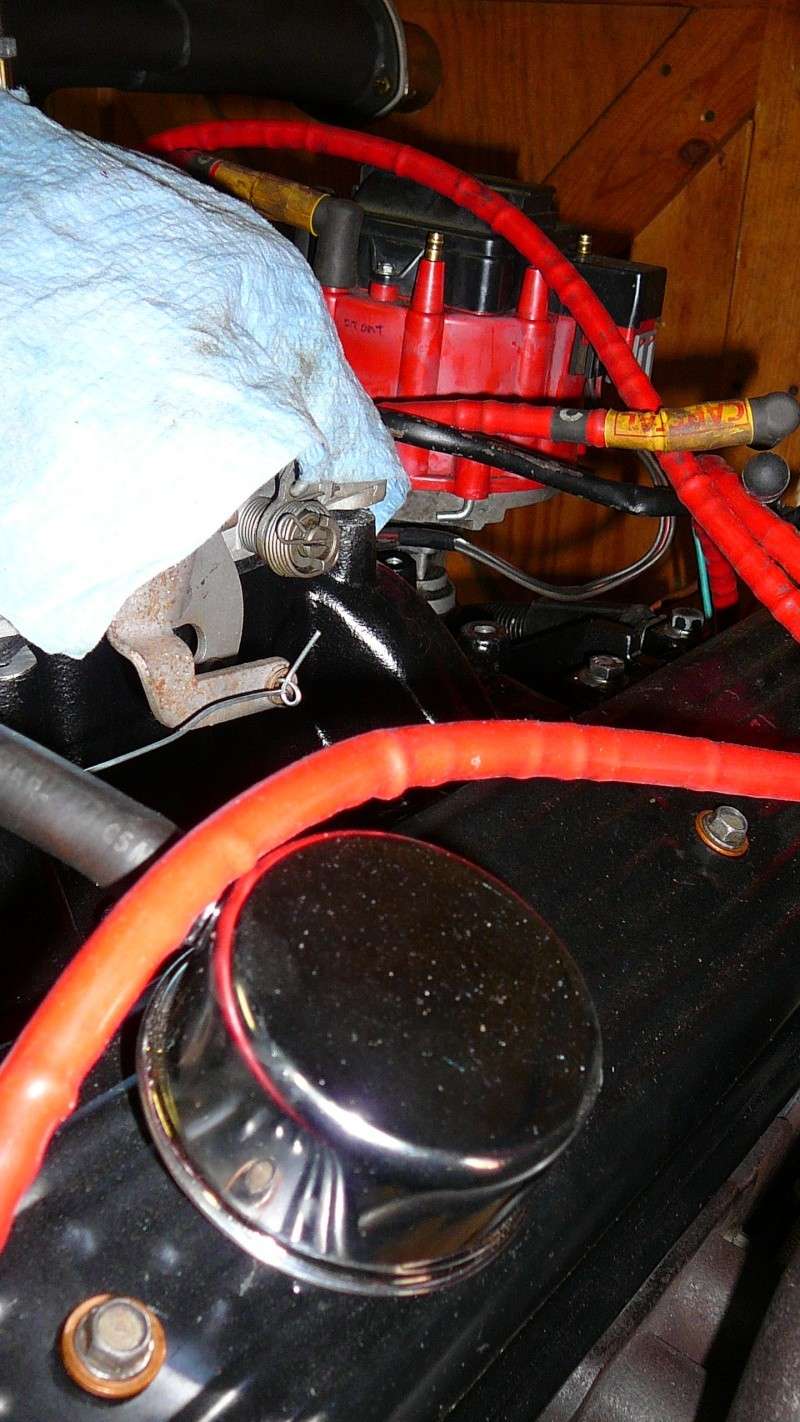
![]() by 77mali Tue May 07, 2013 3:40 pm
by 77mali Tue May 07, 2013 3:40 pm
When torquing the 2 bolts there was a slight movement just @ the very end. This had me confounded as, at first, I thought it might be touching somewhere on the engine stand. Anyway- going to shave a bit more off of the oil pan by the dipstick hole to get it dead nuts. I also took off the starters solenoid in order to get the spring pressure off the pinion gear so that it moves freely & to place a paper clip in between the flywheel. Also- didn't even need to shim doing it this way.
Hey James- the simple little Sh!t is murder, LOL.

(Will be clean up before going back in the car)


Made sure Dist is correct also. Engine is at TDC now but like Bill suggested I'm going to back it off approx 45* & try to turn it then. Little bit more to do & fingers crossed (again).

Here's a view from the PCV...Looks like #1 on the dist is where it ought to be.
77mali- Donating Member
- Street Cred : 62
Re: 1977 Chevelle Malibu Classic Progress Photo's aka Mali
![]() by dynchel Tue May 07, 2013 4:05 pm
by dynchel Tue May 07, 2013 4:05 pm

dynchel- Donating Member
- Street Cred : 40
Re: 1977 Chevelle Malibu Classic Progress Photo's aka Mali
![]() by 77mali Tue May 07, 2013 10:03 pm
by 77mali Tue May 07, 2013 10:03 pm
dynchel wrote:Watch for oil blow by around those auto zone breathers. I had the same ones (twice). And oil would bypass the breather completely and pool on the valve cover. I ended up putting a breather oil cap (bought from eBay) and a regular old pcv valve in the opposite cover. Never had a problem since. I like your way of working out the bugs with the engine out, I always have to fight with it in the car.
dynchel wrote:I have tried those PVC breathers from auto zone (two different times to be exact) and they didn't work well for me. The one time i was leaving for work and the engine started smoking, upon inspection i found oil was blowing right past the breather and pooling (and burning off the valve cover& exhaust). I installed a standard PVC right in the valve cover, the way Chevy did it, and never had another problem. I definitely looked better with the breather. Just my two cents.
77mali wrote:If that happens, I still have the regular style PCV. I'll be able to tell right away. They are not the best quality. A company on ebay sells billet style breathers & PCV's w/ housings you can take apart to clean the breather element & remove & replace the PCV unit for about $18 ea. I'm going that route once the motor is back in the car.
LOL...thought I was havin' Deja Vu or maybe a little too much
 in my system tonight
77mali- Donating Member
- Street Cred : 62
Re: 1977 Chevelle Malibu Classic Progress Photo's aka Mali
![]() by dynchel Tue May 07, 2013 10:45 pm
by dynchel Tue May 07, 2013 10:45 pm
dynchel- Donating Member
- Street Cred : 40
Re: 1977 Chevelle Malibu Classic Progress Photo's aka Mali
![]() by 77mali Tue May 07, 2013 10:50 pm
by 77mali Tue May 07, 2013 10:50 pm
Points for concern & passing along product knowledge.
77mali- Donating Member
- Street Cred : 62
Re: 1977 Chevelle Malibu Classic Progress Photo's aka Mali
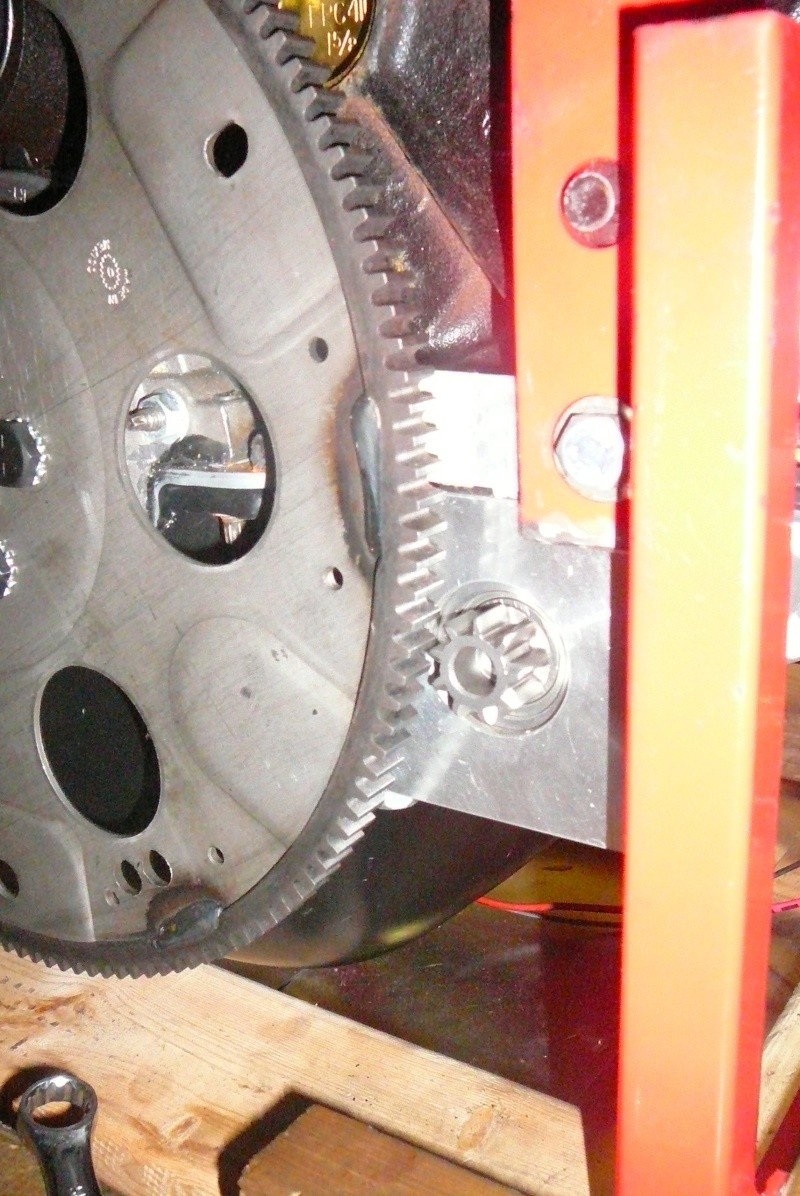
![]() by 77mali Sat Jun 08, 2013 10:04 pm
by 77mali Sat Jun 08, 2013 10:04 pm
So I swapped out the large 168 tooth for the smaller 153 flexplate & got a hi torque mini to make sure it will spin. Now I just have to figure out the wiring as it has one of those "black lead" wires on it.


77mali- Donating Member
- Street Cred : 62
Page 19 of 27 • 1 ... 11 ... 18, 19, 20 ... 23 ... 27 ![]()

 Similar topics
» Looking for an In-Dash Tic-tock Tach for my 1977 Chevelle Classic,
» '73 Chevelle coupe progress
G3GM :: Media :: G3 Project Pictures
|
|
|
» Factory am/fm
» 1973 Chevelle SS, 350, 4spd. build
» Painting Interior Plastic
» 1973 Chevelle SS 1 Family
» Need driver side bucket seat 73 Laguna
» triangle stainless window trim
» door interior trim retainer clips
» Rusty's progress motor Parts arrived LOL Half are on
» Anyone good at photoshop?